Thursday, December 6, 2012

10,000 Revisited

Greetings, volks. Welcome to Hohenfels Volks, THE place for our place! Everywhere you look, you’ll see white! Winter is here for the long haul, and that means it’s time to get some seasonal shots. I hope everyone is getting geared up for Christmas and some great photography.

Earlier today, we had blue skies and some nice clouds, perfect for the landscape shooter in all of us. Of course, things turned ugly quick, and left us in the midst of a dark and icy wall of snow. As often happens, the sun managed to beat back the snow and again we were ready for making some great shots.

Enough weather, that’s not what we’re here for, right? Today we’re going to talk about pride and accomplishment. It’s also a chance for an exercise in good old-fashioned photography. Even though we’re using our digital cameras, and often forget the importance of each shot we make, we can return to the old ways. Remember, as Henri Cartier-Bresson said, “You’re first ten thousand shots are your worst.” In a much older post, we addressed this and modified it to be about 100,000 to 1,000,000 shots. This is due to the inherent nature of instantaneous feedback and automatic cameras.

In the earliest days of photography, folks used glass plates for their negatives. Then film came along. In those early days, your film, or plate, was only sensitive to blue light. This made balancing your light and color very important. With the advent of thinner films and panchromatic emulsions, more sensitivity was added. Then, of course, came color film. When you shot either a sheet or roll, you couldn’t change your ISO or color balance. Film and digital sensors can be thought of as the same thing, and for the rest of this article will be used interchangeably.

Film costs money. It cost money in the old days, as well. When a photographer made shots, he weighed the value of the film and the shot. Every photograph was precious, and had to be made with care. Exposure, color balance, even composition had to be weighed and given some measure of value in relation to the photo. Photography took time, to both master, and in terms of the individual image created. Light meters for measuring exposure, going back to the 1800’s, are available on auction sites all over the internet. Focusing aids, powder flashes, apertures, and even shutters were part of the photographer’s knowledge. In many of the older lenses, the aperture was adjusted using an insert placed in the lens at the time of the photo.

Now that we see how valuable the image was, and the knowledge to make an image, we can see how those early photos, and those that have come down to us through the years, were not the product of guesswork or automation.

For the next few days, try doing an exercise in film. Choose one ISO for your camera, choose one color balance, and only limit yourself to 36 shots per session. Remember, getting your color balance and ISO right will require thought and planning. It will also require learning about your intended shooting situation. If you’re shooting outside, shoot in daylight or around 5200K, and inside shoot at tungsten or around 3200K. If you’re shooting in bright conditions, choose ISO 100, in the dark ISO 800. Finish your 36 shots before changing your settings. Also, don’t look at your images on the camera monitor, or delete any shot. Wait until you get home to see what you have. This will encourage you to value your images, while also helping you improve.
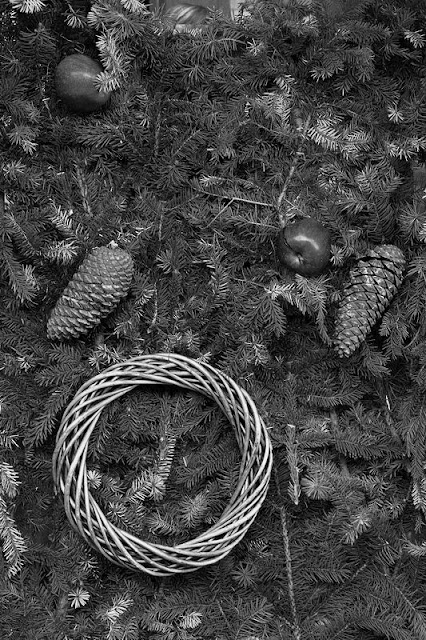
Hohenfels Volks: Dresden Christmas
EI 500, f/5.6, 1/60, 56mm
I couldn't resist this shot, the mix of shapes, textures, and tones are intriguing! Shooting manual all day, let me have control of the camera, instead of the camera controlling me. It also allowed me to use my knowledge to get what I wanted.

This little exercise will require you to know your camera settings, it will require the knowledge to get the shot right, and it will allow for a sense of visualization to settle in. Visualizing your image is an incredibly useful tool in photography. This is a great time to undertake this exercise, as our changing weather conditions, and lighting, will challenge even the best without proving impossible with a little effort. As an added bonus, it’ll make every shoot an adventure, and every moment until the photos are loaded like Christmas. It’s a fun way to experience the anticipation of Christmas with a gift in every session! It’ll also make shorter work of getting the best shots, since you’ll be improving with each photo made. You’ll also develop your confidence, which always helps! Remember, a great camera doesn’t make a great photographer, any more than a great kitchen makes a great cook.

Please feel free to share your photos on our Facebook page. Everyone here would love the chance to see your work! Is there anything you’d like to see here? Do you have a question or an idea? Share your thoughts here or at the Hohenfels Volks Facebook page. Of course, commenting on both Facebook and here is always appreciated, too! Don't forget, we're on Google+, too!

Tuesday, December 4, 2012

Large

Greetings, volks. Welcome to Hohenfels Volks, THE place for our place! Old Man Winter is settling in for his long stay here in Hohenfels! I hope everyone is settling into their anticipation and excitement for the long nights and brilliant moments ahead.

It’s certainly been some time since my last post! I’ve been quite busy as usual. Branching out into large format photography has filled me with new ideas and visions. I hope to make some of the winter shots I’ve been visualizing and preparing for. Large format gives you a way of relating to the scene and subject that it’s hard to imagine without seeing it. This leads us to today’s basic topic, shooting tethered.

One distinct advantage of the digital age is the ability to hook up to a computer and see our images presented quite large. When we load our photos onto our PCs, it gives a way to see detail an ordinary 4x6 print denies us. It also gives us a tool to learn far more rapidly, by allowing us to honestly assess our images in all their glory, and with all their flaws.

But, as many folks don’t know, it also gives us a way to see those flaws prior to making our shot. It allows us to compose our scenes at a scale which invites a more involved relationship with the image. It allows us to troubleshoot our images prior to recording them, and to resolve any images that may prevent the full realization of our vision.

Previously, this has been the domain of those with large format cameras, like the 8x10 field camera or a 4x5 view camera. The composition was done on a negative sized piece of ground glass, with the image upside down and inverted. This naturally led to a slower pace and more contemplative image creation process. Combined with film costs, equipment costs, and time costs, large format photography was largely practiced by those making money from it. With the proliferation of digital cameras and the advent of sites like E-bay, large format become reasonably priced to anyone with the desire and motivation to learn the ins and outs. The format can be daunting and challenging, sometimes extremely so, but it can also be rewarding.

Now that we have DSLRs capable of producing extremely high quality images, and the capabilities of our computers, we can all practice Large Format.

Now that the background is behind us, the steps and equipment are quite simple. You most likely have the equipment you need, as it probably came with your camera. This would include a USB cable to connect to your computer, and the capture software that allows for control of your camera. If your camera didn’t come with the capture software, your manufacturer may have it at their website. If not, there are commercial options available that run from free to higher priced options. You’ll want a tripod and maybe a platform for your PC if you want to use a laptop from other that your desk. That’s it. Just start the software, and for Canon’s, select Remote Live View.

Once you’re connected, you can control everything. You can focus in the autofocus mode using the software, or in manual mode. Both ways give you a giant magnification and full control of your focus. You can control white balance and display your camera’s metering, which will allow you to control your exposure and place your values below, at, or above, neutral gray. It allows for full functionality of the camera, and can even capture directly to your hard drive. The beauty is in a few Windows hot key shortcuts, you can zoom in the live preview, making your preview as large as your monitor. How’s that for large format? Focus, DOF preview, and exposure controls as if shooting directly form the camera, and viewing from the computer, it can’t be beat. You’ll know if you have a keeper even before making the shot.

This has been around some time, just search for tethered shooting, but the first thing to learn is exposure, white balance, and how to use your camera. Once you know these things, you can move on, in ways I can’t even begin to touch upon here! Using tethered shooting will give you an appreciation for all the detail in the scene and lead to a new found way of looking at the smaller parts of a scene to see the big picture. It also saves the frustration of having to sort through the good and the bad. You’ll find yourself making fewer bad images when you shoot tethered.

It has its drawbacks. Who wants to carry a tripod, computer, and cables everywhere? Who feels like lugging extra stuff to make the picture? There are trade-offs in it, but you’ll find if you’re shooting something for your own vision, or if your doing something where there is time to set up and work that way, tethered may be your new default!

I hope this gives you some new ideas. Getting out there and shooting , tethered or un-tethered, will give you the winning shot this winter, so get started making your images now!

Please feel free to share your photos on our Faceboook page. Everyone here would love the chance to see your work! Is there anything you’d like to see here? Do you have a question? Share your thoughts here or at the Hohenfels Volks Facebook page. Of course, commenting on both Facebook and here is always appreciated, too! Don't forget, we're on Google+, too!
Monday, November 12, 2012

Overlooking

Greetings and welcome to Hohenfels Volks, THE place for our place! After a rather gloomy week, punctuated with brief moments of beautiful clarity, we begin another week here, as bland as things have been recently! Hohenfels is turning toward the bleakness of winter, and as we end our autumn, we begin to notice the beauty hidden within the warm grasp of summer’s embrace.

Today we’re going to talk about how we often overlook things, objects, subjects, and other items that could be of interest to an observant photographer.

Humans, being creatures of habit, routine, and ritual, go through life overlooking things they encounter on a daily basis. We take notice only when something is new or suddenly gone. I’ve done this myself, and wound up losing a few shots. Taking anything for granted leaves us a little less than we could be!

Taking notice though, can make for the opportunity of a photographic lifetime! Everyday, during my drives through our wonderful Hohenfels area, I have driven past an area with some ledges and trees alongside the road. This autumn, some Aspen trees along this way turned the most brilliant yellow and orange-gold. They made the change before the rest of the leaves, and held on for so long! With trucks and buses racing by, bringing with them the icy wind clawing on the leaves, trying to pull them down, they have managed to cling for so long, apparently by sheer force of will! The scene was a bit of a “found object” as Ansel Adams called it, and yet everyday I passed it, seeing but not stopping. Today I took the chance, and standing alongside the road, made a couple shots. The negatives developed up nicely, and have some detail that makes me wonder how I ever passed the scene up. Tomorrow, God willing, I’ll make some digital photos, as the scene is too magnificent to pass up!

We begin to take for granted these scenes, and when they depart, we’re left feeling a loss. Of course, there will be next time, if things hold true. But, the disappointment lasts for some time. When we start to pay attention to the world around us, we start to see shots everywhere, there is no shortage of things to make images of. Take the time to stop and observe what’s changed in your area, make a note if you don’t have your camera, and come back to make the shot. You’ll usually be glad you did, and might even make some great memories in the process.

Well, enough preaching! I hope that everyone will see something new in the old, make the shot, and share it with us on our Hohenfels Volks Faceboook page.

Is there anything you’d like to see here? Do you have a question? Share your thoughts here or at the Hohenfels Volks Facebook page. Of course, commenting on both Facebook and here is always appreciated, too! Don't forget, we're on Google+, too!

Thursday, November 8, 2012

Plans...

Greetings and welcome to Hohenfels Volks, THE place for our place! Thursday in Hohenfels, that means it’s time to plan some weekend shooting!

Let’s start with a quote from Ansel Adams. He said, "I never know in advance what I will photograph... I go out into the world and hope I will come across something that imperatively interests me. I am addicted to the found object.”

Planning your shots doesn’t always mean going out with the intention of only shooting 1 thing. Planning your shots means going out with a plan and intention, then being fluid enough to take the shot you find. Part of planning your shot definitely is definitely visualizing the final image, but it doesn’t have to be done when you wake up!

Planning some shots for your autumn collection means planning to get some leaves, using the texture, color, and shapes to emphasize certain things. However, you may come across something that would make for a special “only available now” shot, and if you’re too intent on getting your planned shot, you may miss an opportunity.

In my case, it’s not too terribly hard to get distracted with a new shot or angle, even though I’ve planned everything. The light falling onto and emphasizing a certain part of the scene, a break in the clouds, or even something brought in on a breeze can make for some unplanned magic. As long as you’re open to the experience, and visualize your final image, you’ll make something to crow about!

Well, enough preaching! I hope that everyone will feel some pride in their vision and work, and share it with us on our Hohenfels Volks Faceboook page.

Is there anything you’d like to see here? Do you have a question? Share your thoughts here or at the Hohenfels Volks Facebook page. Of course, commenting on both Facebook and here is always appreciated, too! Don't forget, we're on Google+, too!
Tuesday, November 6, 2012

Creative Metering and Exposure

Greetings and welcome to Hohenfels Volks, THE place for our place! I hope everyone is getting a decent start to the week. The Hohenfels area is beautiful this time of year, as many of you know, and full of go-to places for some great shots.

Today we’re going back a little to some basics. We’re primarily going to look at metering and exposure.

We all know the basics by now, that your meter offers a combination to make the measured area fall at 18% reflectance, or neutral gray. Most of us know that by overriding that proffered setting we can take fuller control and get closer to our vision.

I’ve discussed metering and key stops before, but today we’re going to see how it can be used for maximum impact when combined with our vision.

I’ll be referring to the following photo as an example.

Hohenfels Volks: I UnSubjugated
ISO 125, f/22, 1/2 on Ilford FP4+
I, Un-Subjugated.When we leave the I, or in this case the red, unsubjugated, a wider variety can thrive.

In the above image, both the highlights and shadows were extremely close in values, and were identical with the light shifting as it was. My initial reading was 15 c/f2 for the shadows and 30 for the highlights. The brighter leaves are red and the darker ones are green. Knowing the values were so close, with the red reading about 2/3 to a whole stop brighter, I chose a red filter to bring up the reds and decrease the greens. A red filter allows about 97% of the red light through, while only allowing about 12.5% of the blue and green. It also gives a factor of 8x or 3 stops. Throwing in the aperture decrease, I was shooting with 5 stops less available light for the greens and shadows. By adding 4 stops to their initial reading of 30c/f2, their levels were increased and the red was 2 stops over neutral. In yesterday’s shot, the same leaves and exposures were made, only using a green filter, bringing all the levels more in line with their illuminations.

This is the same shot, and levels as the image I posted yesterday. This will allow you to see how using the tools and techniques at our disposal, we can lead our image and our viewer to the desired result.

When we meter at our key stop, both for highlights and shadows, what we’re learning is the illumination of the subject. The reciprocal of our shutter speed is the amount of illumination, expressed in candles per square foot. By metering off the shadows, mid-tones, and highlights, we have a range of illuminations with which we can work. Those readings will always be the same at any key combination. For instance ISO 100 and f/10 or ISO 400 and f/20. So, we meter 100 foot candles at ISO 400, f/22. At ISO 250, we would set f/16 to get the same results. Now to place that value at somewhat higher value, for instance, we could set our shutter speed to 1/50 instead of 1/100 at f/16 ISO 250, and get a result that is lighter than neutral, by about 1 stop.

Throw in the ability to see our desired results and the steps to get them; an image can be made, not captured. We have several tools to modify the exposure we’ve selected without destroying the original image. With digital photography, shooting RAW gives you complete control. By raising your red tones, and lowering your greens and blues, a red filter can be somewhat approximated, and so on.

By combining exposure, processing, and value controls throughout the photo making session, we can bring our creative expressions to life. The first step to learn is metering and how to use that information. This little tool can be used for a record photo that leaves little to interpretation, and one for the magic of creative photography, as well. You can give voice to your thoughts without uttering a word. Using what you know, and the tools available to you, vision can be brought to life, and given a meaning according to your creativity and visualization.

I hope everyone enjoys the rest of the week and makes an image using their knowledge, tools, and vision to share with all of us! Get out and make it happen, then show us, share what you felt through your images on our Hohenfels Volks Faceboook page.

Is there anything you’d like to see here? Do you have a question? Share your thoughts here or at the Hohenfels Volks Facebook page. Of course, commenting on both Facebook and here is always appreciated, too! Don't forget, we're on Google+, too!

Monday, November 5, 2012

Update!

Greetings and welcome to Hohenfels Volks, THE place for our place! Well, after an incredibly busy October, it looks like things are settling down enough in Hohenfels to say, “I’m back.”

Firstly, I’d like to thank everyone for continuing to check us out!

I’ve been shooting large format 4x5 film almost exclusively as of late, as well as developing and printing the results. That’s made for some interesting photos and even more interesting discoveries.

Our weather here is typical of Hohenfels, rainy and cloudy. Let’s not forget cold, too! There are still enough leaves and signs of autumn to make for some great photos, so it’s time to get out there and make our visions spring to life. Let’s not forget the Christmas markets that begin at the end of the month, either. Just a trip to the market and you’re presented with more photo possibilities that you can imagine. I’m planning up a couple shots for some friends as I write this. Now’s the time to plan yours, the joyous sights, sounds, and smells will fill your thoughts and if you don’t have at least one planned shot, you’ll be overwhelmed.

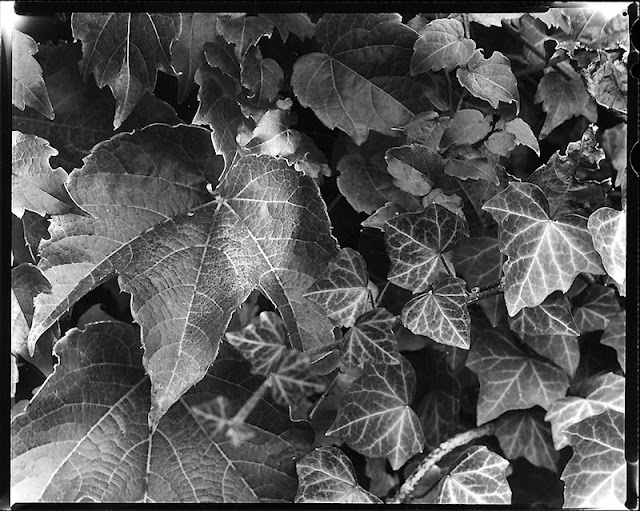
Well, I’m going to leave you with this large format photo. It was taken on Ilford’s FP4+ film, developed in Tetenal’s Ultrafin + 1+9, contact printed on Ilford’s MGIV paper, and finally developed in Tetenal’s Eukobrom 1+18 before scanning it as you see it. I adjusted the levels for contrast and mood.


Hohenfels Volks: I Subjugated
EI 125, f/22, 1/2. 4x5 film using a Calumet CC-401 view camera and Rodenstock Caltar II-e 210mm lens.
I, subjugated. This was shot with a green filter to bring the red leaves in line with the green leaves. By diminishing the levels of the red to match the green, we see everything based on contrast and sharpness, and these guide our eyes through the scene. The crop allows the whole negative to be viewed, although an enlargement would be cropped appropriately.

Here’s hoping you enjoy the rest of your week and capture the shots you’ve been wanting. Get out and make it happen, then show us, share what you felt through your images on our Hohenfels Volks Faceboook page.I'm looking forward to your comments!

Is there anything you’d like to see here? Do you have a question? Share your thoughts here or at the Hohenfels Volks Facebook page. Of course, commenting on both Facebook and here is always appreciated, too! Don't forget, we're on Google+, too!

Tuesday, October 2, 2012

Communication


Greetings and welcome to Hohenfels Volks, THE place for our place! Here’s hoping the weather this weekend will allow for some great shots. Autumn colors are creeping out everywhere you look; it must be time to get some photos!

I'm sorry for the absence. Things have been extremely busy for a while, and are likely to stay that way for the near future! Our contest was a wash, only 1 entry was received. Perhaps our next contest will fare better! On to today's post.

Today I was out shooting with my 4x5 LF camera, when a Polizei stopped by to ask me what I was doing. I know I look strange under the cover and with a 40-year-old camera, so it was no surprise. After telling him I was making a photo, and explaining that it was a tree I was photographing, I let him look at the glass focusing screen. He looked and mentioned that it was nice. I gave him my jacket to cover the screen so he could get a better look. He seemed impressed at the scene of the tree in the village and told me the photo would be beautiful. We spoke for a few minutes and he left. It was a pleasant encounter during a wonderful afternoon shooting.

This led me to thinking about how our photography brings so many diverse peoples and interests together. It even brings our hobbies together. For instance, someone into nature can photograph the beauty of our natural world and relive the splendor repeatedly. Photography is timeless and cultureless when we practice it right. When we put time into our work and know how to deliver our intent, the magic of communication can be brought with it. Keep your vision alive and get out shooting!

Remember, your photos are your words. Make something that speaks for you!

Here’s hoping you enjoy the rest of your week and capture the shots you’ve been wanting. Get out and make it happen, then show us, share what you felt through your images on our Hohenfels Volks Faceboook page.

Is there anything you’d like to see here? Do you have a question? Share your thoughts here or at the Hohenfels Volks Facebook page. Of course, commenting on both Facebook and here is always appreciated, too! Don't forget, we're on Google+, too!

Thursday, September 13, 2012

The Contest

Greetings and welcome to Hohenfels Volks, THE place for our place! Here’s hoping the weather this weekend will allow for some great shots. Hohenfels is getting cold and it’s time to gear up for long dark nights and days that are just as dark! It’s also time to get ready for some great autumn and winter shots!

As promised, the information for the contest. I’ll start with the prizes. First place will get a 25 euro gift certificate to Photohaus Zacharias in Regensburg. Second place will get a 15 Euro and third will get a 10 Euro gift certificate. Of course, for the contest to be valid, we have to get at least 10 entries.

Of course, you have to like our Facebook page and make a great photo to win. I’ll be the sole judge, and each person can only enter 1 photo.

The contest will run from Saturday morning, the 15th until the morning of the 22nd. Photos must be made no earlier than today. Any image that was shot before today cannot be entered. I'll announce the winners soon after the 22nd.

The theme for the contest is “The End of Summer.” With the fests, back-to-school, and fall approaching, there should be plenty to get your creativity fired up! Your image should convey a sense that summer is coming to a close.

I’ll base my judgments on the following criteria:
1- Technical- exposure, color balance, sharpness, and other technical merits.
2- Creative- creativity, creative use of gear, creative use of elements within the scene, and other aspects of creative photography.
3- Impact- does the image induce some feeling or message, and how well does it accomplish this.
4- Theme- how well the image complies with the theme.

Ansel Adams said that “There is nothing worse than a sharp photo of a fuzzy concept.” Your photo may be technically perfect, but if there is no impact or creativity, you probably won’t win.

If we don’t get enough entries, we’ll have to reduce the prizes or limit them to 1 or 2 places. Anyone can enter, but you have to contact me to arrange for pickup of the prize. That means you have to be in the Hohenfels area to receive your prize, or plan to come here to pick it up. If your image doesn’t win, it doesn’t mean that I don’t like it, or you for that matter, it just means the winners had some greater impact or a less fuzzy concept.

This contest isn’t for prestige or grand prizes, it’s about being creative and liking your work. It’s about sharing our work with each other. It’s not about being competitive or better than anyone else.

Hohenfels Volks: Autumn Roadside
ISO 100, f/16, 1/25
Autumn roadside. I wanted to convey the feeling of an old fashioned autumn with this shot. By exposing to place the cut wood and the framing leaves at the top of the shot at a level that pulls you toward the clapboard building, this photo seems to announce the onset of fall.

Here’s hoping you enjoy the rest of your week and capture the shots you’ve been wanting. Get out and make it happen, then show us, share what you felt through your images on our Hohenfels Volks Faceboook page.

Is there anything you’d like to see here? Do you have a question? Share your thoughts here or at the Hohenfels Volks Facebook page. Of course, commenting on both Facebook and here is always appreciated, too! Don't forget, we're on Google+, too!

Wednesday, September 12, 2012

Day Sprees

Greetings and welcome to Hohenfels Volks, THE place for our place!

Today we’re taking a short look at short trips. It’s more about ideas for small shooting sessions.

One of the first things to pop into mind are palaces and their gardens. Often, during spring and summer the gardens are alive with flowers and color. Catching one with some nice clouds can make for a whole day affair, just shooting and enjoying the beauty around you. Another great time for palaces and such is during autumn, when the large amounts of trees create a majestic tapestry of golden and red tones woven to bedazzle. A couple good ones to visit are at Bayreuth and Wurzburg.

Another great place for small shooting excursions is any train station. Larger cities and towns often have old buildings, as well as the more modern types. The old abandoned ones make for some nice ambience, and the newer ones can be seen to bristle with life and the vigorous flow of human traffic. Munich and Regensburg have some great places to shoot, both the life and hustle and the seeming decay and abandonment.

Public parks and monuments make for special cases, as at most you can combine a great time shooting with a family picnic. This allows for some spontaneous portraiture fun, and still allows for some breathtaking photos. Some nice ones are at Walhalla and Kelheim.

Take a drive, pull over at some of the smaller stops, and break out your camera. You’ll be surprised by some of the things that will jump out at your lens. With autumn upon our Hohenfels areas, it’s definitely a great time for the little pullovers.

Well, that’s about it for today!

Here’s hoping you enjoy the rest of your week and capture the shots you’ve been wanting. Get out and make it happen, then show us, share what you felt through your images on our Hohenfels Volks Faceboook page.

Is there anything you’d like to see here? Do you have a question? Share your thoughts here or at the Hohenfels Volks Facebook page. Of course, commenting on both Facebook and here is always appreciated, too! Don't forget, we're on Google+, too!

Tuesday, September 11, 2012

Announcement

Greetings and welcome to Hohenfels Volks, THE place for our place! Tuesday evening finds Hohenfels in the grip of a storm, complete with lightning and thunder!

Today’s post is a short contest announcement. Hohenfels Volks is going to have a photo contest. The prizes are all small, with the winners getting a gift certificate to Photohaus Zacharias. I’ll need to work out some details prior to starting, though.

The winners will be selected based on:
1- Technical Execution- Is the exposure correct is the image sharp, etc.
2- Creativity- How creative is your shot.
3- Theme- Sticking to the posted theme.
4- Impact- Can the viewer connect with the image in some way? What message does it seem to convey?

I’ll post the starting and ending dates Thursday, as well as the theme. A couple notes- first, this is not a photo editing contest. Get it as close to right in the camera, and your job is more than half done! Second-you’ll have to come see me to pick up your prizes. Third- your image is your image, you keep the copyrights, although we’ll feature it here. So start thinking about your shots, planning your tools, and visualizing the image you want to make. This is a great time to practice photography, for all of us!

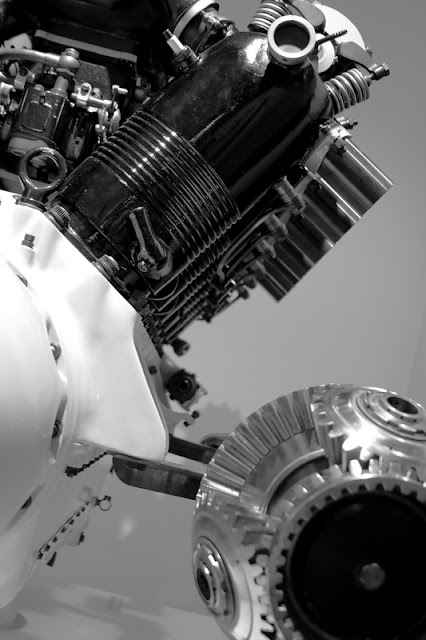
Hohenfels Volks: Rev the Engines
ISO 400, f/3.5, 1/30
An old airplane engine manufactured by BMW, here in Germany. The shapes and lines lead you through the image as you wonder what it is. Sharpness and light work together to creative an interesting draw.

Here’s hoping you enjoy the rest of your week and capture the shots you’ve been wanting. Get out and make it happen, then show us, share what you felt through your images on our Hohenfels Volks Faceboook page.

Is there anything you’d like to see here? Do you have a question? Share your thoughts here or at the Hohenfels Volks Facebook page. Of course, commenting on both Facebook and here is always appreciated, too! Don't forget, we're on Google+, too!

Tuesday, September 4, 2012

Now Departing

Greetings and welcome to Hohenfels Volks, THE place for our place! I hope everyone enjoyed a great weekend and is ready for another one! Here in our Hohenfels area, autumn is rapidly approaching. Soon the trees will be awash in reds, golds, and greens, which creates some great opportunities for photos!

Today we’re going to discuss departing from the literal. As you know, most creative images involve some departure from literal translations of the scene. Often, when shooting black and white, we use filters. In color digital photography, we use CPs and editing software.

To begin our discussion, it’s important to point out a simple fact. That fact is that in order to make any meaningful transition from literal values to a creative placement, you need to know the more technical side of photography. Today’s general discussion assumes you already understand exposure and DOF, as well as the other more technical sides of a good image. On the artistic side of creative departures, we need to understand the relationship between place and fall. This has been discussed before, as has the creative use of DOF to enhance or minimize an area’s impact on the scene.

Hohenfels Volks: The Cleric
ISO 125, f/4, 1/160
By bringing the reds more into play and simulating a red filter, the departure creates something that stands on its own. It also left the tree at a level that exceeded the values of reality, creating a nice chunk of texture.

When we place an area of a scene at a certain value, it needn’t be the literal value. You’re meter will give you the value for 18% gray, but not all things are neutral gray. For instance, clouds should be near white or about 3 stops over the meter. By placing the clouds at 3 stops over meter, or M+3, we have placed them at about their literal values. Everything else in the scene will fall to its prospective values and levels, giving us a literal interpretation.

In this hypothetical situation, we may want some part of the scene to be exposed to a higher value. This can be done, as mentioned, with filters or software. For instance, if we desire the bright green leaves of spring to stand out more, we may expose them to M or even higher. Another way is to use a yellow filter in soft light, if you’re shooting black and white. This can be simulated in software applications through the adjustment of color channels.

A big part of this, as always, is your vision. Visualizing your results, and the steps to make them real, will make your creativity stand out more. It also enables you to make creative departures and still end up with an image that says what you’d like it to. Not every image needs to be literal, many of Ansel Adams and Clyde Butcher’s images are not literal, but they connect to almost everyone who views them. They are often viewed as more realistic than the reality of the scene.

This goes back to creativity, visualization, and knowing your tools. Read the manual for every piece of equipment you own, and the software, too. It’ll prepare you to make the best images possible when you make your vision tangible.

Here’s hoping you enjoy the rest of your week and capture the shots you’ve been wanting. Get out and make it happen, then show us, share what you felt through your images on our Hohenfels Volks Faceboook page.

Is there anything you’d like to see here? Do you have a question? Share your thoughts here or at the Hohenfels Volks Facebook page. Of course, commenting on both Facebook and here is always appreciated, too! Don't forget, we're on Google+, too!

Thursday, August 30, 2012

Find the Light

Greetings and welcome to Hohenfels Volks, THE place for our place! Rainy nights mean clouds and fog coming for some great photos in our Hohenfels area.

Today, a quick post on seeing the light. Nothing long or elaborate, here.

Light glorifies everything. It transforms and ennobles the most commonplace and ordinary subjects. The object is nothing; light is everything - Leonard Misone

An interesting thought. Photography means writing or drawing with light. Often we forget to look at the qualities of the light that surrounds us. That light can make or break an image.

Lighting changes throughout the day, even during weather changes. A nice rich golden or reddish light can make an image pop, but only if you know what to look for in the light. The same can be said for blue light during the blue hour.

Black and white photographers used to use filters for creative effect and control of values based on light color. A red filter on a reddish subject or light, or blue to intensify atmospheric conditions of the light can make magic images that sing.

Scott Kelby’s says that if you find great light, finding something to shoot in it is far easier. Look for the light, and then worry about your subject. Another tool in your creative arsenal.

Hohenfels Volks: Vienna Fountain and Horse
ISO 200, f/8, 1/320
This was shot in bright daylight, which allowed for a faster shutter speed. It also allowed for an improved contrast. The image succeeds because of the lighting.

Don’t forget to share the results of your camera work with us on our Hohenfels Volks Faceboook page.

Is there anything you’d like to see here? Do you have a question? Share your thoughts here or at the Hohenfels Volks Facebook page. Of course, commenting on both Facebook and here is always appreciated, too! Don't forget, we're on Google+, too!

Wednesday, August 29, 2012

Exposing To the Right

Greetings and welcome to Hohenfels Volks, THE place for our place! Beautiful weather and some great photo ops made for a wonderful day here in Hohenfels.

Today, we’re doing just a short post on the concept of ETTR, or expose to the right. This seems to be popular with most digital photographers today, so we’re going to discuss it here. Before we begin though, let me make it clear that I’m not taking sides. My opinion, while favoring other methods, is of no consequence. If ETTR works for you, and you’re happy with your photos, keep shooting that way! Our goal here is to enjoy photography and make images we like. If you haven't tried it out, I suggest you do so. Becoming familiar with various techniques and tools allows you to increase your abilities, and improve your images by allowing you to discover what works for you and what doesn't.

Basically, ETTR says you should always expose your image so that all your information in the histogram is as far right as it can go without blowing the highlights. The stated reason for this is that half the bits are in the highlights, and as we progress down the range of exposure for your sensor, each lower level only has half the remaining depth. By using this technique, you keep more information and detail in the maximum part of the range. It also keeps noise from the shadows, or at least partly mitigates it.

It sounds simple enough; deliberately overexpose the large part of your scene to maximize your available information. On the surface, this seems to make sense. Especially when you’re told it also reduces noise, and helps eliminate posterization. Posterization is the abrupt banding you get in the transition between smooth levels in an image. If you do it with an eye toward balancing the elements of your exposure, it can be quite useful. Just remember to allow for reducing exposure in your RAW conversion.

But, we need to mention the major pitfalls associated with ETTR. It only works with RAW format images. ETTR was conceptualized when sensors had lower ranges and bit depths than we do today. JPEGs can’t have their exposure changed after being fixed into this format. Based on my own experience, ETTR leads to washed out images, with blown highlights. It also doesn’t allow for crafting your image, or for artistic images. Even worse, it prevents creativity from flowing during the capture process. When you are shooting bright scenes or those that contain wide ranges of values, ETTR will usually blow your highlights, and even some of midtones.

Certainly, detail in shadows is very important. However, we often forget that true and near blacks add depth and mood to an image. They also provide places wherein we differentiate areas and ideas within a scene. When we create an expressive image, part of the process is determining value placement. There is the possibility that your chosen placements will result in an image that is not exposed to the right, but entirely below the midline on your histogram. Of course, high key images often need to be exposed right of center in their entirety.

Most beginners allow the camera to do everything. Further along, they begin memorizing little statements like always expose to the right. They follow it religiously. After some time, they may progress to a type of crafter. They use their tools exactly as they say, for instance always using a gray card and any placements go out the window.

Always following one way or another without question or investigation leads to stagnation. All the techniques have a valuable place in our tool kit. For instance, shooting my daughter at play means getting the exposure right for her, and getting a fast enough shutter speed. By placing her at M+1 for the majority of the light she's playing in, I get a better image. A long exposure landscape means taking the time to meter the elements and determine where my placements will best match my vision. When you begin to make your expressive photograph, determining which way you wish to meter or expose your scene, and what tools to use, is part of the creative process and should not be overlooked. Just know the limitations of each method before committing to one.

Don’t forget to share the results of your camera work with us on our Hohenfels Volks Faceboook page.

Is there anything you’d like to see here? Do you have a question? Share your thoughts here or at the Hohenfels Volks Facebook page. Of course, commenting on both Facebook and here is always appreciated, too! Don't forget, we're on Google+, too!

Tuesday, August 28, 2012

The Importance of Being Creative

Greetings and welcome to Hohenfels Volks, THE place for our place! Lovely weather and photographic opportunities abound here in our place.

Today we’re going to put aside our cameras and calculators, and talk about creativity. We’re also going to take a few days break from our cameras while we look for creative ways to work our magic.

I have a slew of quotes on photography and creativity, but I'm only going to use a couple here to emphasize the need for creativity.

“A Ming vase can be well-designed and well-made and is beautiful for that reason alone. I don't think this can be true for photography. Unless there is something a little incomplete and a little strange, it will simply look like a copy of something pretty. We won't take an interest in it.” From the book "Pictures Under Discussion" by John Loengard, one of Life Magazine's most famous photographers.

This quote brings home how essential creativity is in our photography. Ayn Rand viewed photography as a vocation, or craft, because of the lack of a creative process. Many people do not take the time to be creative when making photos. We often find the image we want and make the photo, without putting more than the rudimentary thought into the process.

Hohenfels Volks: Gloria Lux, A Crative Expression
 ISO 160, f/8, 1/20
Gloria Lux, the Glory of Light. A creative expression of the majesty of this common and beautiful Orchid. The exposure placement and element positioning work with the light and lack of color to create an image that's more than "a copy of something pretty."

Ansel Adams referred to photography as “more than a medium for factual communication of ideas. It is a creative art.” If you view any of his photos, you will notice beyond their magnificent scenes, that great effort went into making them. His books on photography begin with chapters on visualization. Before you can visualize your photo, you need to have an idea of what you’re photographing. Begin visualizing all the ways it can be photographed long before you arrive. By the time you get there, you’ll be ready to survey and really visualize the image you desire to make.

I speak of visualization here quite a bit. I’ve discovered that slowing down, seeing the scene, and visualizing the shot, make for a more expressive image. Our photographs are our expressions. They express our thoughts, feelings, and most of all, our vision.

Creativity, and the art of creating, can be inspirations for you in and of themselves. You needn’t have a camera to be creative in your photography. In the words of Minor White, another great photographer, “Often while traveling with a camera we arrive just as the sun slips over the horizon of a moment, too late to expose film, only time enough to expose our hearts.”

Take a couple days without your camera. Go out and drink in the glory around you, expose your heart, and feel the scene surround you. You will come out with a better appreciation of the world around us, of our Hohenfels area, and your own magnificent creativity. The feelings will stay with you and inspire more creativity and expressive images. Reward yourself today with inspiration and creativity by feeling the scenes and sights around you. Enjoy the world and life, and share the results with us on our Faceboook page.

Is there anything you’d like to see here? Do you have a question? Share your thoughts here or at the Hohenfels Volks Facebook page. Of course, commenting on both Facebook and here is always appreciated, too! Don't forget, we're on Google+, too!

Wednesday, August 22, 2012

Basic Calibration

Greetings and welcome to Hohenfels Volks, THE place for our place! Hohenfels was greeted this morning with the sky belching great flashes of light and a seemingly torrential downpour that lasted all of 15 minutes. Of course, our area spent the rest of the day under blue skies and wonderful cloudscapes.

Heading out to Regensburg to get some prints done, I was struck by the fact that we also place faith in others when we hand over our precious photos for processing. Of course, that faith was justified today when I saw the prints from this weekend.

Today, we’re going to touch a little on calibrating your monitor. We’re not using anything fancy, or doing too much involving more than the basic monitor settings in Windows.

For black and white work, I recommend heading over to Ilford and downloading their Monitor Set-Up Print chart. Get the chart printed at your favorite vendor; I use MPIX or Photohaus Zacharias in Regensburg.

When you get the print back, adjust your brightness and contrast settings with the image on display. Make the displayed image match the print, then save your profile. That’s it for Black and White. It should provide good brightness and contrast for general photographic use, as well.

For color, it’s a little more involved. Head over to Digital Dog and download their printer test file. Again, you’ll need to get it printed. With print in hand, make your adjustments in Windows, only this time you’ll want to adjust your color settings as well. Saturation and hue may need adjustment, and possibly your individual colors. Once everything matches, save this profile as something different.

When you’re working on color images, load your color profile before your edits. This will match your colors and levels between the display and the printer. The same applies for Black and White. Knowing your levels through calibration will make your prints match your vision far more closely than an uncalibrated monitor will. It also allows you to work more accurately.

I hope this helps; it works, and leads to great prints. Enjoy the rest of the week, as Hohenfels slides into the weekend. Create something stunning, and share with all of us!

Please feel free to share your photos on our Faceboook page. Everyone here would love the chance to see your work! Is there anything you’d like to see here? Do you have a question? Share your thoughts here or at the Hohenfels Volks Facebook page. Of course, commenting on both Facebook and here is always appreciated, too! Don't forget, we're on Google+, too!
Tuesday, August 21, 2012

Faith and the Photographer

Greetings and welcome to Hohenfels Volks, THE place for our place! Greeted by rain and thunder in the early morning, the day ended nicely, perfect for getting some nice evening shots.

Today we’re going to talk about faith and photography. Believe it or not, the 2 are related.

First, let’s set a definition for faith. Webster’s lists “complete trust” as one of their definitions. For the purposes of this post, we’re going with that, although the definition “something that is believed, especially with strong conviction,” again from Webster’s, fits also.

The first way that faith is relevant to our topic relates to the photographer and the stages of progression. We start out with a decent camera, having complete trust and conviction that our camera will make nice photos. It’s sort of like believing in the government to be our nanny. It’s reassuring to know our camera can do everything for us, leaving us no need to do things for ourselves.

The next stage is trying to do more for yourself. You start believing you can do it, and going out of “P” mode. Trying out AV and TV modes gives you some control, and can lead to images that are more creative. At this level, curiosity about the basics takes root, and starts leading you generally to the next level.

At this level, you start having faith in others and what they can teach you. You start learning from all the resources you can find, and trying out manual mode and value controls. You’ve generally reached the level of most advanced amateurs, and are quite content with your work. You can see the difference between your work and that of others, and for the most part, you’re happy with it.

The last level is a combination of all the above. You have faith that your camera will do what you tell it to do. You have faith that for a given setting, a given image will result. You have faith that your image, when shot a certain way, will end up matching your vision. You have faith that the knowledge of others can be applied to improve your work, and faith in yourself to apply it. You have reached a stage of photographic faith that allows you to find your flaws, and seek solutions with confidence. You can control all the little aspects into visualizing and editing an image that will have a desired impact.

Faith, for the photographer, is an ongoing thing, and something that we sometimes battle. Much like our faith in government or our religious faith, our photographic faith is shaken from time to time. At the lower layers, it leads to growth and improvement. At the later stages, it can concentrate our efforts or it can discourage us if we let it. Fighting that discouragement is another act of faith. Believe me, it’s worth the fight!

On a second aspect of faith and the photographer, I’ve been noticing a general trend to revert to the first stage. There are folks who say things like “Why should I learn to shoot manual?” “My camera does it all for me.”, and “It’s easier to shoot “P” mode, I don’t have to think.” My personal favorite is “It’s digital, so it’s free. Just delete the bad ones.” This trend leads to stagnation and mediocrity. Just because you can shoot 1000 images and delete the 975 that are worthless, doesn’t mean you should. You’ll never grow when you lack faith.

Hohenfels Volks: The Storm Cloud, before
ISO 125, f/14, 1/60
Faith allowed me to make this image, shot to make:

Hohenfels Volks: The Storm Cloud, after
This image. Knowledge, confidence, and faith combine to allow creations like this to be made. Visualizing your image and shooting for that vision are acts of faith.

I hope our Hohenfels Volks enjoy the rest of the week. Keep the faith and get that shot you’ve been seeing in your mind’s eye!

Please feel free to share your photos on our Faceboook page. Everyone here would love the chance to see your work! Is there anything you’d like to see here? Do you have a question? Share your thoughts here or at the Hohenfels Volks Facebook page. Of course, commenting on both Facebook and here is always appreciated, too! Don't forget, we're on Google+, too!

Wednesday, August 15, 2012

Ride Along Rome

Greetings, volks. Welcome to Hohenfels Volks, THE place for our place! Another sunny day in Hohenfels, as we ride out the summer, brings us warmth and brightness.

Today we’re going out on a ride along shot. So, get ready to leave Hohenfels behind, and take a trip through time to ancient Rome.

First, here’s the shot from the camera.

Hohenfels Volks: Colosseum in Rome, Before
ISO 160, f/8, 1/100, Canon EOS 7D
This is washed out and appears to be a failure, but when you shoot for your final result, this is only half the image.

It’s not very pretty, but this goes to show you how you create an image with your vision. I shot it this way fully expecting to get to the final image with some editing in Canon’s DPP. I didn’t use Photoshop or any other program; everything was done in RAW conversion.

We were in Rome a couple weeks ago on a wonderful family vacation with some great friends. The whole family has always wanted to go there, so off we went.

Of course, the Colosseum was a mandatory stop, especially for me. This was shot during our tour, including the underground portion. I got quite a few shots inside, but wanted something that would leave the viewer wondering. I also wanted something that showed its incredible nature, without getting the usual fare.

I was shooting film and digital that day, so used my 7D to meter for both cameras. The film was Kodak Portra 160, which is a color film with a box speed of ISO 160. I metered for the lower wall. I wasn’t concerned about the sky blowing out, as the important details in the tunnel and brick were needed. By metering the lower mid values and exposing for M-1, shadow detail was preserved, as were the mids.

They hardly seem the same. I edited the image by setting my white balance to color temperature. This allows for some contrast control in the final image. The reason color temperature and white balance can be used to control contrast is that our color levels will be adjusted under the RGB tab. After setting the color balance, and setting the exposure to –2/3 stop and adjusting the contrast, I moved over to the RGB tab.

When converting this way, the image starts looking worse as you progress. It simulates color filters. The beauty of digital is that you can simulate different colors for different levels. By increasing the levels of red in the shadows, pretty much removing blue, and giving green a slight decrease, the image looked wonky. Of course, it starts to come together when you slide your saturation under the RGB tab to 0. A little dip of the luminance curve and it’s back to Raw.

By adjusting the color balance back toward blue, you can darken the image. You also increase contrast. Then, once you’re happy with those adjustments, under the RAW tab’s saturation you can further tweak your contrast. With the red bricks, green spots of grass, and blue sky the image was quite suited to this type of conversion. Another suitable type is when one color dominates several neutral or contrasting colors.

Here’s a screen shot of the 2 tabs and the final settings. Shooting RAW gives you so many options to capture shots that bring together your camera work and your vision.

Hohenfels Volks: Colosseum in Rome, RGB tab settings
Here is the RGB tab and the color adjustments.

Hohenfels Volks: Colosseum in Rome, RAW tab settings
And here we see the RAW tab in Canon DPP

Finally, here is the finished image.

Hohenfels Volks: Colosseum Section, Rome
ISO 160, f/8, 1/100
Colosseum Section, Rome, finished. The increased contrast from the color temperature brings detail into the bright stones topping the section. It also makes the entry dark and increases overall image interest.

The tunnel entrance, in dark mysterious shadows, referred to as the vomitorium, allowed for rapid exit during an emergency. The little arches below were entryways into another seating area. The site had a capacity of 50,000 spectators, and even though this small section doesn’t show the full capacity, it does give an impression of the scale and architectural marvel. I also shot a back up to be in color, which pops for the contrast between the sky and walls.

Here’s hoping you finish the week with some great shots. Hohenfels is full of opportunities for photography, and this weekend may be the perfect time to get something in your camera!

Please feel free to share your photos on our Faceboook page. Everyone here would love the chance to see your work! Is there anything you’d like to see here? Do you have a question? Share your thoughts here or at the Hohenfels Volks Facebook page. Of course, commenting on both Facebook and here is always appreciated, too! Don't forget, we're on Google+, too!

Tuesday, August 14, 2012

Your Vision...

Greetings, volks. Welcome to Hohenfels Volks, THE place for our place! I hope this hump-day brings All of Hohenfels into the downside of a great week.

Today’s a quick post on creating an image from an artistic approach.

As we often mention here at Hohenfels Volks, the first part of creating an image is to visualize the final image. During this process, we’re trying to see in our mid and in our heart the image we want to present. Don’t close your eyes and see the scene how it is, see it how you want to show it.

Once you know what you’re trying to show, you can work on visualizing the steps to create that image. One of the things often overlooked is an inventory of the tools you have and how to use them. Perhaps you have Photoshop and want that area of lower color to be more saturated, how do you do it? Photoshop has some great tools to make that happen, including the vibrancy tool, which helps bring out color in under saturated areas without increasing overall saturation. The tools you can use are more than your camera; you can use a flash to highlight part of a scene, bringing the levels to your vision, or add an ND filter to allow longer exposures to make the water more flowing. Know your tools and how to use them. That will get you a long way to creating a wonderful scene.

Another thing to visualize, or know, is how you wish to present your image. Will you make it large? Will it be printed or on a monitor? Knowing these things will improve your images. Should you decide to print it, you may want to make a photo that slightly lighter, and take another for monitor display. What size will you print? The larger the print you desire, the more information you will need to capture. You will also need to have a more accurate focus. This generally means a larger file size. Although, making it a point to always shoot RAW will make you’re your files consistent in size.

Remember to think about how the colors and levels present can affect the viewer. Are they happy or moody? Is there any color? By harmonizing your tones and color, you create an image that impacts far more than a shot made without consideration.

Once you’re ready to make your shot, go for it. Remember though, it won’t look like you visualized without some cleaning up and editing. This isn’t always true, but best kept in mind. When you look on the tiny monitor in your camera, it’s not edited or presented according to your vision. Don’t be disappointed, remember, you planned your shot. Stick to the plan and you’ll get some amazing photos.

The technical side of photography is incredibly important. We need to learn aperture, shutter speed, sensor (or film) speed, and how they work together. However, they are only 1 part of the process. Without vision, creativity, and some thought you’re making snapshots. The see and snaps out there are abundant, but with these things on your side, your images will rock those who view them.

Hohenfels Volks: Vittorio Emanuele II Memorial, Rome
ISO 1600, f/5, 1/30 70mm Canon EOS 7D
Vittorio Emanuele II Memorial in Rome. I wanted to capture this 2 ways, this way in black and white, and again in full color. Knowing the tools I use, including Canon's DPP, allowed me to capture a shot that could be both. In the color version, you can sense the evening in the shot, as the sky behind is dark, and the lights behind the column add beautiful color and depth. By visualizing the shot and taking a little extra time, I got the one I wanted.

Take care, enjoy the downside of your week, and get the shot you’ve been thinking about all day! You’ll feel incredibly accomplished with the shot in your camera. Just think, it’s almost autumn, and that means Hohenfels and our places will be bursting with awesome colors soon! Time to start your visualization!

Please feel free to share your photos on our Faceboook page. Everyone here would love the chance to see your work! Is there anything you’d like to see here? Do you have a question? Share your thoughts here or at the Hohenfels Volks Facebook page. Of course, commenting on both Facebook and here is always appreciated, too! Don't forget, we're on Google+, too!

Tuesday, July 31, 2012

Metering for Effect

Greetings, volks. Welcome to Hohenfels Volks, THE place for our place! I hope everyone managed to break away from the Olympics this weekend and get some great shots of our Hohenfels area.

Some beautiful cloudscapes this weekend started me thinking about how we meter and where we place our exposures. Of course, this led to a short post today about shooting bright scenes, or scenes with a large amount of brighter objects.

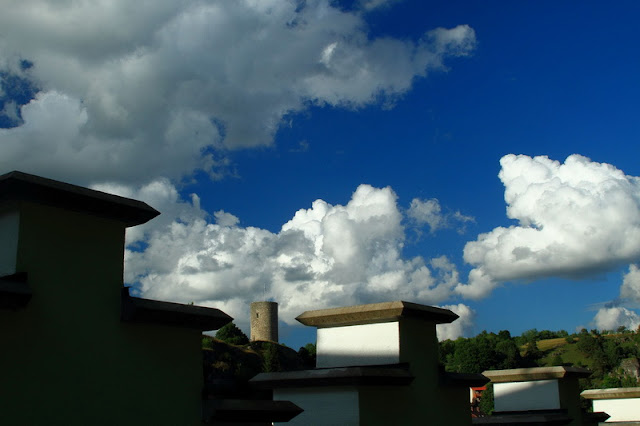
Hohenfels Volks: Castle in the Clouds
This shot was metered for the bottom of the clouds on the left. This left the bright clouds on the right a little overexposed. The values were brought down using the luminance curves in Canon's Digital Photo Pro to match my visualizing. By composing with the crenelations creating a stairstep effect and framing the castle tower, a brighter image could be created. It also brings the eye back to the tower and clouds, adding interest and depth.

The first thing we should be thinking about is our visualization. Where do we want to place our elements? For instance, if your scene contains fields, nice blue skies, and big fluffy clouds, perhaps metering for the fields will turn the sky white, and metering for the clouds will turn the fields black. Knowing where we want our elements in the range of values is the first step in putting our visualization to work.

After we’ve visually composed our image and noted the areas where significant detail must be maintained, we begin to meter. It’s generally best to make several readings from the different values within the scene, as this lets us know our range. In the above mentioned scene with the fields and clouds, we determine the sky itself to be the middle range. If we give this a +1 exposure, the sky is properly exposed, the fields are likely to be also, but the clouds will usually be overexposed. We can try to fix it on the computer, which is often difficult when the highlights are too far gone, or we can expose the clouds for +1 to +2 stops over their meter reading. This will darken the sky to a nice rich blue, and generally provide some slight underexposure in the field. The lowering of values throughout the scene also increases your overall saturation. It also gives you greater control over the chiaroscuro and play of light in your work.

Of course, none of this is useful to you if you don’t know what you want from your shot. Trying to capture the feeling you wish to share may require something else. Having this general idea, though, gives you another tool in the quest for the perfect shot.

Please feel free to share your photos on our Faceboook page. Everyone here would love the chance to see your work! Is there anything you’d like to see here? Do you have a question? Share your thoughts here or at the Hohenfels Volks Facebook page. Of course, commenting on both Facebook and here is always appreciated, too! Don't forget, we're on Google+, too!

Tuesday, July 17, 2012

Converting Your Image

Greetings, volks. Welcome to Hohenfels Volks, THE place for our place! I hope everyone is faring well as press into the week.

Today we’re going to go over a simple, but interesting way to convert your photo to black and white.

As we all know, sometimes color can change the way an image feels. It can take a moody photo and make it seem wrong or out of place. It can distract from the subject and take away from the beauty of the light. There are many reasons for shooting, or converting to, black and white. For this post, we’re going to do something that takes our shot to a better place.

This is the image we’re working on. I’m using Corel’s Paintshop Pro Photo X4, but the concept is the same in Photoshop, Lightroom, or Gimp.

Hohenfels Volks: The Dom
ISO 6400, f/3.4, 1/15
Looking into the Cathedral. The scene was beautiful, yet the image lacks some pop. We'll fix that!

I shot this photo inside the Dom in Regensburg. The beautiful Gothic architecture and art inside this cathedral seem best suited for black and white, and seem quite garish in color. The color temperature also becomes an issue when shooting at high ISOs, although I photographed this with the intent of making it black and white.

Once we’ve converted our image and opened it in our application of choice, we’re going to separate the image into red, green, and blue layers. There we’ll lighten and darken the different layers to our desired levels using curves and levels, and remove the noise. For this image, I slightly decreased the red and blue layers, while only dodging the green along the pipes of the organ. Once you’re content with your adjustments, combine the layers into a new image. For this shot, I slightly darkened the red layer, darkened the blue layer quite a bit, and dodged the pipes of the organ to increase the levels to offset the overall decrease in brightness. The finished combination now looks rather odd, and has some tinting/toning in it.

Hohenfels Volks: The Dom
This is our image after splitting the color channels and recombining them. Notice the green tint on the pipes.

Our next step is to split the image again, this time to hue, saturation, and lightness layers. You can discard the hue and saturation layers, as we will now use the lightness layer for our final canvas. For this image, I adjusted the levels, performed a minor curves adjustment, and increased sharpness. I chose to over-sharpen, using a radius of 1.00, as I would be softening the noisy area under the arch, and applying an edge preserving smooth filter.

Hohenfels Volks: The Dom
Almost finished, a few tweaks and we're there.

The finished result, while no masterpiece, is rewarding. It leaves you with a sense of place and scale that the color version tends to minimize. The chiaroscuro also seems quite well suited to the Gothic cathedral.

Hohenfels Volks: The Dom
And here we go. I think this really brings out the mood and scale of the Dom. Its incredible Gothic architecture and art are magnificent.

Well, that’s one way you can do it. This is by no means the only way. You can also adjust color channels without splitting the image, and then desaturate the image. There are as many ways to convert your image as there are folks playing around to figure out what works best for their photo. One of the biggest keys, though, is color contrast and levels. Getting that where you want it can lead to some very nice results!

Enjoy the rest of your week.

Please feel free to share your photos on our Faceboook page. Everyone here would love the chance to see your work! Is there anything you’d like to see here? Do you have a question? Share your thoughts here or at the Hohenfels Volks Facebook page. Of course, commenting on both Facebook and here is always appreciated, too! Don't forget, we're on Google+, too!

Monday, July 16, 2012

Shooting the Spires

Greetings, volks. Welcome to Hohenfels Volks, THE place for our place! Welcome to another Monday. I hope your week is off to a great start.

Yesterday I posted the following photo, along with a message that I would post more about it tonight.

Hohenfels Volks: Shooting the Spires
ISO 125, f/16, 1/125, 85mm.
This shot is straight from the camera. I applied some sharpening to retain detail during the resize, but no other edits were made. By placing the spires to the right, and using the clouds to create interest in otherwise negative space, mood is created and enhanced.

This photo was made in Regensburg on Saturday. Dachauplatz has a nice garage, located to be within a few minutes walk to just about anywhere in the old part of town. Parking on the roof and scanning the other roofs, this scene just begged to be photographed. The sky was stormy looking, and clouds appeared ominously ready to ruin our afternoon. I metered for the bright clouds and added about 2/3-stop exposure. This left the dark clouds about 1 and 1/3 stop below the meter reading on my 7D.

Composing to minimize intrusion of the garage and several other out of place structures, I made 2 shots about 1/3 stop apart. The mood of the image captured the light, sky, and feeling of that dreadful appearing scene.

After getting the image onto the computer, I decreased the exposure 1/2 stop, brought in the shadow levels to just right of the edge, the highlight levels a slight amount, set contrast to 3, and shadows to 2. I set the color temperature to 3500K, and adjusted the curves for maximum impact. Under the RGB tab, I reduced saturation to 0 and tweaked the curves again to create a balanced scene, resulting in the following B&W image. I applied maximum sharpening on both tabs, and felt pretty good about this image.

The rest of that afternoon was incredibly nice, the weather was on our side, we enjoyed some nice family time, and of course, some ice cream at Eis am Dom, in the Domplatz. Of course, no visit to Regensburg can be complete without a visit to Fotohaus Zacharias. I got to see their latest offerings in the old camera department and pick up some 120 film. They always have so much to choose from. I get lost dreaming about the cameras! I saw a couple old time large format cameras that were incredible. It’s definitely a place to spend a couple hours just looking!

Hohenfels Volks: Shooting the Spires, Monochrome
Here's the finished version. It looks old fashioned in monochrome, and the mood is enhanced without color to distract. Converting images can often be a very simple process when you shoot for a mood.

Well, that about wraps it up for today, but I’ll be back with some more photos from the trip and techniques to get that B&W image you visualized!

Did you get any exciting images this weekend? If so, feel free to share them on our Faceboook page. Is there anything you’d like to see here? Do you have a question? Share your thoughts here or at the Hohenfels Volks Facebook page. Of course, commenting on both Facebook and here is always appreciated, too! Don't forget, we're on Google+, too!

Thursday, July 12, 2012

Continuing Yesterday

Greetings, volks. Welcome to Hohenfels Volks, THE place for our place! Another rainy day and pleasant evening pass through Hohenfels.

I had planned a post about converting color to black and white today, but didn’t get it done. Instead, we’re going to put up a couple more pointers on bringing your vision to life.

The first tip comes from a Facebook post by Clyde Butcher. Clyde is one of the greats. His photos of the Everglades and Florida in general, are incredible. Clyde’s working hard to preserve the Everglades. His tip of the day is to move forward a few feet when you’re shooting wide-angle lenses. This will bring your composition into your visualized range and remove some of the stray elements from the scene. This can be done through cropping, as mentioned in my edit on yesterday’s post, but combining the 2 can make your shots that much easier to edit. Take it from Clyde, he’s waist deep or higher in swamp water and shooting an 8x10 inch Deardorf view camera or an 12x20 Wisner. Check out his homepage, you’ll be amazed.

Our second tip comes from Strobist. The tips is simple, make an idea list. Taking it one step further, make a short term or single trip list, and make a long-term list. I won’t go into a lot of detail here, click the link and read the article. This site has some great stuff!

Our last tip comes from Photofocus. Try to look beyond the obvious. See what you don’t see right away. Try taking in the scene, closing your eyes, and visualizing the scene. You’ll notice more this way and may find your new subject. Again, I’m paraphrasing. Check out Scott’s page, you’ll be glad you did!

Well, that it for this evening. I hope to have the promised conversion post up Monday! I hope everyone has a great Friday, and an even better weekend! Enjoy and get your dream shot. Make sure to share it with us, too!

Do you have an image to share? We’d love to see it! Is there anything you’d like to see here? Do you have a question? Share your thoughts here or at the Hohenfels Volks Facebook page. Of course, commenting on both Facebook and here is always appreciated, too! Don't forget, we're on Google+, too!

Wednesday, July 11, 2012

Creative Exercising

Greetings, volks. Welcome to Hohenfels Volks, THE place for our place! Today, starting out gray and rainy, leaves Hohenfels in the clutches of a very pleasant evening!

Running into one of our friends in the grocery yesterday, I was asked about some exercises for creativity, and photographing some beautiful scenery. I thought a great subject for a post was seeded in that great question, so today, we’ll outline a couple simple ways to get the shot that has others wondering how you did it.

We’ve been posting about exercises to improve your composition, exposure, and creativity, so this is more of a review. It also reinforces how simple photographic techniques can create some winning shots.

The first thing to mention is never take the first shot. Most folks will see something, maybe a statue or other landmark, and take the easy shot. If you have to, take it just to get it out of your system, but then look for some other way to create your unique image. Walk around, check it out from every available and possible angle, view it through your lens, and try moving through a range of focal lengths. Once you’ve settled on the shot, make your image a reality. Remember, part of the creative shooting process is visualization! Edit- Take the first shot, if you pass it up, you may never get the same feeling you had at first. Thanks to Bodensee Bob for that cool tip!

Another simple exercise is to either shoot a prime lens, or use only 1 focal length on a zoom. Remember, doing this forces you to look for other ways to get the shot. You may have to move in closer to tighten up the scene, or move away to add some context. It’s a great way to change how you view the world around you!

The last 2 things are color and scale. First, on color, see how you can use it to create mood. Use your color to balance the mood and feeling, remember complimentary colors? Perhaps shooting a scene with a large red subject, shoot the subject at about 1/3 the frame and use green to fill out the other 2/3. You’ve given importance to the subject through size, and emphasized it by making the color stand out. This is also nice if you use 3 colors in a split complimentary scheme.

Using size and scale to emphasize a subject or restrain non-subject elements is a proven method of increasing interest in an image. It not only adds context, but also can be used creatively. Everyone shoots the trick photos of someone holding up the Leaning Tower, or holding someone in their hand. Moving beyond that, the ability to trick the eyes through scale can make for magic images. Using our first tip combined with this to make an image of a local landmark will stand out. Make the scale of the subject the subject. Instead of taking the Eiffel Tower, take a piece of it, and use the size as part of a composition to reference the actual tower. The same can be done with buildings, statues, and just about anything. Your photo will stand out as more than just another shot of the local scenery. Edit- Another tip from Bodensee Bob is to take the shot of the bigger piece and crop to your liking during editing. Great tip, thanks for sharing!

Hohenfels Volks:Amber Waves of Grain
ISO 125, f/8, 1/125, 56mm, 125 C/ft2 metered at the wheat.
A field of grain in Hohenfels. Using f/8 and 56mm gave me a reasonably shallow DOF, allowing the hills to blur out, and only the foreground section to remain in focus. This combined with the color of the wheat against the color of the sky brings out the wheat as the subject. By shooting from below, I was able to fill the majority of the image with the front wheat, and allude to the size of the field with the shallow DOF. Taking a higher angle allowed more of the field to be seen, yet seemed to lack scale and impact in the final image.

Of course, your best tool for creative and magic images is your mind. A really great photo can convey your reaction and feelings to the scene. It doesn’t have to be a literal rendering; the values you decide to place in each area of exposure are part of your creative process. Making the clouds a little darker than reality or the trees a little brighter is part of spreading your reaction.

I hope this post has helped get your creative regions revving. I can’t wait to see you’re your shots. Tomorrow’s post will hopefully be ready tomorrow. I’m hoping to show a method for converting color images to monochrome in a way that recalls the images of the past. Be sure to check it out.

Do you have an image to share? We’d love to see it! Is there anything you’d like to see here? Do you have a question? Share your thoughts here or at the Hohenfels Volks Facebook page. Of course, commenting on both Facebook and here is always appreciated, too! Don't forget, we're on Google+, too!
Tuesday, July 3, 2012

Happy Independence Day

Greetings, volks. Welcome to Hohenfels Volks, THE place for our place! Another Tuesday draws to a close, as America prepares to celebrate Independence Day.

For those of us who love photography, this is a wonderful opportunity to give our camera a workout. Between picnics, barbecues, and fireworks, the range of photographic expression can be experienced to its fullest. From brightly lit fun in the sun, to dark skies lit only by the bursts of those lovely blossoms reminding us of our celebration, the conditions are ripe to get in your dream shot! I hope everyone will be out chasing theirs.

Independence Day is also a day to celebrate our forefathers and their fortitude. The undertaking before them was ripe with danger and the constant risk of losing their lives. Once committed to their course, they were branded traitors to the crown, and became outlaws. They knew that, but they also knew that to embrace the security of loyalty was the same as living a life dependant on the whim of the king. They knew that future generations would be enslaved to a monarchy that held them in contempt, as colonists enjoyed far less privileges than those at home.

Every time the crown needed money, the colonies were forced to pay huge taxes, without any say in the government, or any value provided in return. Banding together, they risked all they had, including their lives, for the noble idea that freedom is worth fighting for, for the cause of liberty, that people should have a say in their government, for the belief that governments exist to serve their constituents, and for the future.

While you’re out getting that shot, remember what we’re celebrating, it’ll add meaning to your shots and give some depth to your vision.

Of course, the 4th means fireworks, also. Here's a link to a quick post on fireworks. It's worth a short read. Make sure to watch the video, too!

God bless and Happy Independence Day!

Do you have an image to share? We’d love to see it! Is there anything you’d like to see here? Do you have a question? Share your thoughts here or at the Hohenfels Volks Facebook page. Of course, commenting on both Facebook and here is always appreciated, too! Don't forget, we're on Google+, too!

Thursday, June 28, 2012

Process Hang-ups

Greetings, volks. Welcome to Hohenfels Volks, THE place for our place! The skies and lighting these past couple days have created an environment rich with opportunities for making some great shots!

I hope everyone is enjoying the wonderful weather here in our Hohenfels area. Photography is a magic thing during this time, when the sun is up late, and the skies can work their mood into your images. The golden and blue hours can be used to great effect when shooting during this time, and add some drama or serenity to the image you’re creating.

Tonight’s post is based on something I read at Photofocus, by Scott Bourne, about pedantry in learning photography. To sum it up- there are those who are all about the process and sticklers for the “rules” and numbers. I had planned a post about making your image nearly perfect in camera to minimize editing time, but his article struck me as being something to share.

I’m familiar with the process concentration, as I tend to get wrapped up in the process at times. For me, nailing the process leads me to look at ways to improve my images by finding other ways to make the same thing. Learning to do it “correctly” is important to learning how to do it “right.” By correctly, I’m referencing the process and numbers, and by right, I’m referencing the final image I visualized.

The process is a vital tool in making an image, as this is where we start. Learning that reciprocity makes our exposures easier by allowing us to work the exposure triangle is a part of that. Learning that controlling DOF is done through focus and aperture is a part of learning the process. The key is in knowing that the process is not the end, but the beginning. Before we can make impacting departures from the process, we must know the process.

Ansel Adams, one of my favorite photographers and sources of knowledge and inspiration, was well aware of this. Throughout his books, he refers back to visualization and placements. Each book in his series on the Camera, Negative, and Print begins with a chapter on visualization. He constantly references expression while teaching the basic processes and departures from them.

By working together to share our knowledge, we can bring more to expressive and creative photography than just numbers and processes. By sharing our vision and visualizations, we help our fellow photographers in their journey through this wonderful endeavor. The important thing is how does your image feel and how does it impact you and your intended audience. Other than that, the opinions of others, especially the pedants out there, should matter very little. Their opinion requires weighing, and the helpful bits used while the rest are discarded like week old leftovers.

Don’t let those folks disappoint you, don’t let them bring doubt into your mindset, and don’t let them change your style. Your photography is for you, your vision, while shared with others, is still yours. The biggest point in all this is enjoyment. Make sure you’re getting the most enjoyment you can from the time you spend making images, and from those photos you worked to give life to.

You really should check out Photofocus, Scott posts some incredible photos and his articles are a great resource for those of us addicted to the magic of bringing that feeling to life in our art.

Hohenfels Volks: Abandoned Door
ISO 125, f/11, 1/60
This image is likely to be called too dark by those who think only of the process and "correctness" of an image. It was intentionally left dark to add to the mood and impression of abandonment. By departing from the process we can make our art more meaningful.

I hope you have some great plans for the weekend, and are ready to share your visions with us. We’re all eager to see folks sharing their images, their vision, and thoughts. Enjoy your Friday, and enjoy your time behind the camera!

Do you have an image to share? We’d love to see it! Is there anything you’d like to see here? Do you have a question? Share your thoughts here or at the Hohenfels Volks Facebook page. Of course, commenting on both Facebook and here is always appreciated, too! Don't forget, we're on Google+, too!