Showing posts with label creation. Show all posts

Wednesday, September 11, 2013

A Tryst

Greetings and welcome to Hohenfels Volks, THE place for our place! Another rainy reminder that autumn is upon us. The colors and clarity of the season provide so much to intoxicate the spirit, and numb the body for the long cold ahead! Here, in Hohenfels, it’s no different!

It has been said that art is a tryst, for in the joy of it maker and beholder meet.
Kojiro Tomita

Again, another taste of the artistic and spiritual side. Kojiro Tomita was an early 20th century art expert from Japan. He had come to America to expose the U.S. to Japanese aesthetics and art. He was curator of the Museum of Fine Art in Boston.

I chose to use this particular quote to express what our photography can do, and how we involve our audience in our work.

When we feel our shot is the right one, when we see the scene, and visualize our final image, we often feel something beyond our technical and expressive processes. If we stop and think about what we’re expressing, and who we’re expressing it to, we begin to see a relationship take shape.

Neither party may know each other; indeed, they may be separated by centuries. At the same time, though, we are brought together for a small moment, in some connection that shares our feelings and viewpoints with those of our viewer. We connect.

Just something to think about the next time your out. If you’re out to make a portrait, find a way to include your subject, as well as your audience and yourself, in that connection. You’ll find a photo that will touch lives for generations to come! When making a still life, try to visualize the final product, and put yourself in the shoes of the viewer. How does that visualization make you feel? If your reaction brings you deeper into the scene, then your audience will no longer be your audience; they’ll be a tryst you enjoyed while expressing your vision, and enjoying your creativity! Of course, that’s just my thought!


ISO 3200, f/5, 1/30
Flowers in Vase, my tryst. This was taken in a little Vietnamese restaurant in Bayreuth during my last day trip. I made the shot knowing that the flowers in stark isolation against the background would create a sense of isolation, especially with all the negative space. I also noticed, even in that sea of isolation, that the flowers were not alone. Their isolation created a balance that allowed their relationship to transcend appearances and become tryst like in its relation of tones, shapes, and placement. I knew this one would speak to someone as a reminder that we are never alone, even when we feel like it. To paraphrase Ansel Adams, "There are always two people in every photo." That seems to go along with today's theme nicely.

I hope all our Hohenfels Volks readers will get out and create something of a tryst in their photography, and share it with us on our Hohenfels Volks Faceboook page. We’d love to see your work.

Is there anything you’d like to see here? Do you have a question? Share your thoughts here or at the Hohenfels Volks Facebook page. Of course, commenting on both Facebook and here is always appreciated, too! Don't forget, we're on Google+, too!

Monday, September 9, 2013

Presence

Greetings and welcome to Hohenfels Volks, THE place for our place! Rain, sun, wind, chills, and warmth. All the seasons were experienced in one day here in Hohenfels!

Be still with yourself until the object of your attention affirms your presence.
Minor White

It's amazing the insight in that little quote...

Communication exists between the photographer, the subject, and the viewer, and can only be understood by those few who feel the affirmation of the object upon which you've cast your attention.

I posted that earlier today on our Hohenfels Volks Facebook page. It’s meant to call attention to the fact that our expressions have a link to the subject.

Many of the early and famous photographers were quoted saying things about the importance of creativity. They were also famously quoted speaking or writing about expression and the relation of photography to communication. Ansel Adams said there are always 2 people in a photograph, even one devoid of people, the photographer, and the viewer.

It’s important to remember that even though we see no person when we make the image, we are indeed communicating our feelings, thoughts, and ideas about the subject to our future viewers. We are also expressing something of our feelings and thoughts about our potential viewers. When we think of our viewers, and what we hope for them to feel and opine on our images, we are indeed receiving their affirmation. If our viewers are not an object of our attention, then what else is? Beyond our subject and ourselves, there is little left to affirm our presence.

Of course, our subject affirming our presence may seem ridiculous, as often we photograph the inanimate. This affirmation can be almost spiritual, it’s an awareness of the light, the shade, the texture, and the myriad other things that make our expressions our own, and help us communicate across all boundaries. We generally feel this affirmation as what Cartier-Breson called the “decisive moment.”

Hohenfels Volks: Rebirth In Bayreuth
ISO 1600, f/8, 1/30
Another angle on yesterday's photo. I love the way the green leaves stand out both visually, and metaphorically, against the orange, and even above the greens of the moss. By creating a connection with the scene, I was able to express my love of the way new lives grow from the old, and yet remain part of the old.

I hope everyone gets the chance to seek the their object's affirmation, and will feel their images. I also hope you’ll share them with us on our Hohenfels Volks Facebook page. We’d love to see your work.

Is there anything you’d like to see here? Do you have a question? Share your thoughts here or at the Hohenfels Volks Facebook page. Of course, commenting on both Facebook and here is always appreciated, too! Don't forget, we're on Google+, too!
Thursday, December 6, 2012

10,000 Revisited

Greetings, volks. Welcome to Hohenfels Volks, THE place for our place! Everywhere you look, you’ll see white! Winter is here for the long haul, and that means it’s time to get some seasonal shots. I hope everyone is getting geared up for Christmas and some great photography.

Earlier today, we had blue skies and some nice clouds, perfect for the landscape shooter in all of us. Of course, things turned ugly quick, and left us in the midst of a dark and icy wall of snow. As often happens, the sun managed to beat back the snow and again we were ready for making some great shots.

Enough weather, that’s not what we’re here for, right? Today we’re going to talk about pride and accomplishment. It’s also a chance for an exercise in good old-fashioned photography. Even though we’re using our digital cameras, and often forget the importance of each shot we make, we can return to the old ways. Remember, as Henri Cartier-Bresson said, “You’re first ten thousand shots are your worst.” In a much older post, we addressed this and modified it to be about 100,000 to 1,000,000 shots. This is due to the inherent nature of instantaneous feedback and automatic cameras.

In the earliest days of photography, folks used glass plates for their negatives. Then film came along. In those early days, your film, or plate, was only sensitive to blue light. This made balancing your light and color very important. With the advent of thinner films and panchromatic emulsions, more sensitivity was added. Then, of course, came color film. When you shot either a sheet or roll, you couldn’t change your ISO or color balance. Film and digital sensors can be thought of as the same thing, and for the rest of this article will be used interchangeably.

Film costs money. It cost money in the old days, as well. When a photographer made shots, he weighed the value of the film and the shot. Every photograph was precious, and had to be made with care. Exposure, color balance, even composition had to be weighed and given some measure of value in relation to the photo. Photography took time, to both master, and in terms of the individual image created. Light meters for measuring exposure, going back to the 1800’s, are available on auction sites all over the internet. Focusing aids, powder flashes, apertures, and even shutters were part of the photographer’s knowledge. In many of the older lenses, the aperture was adjusted using an insert placed in the lens at the time of the photo.

Now that we see how valuable the image was, and the knowledge to make an image, we can see how those early photos, and those that have come down to us through the years, were not the product of guesswork or automation.

For the next few days, try doing an exercise in film. Choose one ISO for your camera, choose one color balance, and only limit yourself to 36 shots per session. Remember, getting your color balance and ISO right will require thought and planning. It will also require learning about your intended shooting situation. If you’re shooting outside, shoot in daylight or around 5200K, and inside shoot at tungsten or around 3200K. If you’re shooting in bright conditions, choose ISO 100, in the dark ISO 800. Finish your 36 shots before changing your settings. Also, don’t look at your images on the camera monitor, or delete any shot. Wait until you get home to see what you have. This will encourage you to value your images, while also helping you improve.

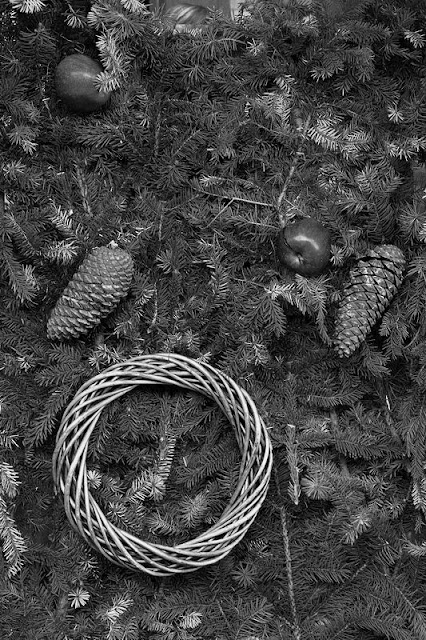
Hohenfels Volks: Dresden Christmas
EI 500, f/5.6, 1/60, 56mm
I couldn't resist this shot, the mix of shapes, textures, and tones are intriguing! Shooting manual all day, let me have control of the camera, instead of the camera controlling me. It also allowed me to use my knowledge to get what I wanted.

This little exercise will require you to know your camera settings, it will require the knowledge to get the shot right, and it will allow for a sense of visualization to settle in. Visualizing your image is an incredibly useful tool in photography. This is a great time to undertake this exercise, as our changing weather conditions, and lighting, will challenge even the best without proving impossible with a little effort. As an added bonus, it’ll make every shoot an adventure, and every moment until the photos are loaded like Christmas. It’s a fun way to experience the anticipation of Christmas with a gift in every session! It’ll also make shorter work of getting the best shots, since you’ll be improving with each photo made. You’ll also develop your confidence, which always helps! Remember, a great camera doesn’t make a great photographer, any more than a great kitchen makes a great cook.

Please feel free to share your photos on our Facebook page. Everyone here would love the chance to see your work! Is there anything you’d like to see here? Do you have a question or an idea? Share your thoughts here or at the Hohenfels Volks Facebook page. Of course, commenting on both Facebook and here is always appreciated, too! Don't forget, we're on Google+, too!

Tuesday, August 28, 2012

The Importance of Being Creative

Greetings and welcome to Hohenfels Volks, THE place for our place! Lovely weather and photographic opportunities abound here in our place.

Today we’re going to put aside our cameras and calculators, and talk about creativity. We’re also going to take a few days break from our cameras while we look for creative ways to work our magic.

I have a slew of quotes on photography and creativity, but I'm only going to use a couple here to emphasize the need for creativity.

“A Ming vase can be well-designed and well-made and is beautiful for that reason alone. I don't think this can be true for photography. Unless there is something a little incomplete and a little strange, it will simply look like a copy of something pretty. We won't take an interest in it.” From the book "Pictures Under Discussion" by John Loengard, one of Life Magazine's most famous photographers.

This quote brings home how essential creativity is in our photography. Ayn Rand viewed photography as a vocation, or craft, because of the lack of a creative process. Many people do not take the time to be creative when making photos. We often find the image we want and make the photo, without putting more than the rudimentary thought into the process.

Hohenfels Volks: Gloria Lux, A Crative Expression
 ISO 160, f/8, 1/20
Gloria Lux, the Glory of Light. A creative expression of the majesty of this common and beautiful Orchid. The exposure placement and element positioning work with the light and lack of color to create an image that's more than "a copy of something pretty."

Ansel Adams referred to photography as “more than a medium for factual communication of ideas. It is a creative art.” If you view any of his photos, you will notice beyond their magnificent scenes, that great effort went into making them. His books on photography begin with chapters on visualization. Before you can visualize your photo, you need to have an idea of what you’re photographing. Begin visualizing all the ways it can be photographed long before you arrive. By the time you get there, you’ll be ready to survey and really visualize the image you desire to make.

I speak of visualization here quite a bit. I’ve discovered that slowing down, seeing the scene, and visualizing the shot, make for a more expressive image. Our photographs are our expressions. They express our thoughts, feelings, and most of all, our vision.

Creativity, and the art of creating, can be inspirations for you in and of themselves. You needn’t have a camera to be creative in your photography. In the words of Minor White, another great photographer, “Often while traveling with a camera we arrive just as the sun slips over the horizon of a moment, too late to expose film, only time enough to expose our hearts.”

Take a couple days without your camera. Go out and drink in the glory around you, expose your heart, and feel the scene surround you. You will come out with a better appreciation of the world around us, of our Hohenfels area, and your own magnificent creativity. The feelings will stay with you and inspire more creativity and expressive images. Reward yourself today with inspiration and creativity by feeling the scenes and sights around you. Enjoy the world and life, and share the results with us on our Faceboook page.

Is there anything you’d like to see here? Do you have a question? Share your thoughts here or at the Hohenfels Volks Facebook page. Of course, commenting on both Facebook and here is always appreciated, too! Don't forget, we're on Google+, too!

Tuesday, August 14, 2012

Your Vision...

Greetings, volks. Welcome to Hohenfels Volks, THE place for our place! I hope this hump-day brings All of Hohenfels into the downside of a great week.

Today’s a quick post on creating an image from an artistic approach.

As we often mention here at Hohenfels Volks, the first part of creating an image is to visualize the final image. During this process, we’re trying to see in our mid and in our heart the image we want to present. Don’t close your eyes and see the scene how it is, see it how you want to show it.

Once you know what you’re trying to show, you can work on visualizing the steps to create that image. One of the things often overlooked is an inventory of the tools you have and how to use them. Perhaps you have Photoshop and want that area of lower color to be more saturated, how do you do it? Photoshop has some great tools to make that happen, including the vibrancy tool, which helps bring out color in under saturated areas without increasing overall saturation. The tools you can use are more than your camera; you can use a flash to highlight part of a scene, bringing the levels to your vision, or add an ND filter to allow longer exposures to make the water more flowing. Know your tools and how to use them. That will get you a long way to creating a wonderful scene.

Another thing to visualize, or know, is how you wish to present your image. Will you make it large? Will it be printed or on a monitor? Knowing these things will improve your images. Should you decide to print it, you may want to make a photo that slightly lighter, and take another for monitor display. What size will you print? The larger the print you desire, the more information you will need to capture. You will also need to have a more accurate focus. This generally means a larger file size. Although, making it a point to always shoot RAW will make you’re your files consistent in size.

Remember to think about how the colors and levels present can affect the viewer. Are they happy or moody? Is there any color? By harmonizing your tones and color, you create an image that impacts far more than a shot made without consideration.

Once you’re ready to make your shot, go for it. Remember though, it won’t look like you visualized without some cleaning up and editing. This isn’t always true, but best kept in mind. When you look on the tiny monitor in your camera, it’s not edited or presented according to your vision. Don’t be disappointed, remember, you planned your shot. Stick to the plan and you’ll get some amazing photos.

The technical side of photography is incredibly important. We need to learn aperture, shutter speed, sensor (or film) speed, and how they work together. However, they are only 1 part of the process. Without vision, creativity, and some thought you’re making snapshots. The see and snaps out there are abundant, but with these things on your side, your images will rock those who view them.

Hohenfels Volks: Vittorio Emanuele II Memorial, Rome
ISO 1600, f/5, 1/30 70mm Canon EOS 7D
Vittorio Emanuele II Memorial in Rome. I wanted to capture this 2 ways, this way in black and white, and again in full color. Knowing the tools I use, including Canon's DPP, allowed me to capture a shot that could be both. In the color version, you can sense the evening in the shot, as the sky behind is dark, and the lights behind the column add beautiful color and depth. By visualizing the shot and taking a little extra time, I got the one I wanted.

Take care, enjoy the downside of your week, and get the shot you’ve been thinking about all day! You’ll feel incredibly accomplished with the shot in your camera. Just think, it’s almost autumn, and that means Hohenfels and our places will be bursting with awesome colors soon! Time to start your visualization!

Please feel free to share your photos on our Faceboook page. Everyone here would love the chance to see your work! Is there anything you’d like to see here? Do you have a question? Share your thoughts here or at the Hohenfels Volks Facebook page. Of course, commenting on both Facebook and here is always appreciated, too! Don't forget, we're on Google+, too!

Monday, December 12, 2011

Exposure and Exposing?

Greetings, Hohenfels, welcome to Hohenfels Volks, THE place for our place. Monday in Hohenfels, the start of a new week, finds the children going to school, the adults going to work or the fields, and the rest of us going in 10 different directions.

Of course, here in Hohenfels, Monday also means another theme. Based on the voting, this week’s theme will be “Expose Yourself (Umm, NOT like that!),” with 50% of the votes. 50% sounds so much nicer than 3 votes. This week, we should get a lot more votes, and a lot more participation, I hope!

The purpose of last week’s theme was to see the light, the way light moves, and the way it rises and falls. I hope, even if you didn’t participate, you were able to do some work with lighting. One of the tips I offered was to place an IPad with a white screen under a semi-transparent bowl. The bowl creates a half dome, allowing for easier viewing of the “bubble” created by the light. This “bubble” is not so much a thing you see, but something you notice in the way it interacts with the scene. I’ll have more about the nature of light and what I call “the bubble effect” in another post.

Moving on to this week’s theme, it should be easier than last week’s! At least, it should be somewhat easier. Because photography is an art, this week’s theme deals less with the technical side, and more with the expressive and artistic side of photography. This is where it may be harder, too. Because to do a shot that meets this week’s theme, "Expose Yourself (Umm, NOT like that!)," means injecting your self into the image. Notice how I separated yourself into 2 distinct words here, your self. By injecting your self into an image, you can create an impact with your photos and control the reaction of the viewer.

Here are some thoughts to make it easier for you to Expose Yourself. One way is to think of that which you value, it may be a possession, a person, or an ideal. Some ideas are a family member, the relationship you share with a special friend, integrity, hard work, and liberty, just something positive in which you place high stock. Think about how that which you value makes you feel, and how you can best show, and share, the feeling you get. The key here is not to be in or part of the image, beyond its creation.

Perhaps your memories of long ago Christmases with family gathering, and the smell of the tree can bring a feeling to you like nothing else. Share that feeling by creating an image that represents the memories. Maybe you hate the way the politicians use the commoditization of poverty to stay in power; it really gets your goat to see people enslaved to the greed of the powerful elite. Capture something that shows that, that shows us the way these people bring you down, that makes us angry right beside you. Of course, it could just be as simple as that magnificent golden pink glow as the sun sets over an idyllic village somewhere in the heart of Bavaria. Tinged with light pinks, purples, and bold fiery reds, the sunset made you feel like the magic of childhood. Share that feeling!

The most important thing for this week is to bring your feelings to fruition through your work, to share that feeling and moment with us, to make us feel something you felt when you viewed the scene before taking the image, to wow us the way you were wowed. Now doesn’t that make you feel better than what you were expecting when you saw “Expose Yourself” as one of the choices?

Remember to cast your vote for next week’s theme. Don’t forget to get your pics posted at the Hohenfels Volks Facebook page. Of course, commenting on both Facebook and here is always appreciated, too!

Thursday, November 10, 2011

Composition- Seeing in Color

Hello, Volks, welcome to Hohenfels Volks. Another week is almost over here in Hohenfels, and we’re onto another post!

Following up on yesterday’s post about color, today we’re going to talk about how color theory can work for you. Using complimentary and adjacent, or analogous, colors can really improve your compositions. The masters, including the painters and old time photographers knew how to get the most from the colors available to them.

Color theory is an extensive subject, and involves a lot more than we’re going to discuss. If you remember back in grade school, you learned there are 3 primary colors, red, yellow, and blue. They are primary because they cannot be made from combinations of other colors. Here’s a basic primary color wheel.


The 3 primary colors

The secondary colors, made from equal parts of 2 primary colors are orange, green, and purple. Here’s another chart showing the relationship between primaries.


The 3 primaries with the secondary colors

Colors opposite each other on the wheel are called complimentary colors. If you stare at one of the colors for some time, and then shift your view to solid white, the compliment, or opposite, of the stared at color will appear.

Beyond that, you have tertiary colors and other more complex blends and hues. Here is a 12-color wheel showing some of the basic ones.


12 colors, including primary, secondary, and tertiary.

Just as colors opposite each other are complimentary, colors next to each other are analogous, which means they are analogs of or for each other.

In normal human color vision, red focus beyond the focal plane, green directly on it, and blue focuses short of it. This is why red appears to advance and blue seems to recede. Another effect of normal human color vision is that the same color appears brighter and larger against a dark background than against a lighter one. Another interesting fact along that same line is that Da Vinci observed, "Colors appear what they are not, according to the ground that surrounds them." Handy stuff for the photographer!

With all that information, feeling overwhelmed can be a problem. So, to make this subject easier, we’re going to show a couple example of how to combine colors into a harmonious composition, and have them add to your image rather than distract from it.


Analogous color scheme. Using this scheme can create calm scenes and photos. Make sure you have enough color contrast, though, to keep your image interesting.


Complementary. Very vibrant and exciting images. Don't overdo it and you can get something really appealing.


This is called a split complementary scheme. This has a strong visual appeal like complementary colors, but with less risk of overdoing it.

Remember, there are other schemes as well. You could do a three color scheme using colors equally spaced through the wheel, which can create a dynamic image, especially when one is given a greater weight in the composition. A great way to get more information is to use Google "color theory." Another great source is Tiger Color. They also have some nifty software and such that will help you understand color.

Look for an assignment related to this post on Facebook in the next couple days. Hopefully we can get everyone posting a couple photos, and get more assignments going. Drop us a comment and let us know what you think of the idea.

Remember to share your pics and post your questions at the Hohenfels Volks Facebook page, and or by commenting here!

Wednesday, November 2, 2011

Bresson...

Hello, Volks! Welcome to Hohenfels Volks. I hope you’re all doing well, here in Hohenfels!

“Your first 10,000 photos are your worst” ~ Henri Cartier Bresson

As mentioned yesterday, Bresson said that well before digital cameras.

My thought on this quote, being in the digital age, is that it’s no longer your first 10,000, but your first 100,000 to 1,000,000 that qualify for his comment. It’s easy to understand this, given the widespread use of DSLRs and computers. We no longer have to pay for each shot, we don’t have to wait for processing, and we can see it instantly. We now shoot 10-100 times what the old masters did. They had to pay around $10 for one 8x10 piece of negative. Shooting one shot therefore cost quite a bit and they made sure they made it count. Today we don’t. Another downside of the digital age, is that those same worst shots, are also our best.

The reason is simple, when you see your first pic from a nice camera, you think “WOW! This is so cool!” Of course, all your friends tell you how good your pics are, too. Of course, like the old days, you’re learning without even knowing it. You start showing your stuff online and posting to Facebook, people are leaving good comments and life is good.

Then… you start looking at other photographers and their works. You start asking “Why isn’t mine that good?” Maybe they have a better camera! Actually, they’re just a little further down the road. However, that question leads you to the next step, conscious learning. You’ve awoken to the reality of Bresson’s basic statement about your first photos being your worst. You now seek to improve and learn. You start asking for criticism and advice. You read everything, you learn the rules, you start shooting AV or TV, and now your photos are getting better. You can see the improvement, so can others. Still you see all the rules you broke, and think, “How can I do this right?”

Here’s the short answer- you don’t. Photography is art, and adventure, and fun, and frustrating. It’s all about the rules, and breaking them on purpose. If you’re breaking them and not knowing it, not knowing how, and not knowing why, then you’ve not moved on. Learn the rules, and learn when, how and why to break them. You’re images will speak to your art, and start telling volks the story you want told. Learning to use your camera, in AV, TV, or manual mode is a big step. Adding light and flash is another step, knowing about framing inside the image, and other compositional tips, will all improve your work. You’ll still be critical, but in a way that leads to something nice. Asking how to make it better is positive and can be a great way to master your art.

We all learn, all the time, as long as we don’t let ourselves get stuck in the negative thoughts. Don’t be too hard when looking at your work, look more for the technical side, like exposure and sharpness. Let your visualizations and compositions lead you to new rules and to breaking those rules. Whatever you do, don’t stop loving photography or the art. Keep your love and don’t let your criticism of yourself take away the joy you felt at your first few shots. Trust me, that feeling will return, each and every time you learn something new and make it work in your photography.

Enjoy the rest of you week, keep shooting, and remember to share your pics and post your questions at the Hohenfels Volks Facebook page, and or by commenting here!

Tuesday, October 4, 2011

Intro to Composition

Today we’re going to talk about COMPOSITION.

Simply put, COMPOSITION is bringing the image you’ve just visualized to life in a pleasing and attractive fashion. Pretty straight forward, isn’t it? Like many things related to photography, it goes deeper than that, simple- yes, easy - no.

Diving into the subject on a basic level, we’re going to cover some basics today.

First, there is subject and object placement to consider. Then there are color, exposure, DOF, weight, balance, and various other considerations.

The tips I’m outlining are not hard and fast rules! While often called rules, you can break them anytime. The trick is to know when and why to break them. That takes some time and practice.

The most commonly discussed is the “rule of thirds.” This rule states that your subject, or subjects, should be placed along an imaginary line dividing the image into thirds. For a more powerful composition, intersections of horizontal and vertical thirds are used. I’ve included a chart showing this and a sample using it below.


This is just a basic chart to show where things line up.


This is an example using a photo I recently took. Notice how the right line runs through the middle of her eye and the bottom right intersection is right about on the corner of her smile. Also, notice the diagonal lines formed by her eyes, smile, and head.

Another rule is the “Golden Spiral.” This one seems to have several names. This is placing your subject near one of the points of intersection in the thirds, and using a nautilus type spiral to lead the eye through the image to the subject. There is some mathematics behind this using the Fibonacci sequence and the “Golden Ratio” of 1.618 to 1. This can be more appealing than a simple rule of thirds, as this more natural. It just takes some practice and patience. I’ve included a link to a site that shows an applet demonstrating this and several others.

Java Adjuster A cool applet that shows the effects and use of the rules regarding composition.
Golden Section and the Rule of Thirds An informative sight covering more about using these rules.

Place your subjects and objects according to how you visualized their importance to the scene. A subject that is important to the overall composition can be placed on one the intersections, or in the center of your “Golden Spiral,” while objects of lower importance can be placed along either a vertical or horizontal third only. Giving each object or subject a weight or ranking based on how you visualize the scene can help in using, and breaking, the rules.

Another important element in COMPOSITION is lines. By having lines in your image, you can lead your viewer through your vision and tell a story in your work.

Diagonal lines add a dynamic and powerful element to an image. C and S shaped lines create a sense of grace and harmony. Vertical and horizontal lines are static. Including a graceful element, like a river, and ensuring that is either C or S shaped, gives the viewer a sense of calm and grace. Use your leading lines, and you will see a change in how you look at a scene and how you start to visualize your images.

Here's a link to a nice little page about COMPOSITION. It's short, simple, and very helpful! 10 Top Photography Composition Rules

Well enough for today. We’ll dive more into COMPOSITION in another post.

Try this out and let me know how it works for you! There are a large number of places that will help you feel more at ease with your COMPOSITIONS around Hohenfels! I’d love to know if it helps! If you have a question, post it to our Facebook account. Also post it here as a comment on the related post, I’ll review it and get back to you! If you have a photo you’d like to share, add it to our wall on Facebook, and I’ll get it posted here.