Showing posts with label creativity. Show all posts

Wednesday, August 27, 2014

Express or Selfie?

Greetings and welcome to Hohenfels Volks, THE place for our place!

Ansel Adams once said, “We must remember that a photograph can hold just as much as we put into it, and no one has ever approached the full possibilities of the medium.”

Given the self absorbed state of the world around us, evidenced by the "art" of the "selfie," it's time to start looking back and moving toward approaching the full possibilities of our medium.

The best "selfie" is made using the external to express something of the internal, allowing a fuller expression of the individual self than a cell phone at arm's length. When we make our photography expressive, as well as creative, we can approach closer the full possibilities of the medium.

Of course, that's just my two cents.


The lodge wall. Antique sleigh on the wall at the lodge.
ISO 800, f/5.6, 1/30, digital

A photo doesn't have to be fancy or artsy to be expressive, creative, and artistic. Look internally, and find the expression in something external!

Well, that’s enough for today. We want you to share your photos, especially of our place, with us on our Hohenfels Volks Facebook page, and we’ll get them posted here! Is there anything you’d like to see here? Do you have a question? Submit them and we’ll get them posted, also. We also welcome any tips, tricks, and ideas. If you’d like to write an article about something photographic or some place of interest, we’d be happy to post it here! You can also e-mail questions, photos, or comments to HohenfelsVolks(at)tks-net.com, and we’ll get them posted! Of course, commenting on both Facebook and here is always appreciated, too!

Sunday, June 29, 2014

National Camera Day

Greetings and welcome to Hohenfels Volks, THE place for our place!

Here's an item from the good Volks at SnapKnot to celebrate National Camera Day.

SnapKnot
Courtesy of: SnapKnot

I hope you have your passport and get some great photos this week.

We want you to share your photos, especially of our place, with us on our Hohenfels Volks Facebook page. You can also e-mail questions, photos, or comments to HohenfelsVolks(at)tks-net.com, and we’ll get them posted!

Is there anything you’d like to see here? Do you have a question? Share your thoughts here or at the Hohenfels Volks Facebook page. Of course, commenting on both Facebook and here is always appreciated, too! Don't forget, we're on Google+, too!

Monday, September 30, 2013

On the Cheap

Greetings and welcome to Hohenfels Volks, THE place for our place!

“Valor is strength, not of legs and arms, but of heart and soul; it consists not in the worth of our horse or our weapons, but in our own.” Michel de Montaigne, Cannibales

“The Master said, “A true gentleman is one who has set his heart upon the Way. A fellow who is ashamed merely of shabby clothing or modest meals is not even worth conversing with.” (Analects 4.9)” Confucius

Both the above quotes refer to the fact that expensive is not always the best, nor is it always necessary. That’s the topic of today’s post, inexpensive lighting mods.

Firstly, this is not to say good equipment isn’t worth the price. A good set of lighting modifiers can be worth their weight, if they’re used. For most of us, a reflector, flash, and maybe something like a Rogue Flashbender are more than enough. There are also times when having something like a soft box or snoot can add a little something to your photo, especially in portraits.

Hohenfels Volks: The Ultimate Ransom
ISO 400, f/5.6, 1/30
This was shot in a local church. I used a Rogue Flashbender on my YN-560 flash wirelessly triggered. The flash was above and to the right of the camera. The soft light wraps, but still has direction to it, giving a nicely lit portrait of our Jesus' love for us!

When I first started out with homemade light mods, the first thing I built was an ice chest soft box. By cutting a hole in the bottom of a Styrofoam cooler the size of my flash head and covering the front with a white pillowcase, I had a soft box. The soft box softens the lights by giving us a larger light source, diffusing the lights internally to the box, and softening the light as it exits the box with a piece of diffusing fabric.

Take your ice chest, with the hole cut in it, and line it with aluminum foil, shiny side out. Tape of glue the foil to the inside of the chest. Let it crinkle up and have lots of texture, as this diffuses the light more. Once that’s done, tape, or glue a piece of white fabric to the inside of the ice chest to cover the opening. Taping it about 1 inch back from the edge gives you some spill control and allows for more directionality of the light. If you’re particularly ambitious, you can add some support to keep it from sagging, perhaps mounting it to a tripod.

Another great mod is a snoot. This allows a focused ray of light to be targeted to your application. One easy method is to cut both ends from a Pringles can. Using one end over your flash, and the other end open, you have a beam of light for a spot effect or hair light. Cover the flash end to prevent light leaks. You can even wrap the can with some colored paper and have a nice looking snoot. Placing the cap over the end of the can softens the spot a little, giving you a wider beam. A snoot can also be made from a rolled up cereal box, although you may want to line it with foil.

Another simple mod is a pie pan beauty dish. By taking a solid pie pan, or even some larger, a very nice light can be created. Cut an opening in the back for your flash, and drill 3 small holes. Place a 2-3 inch disk about 2-3 inches above the opening using stand offs or long screws, and voila, instant mod! Great for a more focused, glamorous light and ring like catch lights in your subject’s eyes, that adds drama to your scene.

For more advanced stuff, like large scrims or reflectors, PVC can be used as a frame with white sheets cut and sewn to fit. You can even make adjustable mods this way, and add legs or stands. Scrims are great for shooting in sunlight, as they soften the sun’s light and create nice shadows. You can even use a space blanket for extra large reflectors. They have a gold side and a silver side, like most commercial reflectors, and smaller sections can be used for fill light on product shots or close ups of flowers. When you’re making the larger sizes, it pays to measure everything out and have your fabric cut and sewn to match the several options you’ll have available. There are instructions online for making the larger PVC mods, and that’s a great way to build up your kit without breaking the bank.

With a little effort and ingenuity, a lot can be done. Even going back to Ansel Adams and many of the older era photographers, simple and cheap was a good thing. Ansel Adams was known to use the white side of his dark cloth for fill light when needed. Improvisation was often necessary, and following in that vein, we can get great shots without breaking the bank. A great place to start is DIY photography. They’re listed on our resources page!

We want you to share your photos with us on our Hohenfels Volks Facebook page. You can also e-mail questions, photos, or comments to HohenfelsVolks(at)tks-net.com, and we’ll get them posted!

Is there anything you’d like to see here? Do you have a question? Share your thoughts here or at the Hohenfels Volks Facebook page. Of course, commenting on both Facebook and here is always appreciated, too! Don't forget, we're on Google+, too!

Tuesday, September 24, 2013

From the Soapbox

Greetings and welcome to Hohenfels Volks, THE place for our place!

Today’s discussion is a short one on a quote from one of the early greats in photography, Alfred Stieglitz.

Photographers must learn not to be ashamed to have their photographs look like photographs. Alfred Stieglitz

First, a little background on Stieglitz. He began photography in the 1880s, and campaigned hard for photography to be recognized as an art unto itself. In 1902 he held one of the first ever photo exhibitions to be judged solely by photographers. Prior to this point, exhibits were being judged by painters and the like, who’s influence led to a more painterly and less vigorous style holding sway in the art. Over the years he influenced many photographers, founded several asscoiations, clubs, organizations, and galleries. He was friends with many famous photographers, including Edward Weston and Ansel Adams. He worked with them to ascribe a new ideal to photographic artistry.

All this brings me around to the quote, and also to today’s message. As we all know, learning photography takes some effort, it’s a task that frustrates and rewards those who set themselves to it. We go through the various stages, and then we find ourselves making photos that can connect, communicate, and express on their own merits. Most of know the joy that somes from that achievement, we know the sense of accomplishment that we feel.

The issue we’re seeing is that too often, marketing tells us that our photos should look like paintings, or that we need to do things with software that we can’t do with our camera. We see plug-ins and products designed to sell us on the idea that our photos should be a little less like photos. My concern is that all too often, we’re being led into a path that doesn’t match what our vision or intent. Frequently, these products and techniques are either marketed or taught to folks to cover up or salvage bad shots, which undermines the learning process.

Hohenfels Volks: Abstract Clarity
ISO 125, f/4.5, 1/25
This was shot in Munich at BMW World during a daytrip. I wanted to share something of how our world may be changing, but some things will remain timeless. Exposing and planning for black and white allowed a more readily grasped sense of that thought. I knew that any other rendition would create an association with different art forms, which I did not want. This is the final intent, to show that abstract use of lines, tones, and texture can still look like a photograph and be artistic. I have a print of this I find very pleasing.

Be proud when your photos look like photos. Show off your photos, share your photos, and let the world know you made your photos! That feeling of pride that comes from the successful matching of our vision, intent, and final product can’t be replaced, and if your intent is canvas, than be proud of that canvas! Jump for joy and shout Hallelujah if it looks the way you want, because that’s what we’re trying to accomplish.

Enough of the old soapbox. I don’t want to discourage anyone from trying something new, but those new ideas can become a crutch all too easily. I relied on some of those crutches myself early on, and I know how easy it happens!

So now, it’s time to get out and get shooting! Plan your presentation while your planning your shot, and you’ll be way ahead. Then, make your shot and share it with us on our Hohenfels Volks Facebook page. We’d love to see your work.

Is there anything you’d like to see here? Do you have a question? Share your thoughts here or at the Hohenfels Volks Facebook page. Of course, commenting on both Facebook and here is always appreciated, too! Don't forget, we're on Google+, too!

Wednesday, September 11, 2013

A Tryst

Greetings and welcome to Hohenfels Volks, THE place for our place! Another rainy reminder that autumn is upon us. The colors and clarity of the season provide so much to intoxicate the spirit, and numb the body for the long cold ahead! Here, in Hohenfels, it’s no different!

It has been said that art is a tryst, for in the joy of it maker and beholder meet.
Kojiro Tomita

Again, another taste of the artistic and spiritual side. Kojiro Tomita was an early 20th century art expert from Japan. He had come to America to expose the U.S. to Japanese aesthetics and art. He was curator of the Museum of Fine Art in Boston.

I chose to use this particular quote to express what our photography can do, and how we involve our audience in our work.

When we feel our shot is the right one, when we see the scene, and visualize our final image, we often feel something beyond our technical and expressive processes. If we stop and think about what we’re expressing, and who we’re expressing it to, we begin to see a relationship take shape.

Neither party may know each other; indeed, they may be separated by centuries. At the same time, though, we are brought together for a small moment, in some connection that shares our feelings and viewpoints with those of our viewer. We connect.

Just something to think about the next time your out. If you’re out to make a portrait, find a way to include your subject, as well as your audience and yourself, in that connection. You’ll find a photo that will touch lives for generations to come! When making a still life, try to visualize the final product, and put yourself in the shoes of the viewer. How does that visualization make you feel? If your reaction brings you deeper into the scene, then your audience will no longer be your audience; they’ll be a tryst you enjoyed while expressing your vision, and enjoying your creativity! Of course, that’s just my thought!


ISO 3200, f/5, 1/30
Flowers in Vase, my tryst. This was taken in a little Vietnamese restaurant in Bayreuth during my last day trip. I made the shot knowing that the flowers in stark isolation against the background would create a sense of isolation, especially with all the negative space. I also noticed, even in that sea of isolation, that the flowers were not alone. Their isolation created a balance that allowed their relationship to transcend appearances and become tryst like in its relation of tones, shapes, and placement. I knew this one would speak to someone as a reminder that we are never alone, even when we feel like it. To paraphrase Ansel Adams, "There are always two people in every photo." That seems to go along with today's theme nicely.

I hope all our Hohenfels Volks readers will get out and create something of a tryst in their photography, and share it with us on our Hohenfels Volks Faceboook page. We’d love to see your work.

Is there anything you’d like to see here? Do you have a question? Share your thoughts here or at the Hohenfels Volks Facebook page. Of course, commenting on both Facebook and here is always appreciated, too! Don't forget, we're on Google+, too!

Monday, September 9, 2013

Presence

Greetings and welcome to Hohenfels Volks, THE place for our place! Rain, sun, wind, chills, and warmth. All the seasons were experienced in one day here in Hohenfels!

Be still with yourself until the object of your attention affirms your presence.
Minor White

It's amazing the insight in that little quote...

Communication exists between the photographer, the subject, and the viewer, and can only be understood by those few who feel the affirmation of the object upon which you've cast your attention.

I posted that earlier today on our Hohenfels Volks Facebook page. It’s meant to call attention to the fact that our expressions have a link to the subject.

Many of the early and famous photographers were quoted saying things about the importance of creativity. They were also famously quoted speaking or writing about expression and the relation of photography to communication. Ansel Adams said there are always 2 people in a photograph, even one devoid of people, the photographer, and the viewer.

It’s important to remember that even though we see no person when we make the image, we are indeed communicating our feelings, thoughts, and ideas about the subject to our future viewers. We are also expressing something of our feelings and thoughts about our potential viewers. When we think of our viewers, and what we hope for them to feel and opine on our images, we are indeed receiving their affirmation. If our viewers are not an object of our attention, then what else is? Beyond our subject and ourselves, there is little left to affirm our presence.

Of course, our subject affirming our presence may seem ridiculous, as often we photograph the inanimate. This affirmation can be almost spiritual, it’s an awareness of the light, the shade, the texture, and the myriad other things that make our expressions our own, and help us communicate across all boundaries. We generally feel this affirmation as what Cartier-Breson called the “decisive moment.”

Hohenfels Volks: Rebirth In Bayreuth
ISO 1600, f/8, 1/30
Another angle on yesterday's photo. I love the way the green leaves stand out both visually, and metaphorically, against the orange, and even above the greens of the moss. By creating a connection with the scene, I was able to express my love of the way new lives grow from the old, and yet remain part of the old.

I hope everyone gets the chance to seek the their object's affirmation, and will feel their images. I also hope you’ll share them with us on our Hohenfels Volks Facebook page. We’d love to see your work.

Is there anything you’d like to see here? Do you have a question? Share your thoughts here or at the Hohenfels Volks Facebook page. Of course, commenting on both Facebook and here is always appreciated, too! Don't forget, we're on Google+, too!

Sunday, September 8, 2013

Jaunty in Hohenfels

Greetings and welcome to Hohenfels Volks, THE place for our place! Several days of beautiful weather have made life comfortable here in Hohenfels and our surrounding areas. Bayreuth last weekend was especially beautiful, as the clouds and lighting made for some magnificent wooded shots. Yesterday’s clear skies made the Nuremberg flea market, scattered throughout the old parts of town, a place full of photographic treasures.

Today’s post is short and simple. We’re going to talk about day jaunts to local areas. We’re not going to expound too much on places, it’s more about finding and making photos we like. Expressive images make the creative process a reward in itself, and being prepared can make a big difference.

I’m planning a mid-Autumn trip to Bayreuth to make some photos. The intent is to make some beautiful photographs of the autumn state at a couple places there. The first one is the Hermitage. I fell in love with this place on my first visit. The lighting, textures, and wooded areas make for something magical. The second one is at the New Residenz, which is similar, but has a completely different feel. I also hope to make a portrait or 2, and shoot some slide film.

The reason I mention that, is our main reason for the topic today. When we make our jaunts and trips, it’s always a good idea to know what to expect. By making a trip or 2 in advance, and maybe some shots of our ideas, we can be prepared for the situations we’re likely to encounter. For instance, at the Hermitage a reflector is a good idea. On a sunny day, it can be used to fill in the shaded areas with light streaming through the trees. Because of the large volume of trees, autumn will increase the warmth of the light, and a clear day will help keep it from going to warm. In Regensburg, I might rely on a golden reflector or gelled flash, as the light in the park by the bahnhof feels quite different. In either place, flash and gels are vital to getting a portrait to be more in line with our vision and intent.

Around our area, going place to place is simply a matter of taking the train. A train to Bamberg doesn’t take too long, and can lead to some quiet contemplation of what our intentions may be. We can also relax on the way back and reflect on our efforts. Trains also provide an easy way to scout a location. They run close to our own schedules in most cases, and we can leave when we see fit, or stay as long as we want. Avoiding the traffic allows for more insightful planning and reflection.

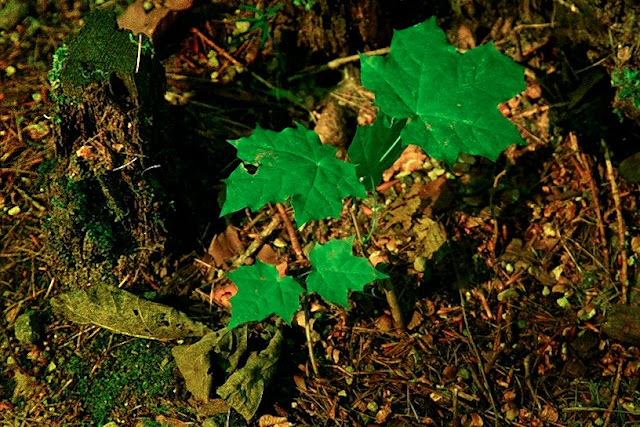
Hohenfels Volks: Rebirth In Bayreuth
ISO 1600, f/8, 1/30
Rebirth in Bayreuth. Green against orange. Leaves intensified by shooting with a yellow filter. Yes, black and white filters can be used on digital cameras. By bringing out the green slightly, the leaves are made to stand out. Just a small fraction of the beauty in Bayreuth. The leaves growing from amidst the decay of an older tree brought a sense of rebirth, and second chances, the shallow DOF allows a more meaningful contemplation. I plan to re-do this shot when the leaves are changing for a different mood.

On another note, I’m hoping we can get some volks to contribute a small article about a place they like to shoot, and maybe some pics. It’ll help flesh out our “Your Works” and “Our Places” pages, and help others out with their day trips.

I hope all of you will get out and plan a day trip to make some shots. I also hope you’ll share it with us on our Hohenfels Volks Faceboook page. We’d love to see your work.

Is there anything you’d like to see here? Do you have a question? Share your thoughts here or at the Hohenfels Volks Facebook page. Of course, commenting on both Facebook and here is always appreciated, too! Don't forget, we're on Google+, too!

Thursday, December 6, 2012

10,000 Revisited

Greetings, volks. Welcome to Hohenfels Volks, THE place for our place! Everywhere you look, you’ll see white! Winter is here for the long haul, and that means it’s time to get some seasonal shots. I hope everyone is getting geared up for Christmas and some great photography.

Earlier today, we had blue skies and some nice clouds, perfect for the landscape shooter in all of us. Of course, things turned ugly quick, and left us in the midst of a dark and icy wall of snow. As often happens, the sun managed to beat back the snow and again we were ready for making some great shots.

Enough weather, that’s not what we’re here for, right? Today we’re going to talk about pride and accomplishment. It’s also a chance for an exercise in good old-fashioned photography. Even though we’re using our digital cameras, and often forget the importance of each shot we make, we can return to the old ways. Remember, as Henri Cartier-Bresson said, “You’re first ten thousand shots are your worst.” In a much older post, we addressed this and modified it to be about 100,000 to 1,000,000 shots. This is due to the inherent nature of instantaneous feedback and automatic cameras.

In the earliest days of photography, folks used glass plates for their negatives. Then film came along. In those early days, your film, or plate, was only sensitive to blue light. This made balancing your light and color very important. With the advent of thinner films and panchromatic emulsions, more sensitivity was added. Then, of course, came color film. When you shot either a sheet or roll, you couldn’t change your ISO or color balance. Film and digital sensors can be thought of as the same thing, and for the rest of this article will be used interchangeably.

Film costs money. It cost money in the old days, as well. When a photographer made shots, he weighed the value of the film and the shot. Every photograph was precious, and had to be made with care. Exposure, color balance, even composition had to be weighed and given some measure of value in relation to the photo. Photography took time, to both master, and in terms of the individual image created. Light meters for measuring exposure, going back to the 1800’s, are available on auction sites all over the internet. Focusing aids, powder flashes, apertures, and even shutters were part of the photographer’s knowledge. In many of the older lenses, the aperture was adjusted using an insert placed in the lens at the time of the photo.

Now that we see how valuable the image was, and the knowledge to make an image, we can see how those early photos, and those that have come down to us through the years, were not the product of guesswork or automation.

For the next few days, try doing an exercise in film. Choose one ISO for your camera, choose one color balance, and only limit yourself to 36 shots per session. Remember, getting your color balance and ISO right will require thought and planning. It will also require learning about your intended shooting situation. If you’re shooting outside, shoot in daylight or around 5200K, and inside shoot at tungsten or around 3200K. If you’re shooting in bright conditions, choose ISO 100, in the dark ISO 800. Finish your 36 shots before changing your settings. Also, don’t look at your images on the camera monitor, or delete any shot. Wait until you get home to see what you have. This will encourage you to value your images, while also helping you improve.
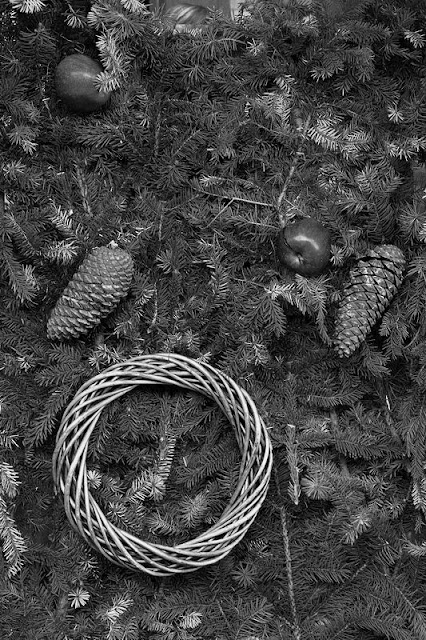
Hohenfels Volks: Dresden Christmas
EI 500, f/5.6, 1/60, 56mm
I couldn't resist this shot, the mix of shapes, textures, and tones are intriguing! Shooting manual all day, let me have control of the camera, instead of the camera controlling me. It also allowed me to use my knowledge to get what I wanted.

This little exercise will require you to know your camera settings, it will require the knowledge to get the shot right, and it will allow for a sense of visualization to settle in. Visualizing your image is an incredibly useful tool in photography. This is a great time to undertake this exercise, as our changing weather conditions, and lighting, will challenge even the best without proving impossible with a little effort. As an added bonus, it’ll make every shoot an adventure, and every moment until the photos are loaded like Christmas. It’s a fun way to experience the anticipation of Christmas with a gift in every session! It’ll also make shorter work of getting the best shots, since you’ll be improving with each photo made. You’ll also develop your confidence, which always helps! Remember, a great camera doesn’t make a great photographer, any more than a great kitchen makes a great cook.

Please feel free to share your photos on our Facebook page. Everyone here would love the chance to see your work! Is there anything you’d like to see here? Do you have a question or an idea? Share your thoughts here or at the Hohenfels Volks Facebook page. Of course, commenting on both Facebook and here is always appreciated, too! Don't forget, we're on Google+, too!

Monday, November 12, 2012

Overlooking

Greetings and welcome to Hohenfels Volks, THE place for our place! After a rather gloomy week, punctuated with brief moments of beautiful clarity, we begin another week here, as bland as things have been recently! Hohenfels is turning toward the bleakness of winter, and as we end our autumn, we begin to notice the beauty hidden within the warm grasp of summer’s embrace.

Today we’re going to talk about how we often overlook things, objects, subjects, and other items that could be of interest to an observant photographer.

Humans, being creatures of habit, routine, and ritual, go through life overlooking things they encounter on a daily basis. We take notice only when something is new or suddenly gone. I’ve done this myself, and wound up losing a few shots. Taking anything for granted leaves us a little less than we could be!

Taking notice though, can make for the opportunity of a photographic lifetime! Everyday, during my drives through our wonderful Hohenfels area, I have driven past an area with some ledges and trees alongside the road. This autumn, some Aspen trees along this way turned the most brilliant yellow and orange-gold. They made the change before the rest of the leaves, and held on for so long! With trucks and buses racing by, bringing with them the icy wind clawing on the leaves, trying to pull them down, they have managed to cling for so long, apparently by sheer force of will! The scene was a bit of a “found object” as Ansel Adams called it, and yet everyday I passed it, seeing but not stopping. Today I took the chance, and standing alongside the road, made a couple shots. The negatives developed up nicely, and have some detail that makes me wonder how I ever passed the scene up. Tomorrow, God willing, I’ll make some digital photos, as the scene is too magnificent to pass up!

We begin to take for granted these scenes, and when they depart, we’re left feeling a loss. Of course, there will be next time, if things hold true. But, the disappointment lasts for some time. When we start to pay attention to the world around us, we start to see shots everywhere, there is no shortage of things to make images of. Take the time to stop and observe what’s changed in your area, make a note if you don’t have your camera, and come back to make the shot. You’ll usually be glad you did, and might even make some great memories in the process.

Well, enough preaching! I hope that everyone will see something new in the old, make the shot, and share it with us on our Hohenfels Volks Faceboook page.

Is there anything you’d like to see here? Do you have a question? Share your thoughts here or at the Hohenfels Volks Facebook page. Of course, commenting on both Facebook and here is always appreciated, too! Don't forget, we're on Google+, too!

Tuesday, November 6, 2012

Creative Metering and Exposure

Greetings and welcome to Hohenfels Volks, THE place for our place! I hope everyone is getting a decent start to the week. The Hohenfels area is beautiful this time of year, as many of you know, and full of go-to places for some great shots.

Today we’re going back a little to some basics. We’re primarily going to look at metering and exposure.

We all know the basics by now, that your meter offers a combination to make the measured area fall at 18% reflectance, or neutral gray. Most of us know that by overriding that proffered setting we can take fuller control and get closer to our vision.

I’ve discussed metering and key stops before, but today we’re going to see how it can be used for maximum impact when combined with our vision.

I’ll be referring to the following photo as an example.

Hohenfels Volks: I UnSubjugated
ISO 125, f/22, 1/2 on Ilford FP4+
I, Un-Subjugated.When we leave the I, or in this case the red, unsubjugated, a wider variety can thrive.

In the above image, both the highlights and shadows were extremely close in values, and were identical with the light shifting as it was. My initial reading was 15 c/f2 for the shadows and 30 for the highlights. The brighter leaves are red and the darker ones are green. Knowing the values were so close, with the red reading about 2/3 to a whole stop brighter, I chose a red filter to bring up the reds and decrease the greens. A red filter allows about 97% of the red light through, while only allowing about 12.5% of the blue and green. It also gives a factor of 8x or 3 stops. Throwing in the aperture decrease, I was shooting with 5 stops less available light for the greens and shadows. By adding 4 stops to their initial reading of 30c/f2, their levels were increased and the red was 2 stops over neutral. In yesterday’s shot, the same leaves and exposures were made, only using a green filter, bringing all the levels more in line with their illuminations.

This is the same shot, and levels as the image I posted yesterday. This will allow you to see how using the tools and techniques at our disposal, we can lead our image and our viewer to the desired result.

When we meter at our key stop, both for highlights and shadows, what we’re learning is the illumination of the subject. The reciprocal of our shutter speed is the amount of illumination, expressed in candles per square foot. By metering off the shadows, mid-tones, and highlights, we have a range of illuminations with which we can work. Those readings will always be the same at any key combination. For instance ISO 100 and f/10 or ISO 400 and f/20. So, we meter 100 foot candles at ISO 400, f/22. At ISO 250, we would set f/16 to get the same results. Now to place that value at somewhat higher value, for instance, we could set our shutter speed to 1/50 instead of 1/100 at f/16 ISO 250, and get a result that is lighter than neutral, by about 1 stop.

Throw in the ability to see our desired results and the steps to get them; an image can be made, not captured. We have several tools to modify the exposure we’ve selected without destroying the original image. With digital photography, shooting RAW gives you complete control. By raising your red tones, and lowering your greens and blues, a red filter can be somewhat approximated, and so on.

By combining exposure, processing, and value controls throughout the photo making session, we can bring our creative expressions to life. The first step to learn is metering and how to use that information. This little tool can be used for a record photo that leaves little to interpretation, and one for the magic of creative photography, as well. You can give voice to your thoughts without uttering a word. Using what you know, and the tools available to you, vision can be brought to life, and given a meaning according to your creativity and visualization.

I hope everyone enjoys the rest of the week and makes an image using their knowledge, tools, and vision to share with all of us! Get out and make it happen, then show us, share what you felt through your images on our Hohenfels Volks Faceboook page.

Is there anything you’d like to see here? Do you have a question? Share your thoughts here or at the Hohenfels Volks Facebook page. Of course, commenting on both Facebook and here is always appreciated, too! Don't forget, we're on Google+, too!

Tuesday, September 11, 2012

Announcement

Greetings and welcome to Hohenfels Volks, THE place for our place! Tuesday evening finds Hohenfels in the grip of a storm, complete with lightning and thunder!

Today’s post is a short contest announcement. Hohenfels Volks is going to have a photo contest. The prizes are all small, with the winners getting a gift certificate to Photohaus Zacharias. I’ll need to work out some details prior to starting, though.

The winners will be selected based on:
1- Technical Execution- Is the exposure correct is the image sharp, etc.
2- Creativity- How creative is your shot.
3- Theme- Sticking to the posted theme.
4- Impact- Can the viewer connect with the image in some way? What message does it seem to convey?

I’ll post the starting and ending dates Thursday, as well as the theme. A couple notes- first, this is not a photo editing contest. Get it as close to right in the camera, and your job is more than half done! Second-you’ll have to come see me to pick up your prizes. Third- your image is your image, you keep the copyrights, although we’ll feature it here. So start thinking about your shots, planning your tools, and visualizing the image you want to make. This is a great time to practice photography, for all of us!

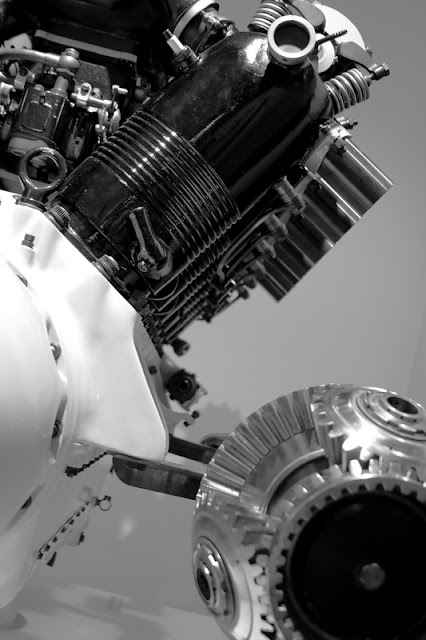
Hohenfels Volks: Rev the Engines
ISO 400, f/3.5, 1/30
An old airplane engine manufactured by BMW, here in Germany. The shapes and lines lead you through the image as you wonder what it is. Sharpness and light work together to creative an interesting draw.

Here’s hoping you enjoy the rest of your week and capture the shots you’ve been wanting. Get out and make it happen, then show us, share what you felt through your images on our Hohenfels Volks Faceboook page.

Is there anything you’d like to see here? Do you have a question? Share your thoughts here or at the Hohenfels Volks Facebook page. Of course, commenting on both Facebook and here is always appreciated, too! Don't forget, we're on Google+, too!

Tuesday, September 4, 2012

Now Departing

Greetings and welcome to Hohenfels Volks, THE place for our place! I hope everyone enjoyed a great weekend and is ready for another one! Here in our Hohenfels area, autumn is rapidly approaching. Soon the trees will be awash in reds, golds, and greens, which creates some great opportunities for photos!

Today we’re going to discuss departing from the literal. As you know, most creative images involve some departure from literal translations of the scene. Often, when shooting black and white, we use filters. In color digital photography, we use CPs and editing software.

To begin our discussion, it’s important to point out a simple fact. That fact is that in order to make any meaningful transition from literal values to a creative placement, you need to know the more technical side of photography. Today’s general discussion assumes you already understand exposure and DOF, as well as the other more technical sides of a good image. On the artistic side of creative departures, we need to understand the relationship between place and fall. This has been discussed before, as has the creative use of DOF to enhance or minimize an area’s impact on the scene.

Hohenfels Volks: The Cleric
ISO 125, f/4, 1/160
By bringing the reds more into play and simulating a red filter, the departure creates something that stands on its own. It also left the tree at a level that exceeded the values of reality, creating a nice chunk of texture.

When we place an area of a scene at a certain value, it needn’t be the literal value. You’re meter will give you the value for 18% gray, but not all things are neutral gray. For instance, clouds should be near white or about 3 stops over the meter. By placing the clouds at 3 stops over meter, or M+3, we have placed them at about their literal values. Everything else in the scene will fall to its prospective values and levels, giving us a literal interpretation.

In this hypothetical situation, we may want some part of the scene to be exposed to a higher value. This can be done, as mentioned, with filters or software. For instance, if we desire the bright green leaves of spring to stand out more, we may expose them to M or even higher. Another way is to use a yellow filter in soft light, if you’re shooting black and white. This can be simulated in software applications through the adjustment of color channels.

A big part of this, as always, is your vision. Visualizing your results, and the steps to make them real, will make your creativity stand out more. It also enables you to make creative departures and still end up with an image that says what you’d like it to. Not every image needs to be literal, many of Ansel Adams and Clyde Butcher’s images are not literal, but they connect to almost everyone who views them. They are often viewed as more realistic than the reality of the scene.

This goes back to creativity, visualization, and knowing your tools. Read the manual for every piece of equipment you own, and the software, too. It’ll prepare you to make the best images possible when you make your vision tangible.

Here’s hoping you enjoy the rest of your week and capture the shots you’ve been wanting. Get out and make it happen, then show us, share what you felt through your images on our Hohenfels Volks Faceboook page.

Is there anything you’d like to see here? Do you have a question? Share your thoughts here or at the Hohenfels Volks Facebook page. Of course, commenting on both Facebook and here is always appreciated, too! Don't forget, we're on Google+, too!

Tuesday, August 28, 2012

The Importance of Being Creative

Greetings and welcome to Hohenfels Volks, THE place for our place! Lovely weather and photographic opportunities abound here in our place.

Today we’re going to put aside our cameras and calculators, and talk about creativity. We’re also going to take a few days break from our cameras while we look for creative ways to work our magic.

I have a slew of quotes on photography and creativity, but I'm only going to use a couple here to emphasize the need for creativity.

“A Ming vase can be well-designed and well-made and is beautiful for that reason alone. I don't think this can be true for photography. Unless there is something a little incomplete and a little strange, it will simply look like a copy of something pretty. We won't take an interest in it.” From the book "Pictures Under Discussion" by John Loengard, one of Life Magazine's most famous photographers.

This quote brings home how essential creativity is in our photography. Ayn Rand viewed photography as a vocation, or craft, because of the lack of a creative process. Many people do not take the time to be creative when making photos. We often find the image we want and make the photo, without putting more than the rudimentary thought into the process.

Hohenfels Volks: Gloria Lux, A Crative Expression
 ISO 160, f/8, 1/20
Gloria Lux, the Glory of Light. A creative expression of the majesty of this common and beautiful Orchid. The exposure placement and element positioning work with the light and lack of color to create an image that's more than "a copy of something pretty."

Ansel Adams referred to photography as “more than a medium for factual communication of ideas. It is a creative art.” If you view any of his photos, you will notice beyond their magnificent scenes, that great effort went into making them. His books on photography begin with chapters on visualization. Before you can visualize your photo, you need to have an idea of what you’re photographing. Begin visualizing all the ways it can be photographed long before you arrive. By the time you get there, you’ll be ready to survey and really visualize the image you desire to make.

I speak of visualization here quite a bit. I’ve discovered that slowing down, seeing the scene, and visualizing the shot, make for a more expressive image. Our photographs are our expressions. They express our thoughts, feelings, and most of all, our vision.

Creativity, and the art of creating, can be inspirations for you in and of themselves. You needn’t have a camera to be creative in your photography. In the words of Minor White, another great photographer, “Often while traveling with a camera we arrive just as the sun slips over the horizon of a moment, too late to expose film, only time enough to expose our hearts.”

Take a couple days without your camera. Go out and drink in the glory around you, expose your heart, and feel the scene surround you. You will come out with a better appreciation of the world around us, of our Hohenfels area, and your own magnificent creativity. The feelings will stay with you and inspire more creativity and expressive images. Reward yourself today with inspiration and creativity by feeling the scenes and sights around you. Enjoy the world and life, and share the results with us on our Faceboook page.

Is there anything you’d like to see here? Do you have a question? Share your thoughts here or at the Hohenfels Volks Facebook page. Of course, commenting on both Facebook and here is always appreciated, too! Don't forget, we're on Google+, too!

Tuesday, August 14, 2012

Your Vision...

Greetings, volks. Welcome to Hohenfels Volks, THE place for our place! I hope this hump-day brings All of Hohenfels into the downside of a great week.

Today’s a quick post on creating an image from an artistic approach.

As we often mention here at Hohenfels Volks, the first part of creating an image is to visualize the final image. During this process, we’re trying to see in our mid and in our heart the image we want to present. Don’t close your eyes and see the scene how it is, see it how you want to show it.

Once you know what you’re trying to show, you can work on visualizing the steps to create that image. One of the things often overlooked is an inventory of the tools you have and how to use them. Perhaps you have Photoshop and want that area of lower color to be more saturated, how do you do it? Photoshop has some great tools to make that happen, including the vibrancy tool, which helps bring out color in under saturated areas without increasing overall saturation. The tools you can use are more than your camera; you can use a flash to highlight part of a scene, bringing the levels to your vision, or add an ND filter to allow longer exposures to make the water more flowing. Know your tools and how to use them. That will get you a long way to creating a wonderful scene.

Another thing to visualize, or know, is how you wish to present your image. Will you make it large? Will it be printed or on a monitor? Knowing these things will improve your images. Should you decide to print it, you may want to make a photo that slightly lighter, and take another for monitor display. What size will you print? The larger the print you desire, the more information you will need to capture. You will also need to have a more accurate focus. This generally means a larger file size. Although, making it a point to always shoot RAW will make you’re your files consistent in size.

Remember to think about how the colors and levels present can affect the viewer. Are they happy or moody? Is there any color? By harmonizing your tones and color, you create an image that impacts far more than a shot made without consideration.

Once you’re ready to make your shot, go for it. Remember though, it won’t look like you visualized without some cleaning up and editing. This isn’t always true, but best kept in mind. When you look on the tiny monitor in your camera, it’s not edited or presented according to your vision. Don’t be disappointed, remember, you planned your shot. Stick to the plan and you’ll get some amazing photos.

The technical side of photography is incredibly important. We need to learn aperture, shutter speed, sensor (or film) speed, and how they work together. However, they are only 1 part of the process. Without vision, creativity, and some thought you’re making snapshots. The see and snaps out there are abundant, but with these things on your side, your images will rock those who view them.

Hohenfels Volks: Vittorio Emanuele II Memorial, Rome
ISO 1600, f/5, 1/30 70mm Canon EOS 7D
Vittorio Emanuele II Memorial in Rome. I wanted to capture this 2 ways, this way in black and white, and again in full color. Knowing the tools I use, including Canon's DPP, allowed me to capture a shot that could be both. In the color version, you can sense the evening in the shot, as the sky behind is dark, and the lights behind the column add beautiful color and depth. By visualizing the shot and taking a little extra time, I got the one I wanted.

Take care, enjoy the downside of your week, and get the shot you’ve been thinking about all day! You’ll feel incredibly accomplished with the shot in your camera. Just think, it’s almost autumn, and that means Hohenfels and our places will be bursting with awesome colors soon! Time to start your visualization!

Please feel free to share your photos on our Faceboook page. Everyone here would love the chance to see your work! Is there anything you’d like to see here? Do you have a question? Share your thoughts here or at the Hohenfels Volks Facebook page. Of course, commenting on both Facebook and here is always appreciated, too! Don't forget, we're on Google+, too!

Tuesday, July 31, 2012

Metering for Effect

Greetings, volks. Welcome to Hohenfels Volks, THE place for our place! I hope everyone managed to break away from the Olympics this weekend and get some great shots of our Hohenfels area.

Some beautiful cloudscapes this weekend started me thinking about how we meter and where we place our exposures. Of course, this led to a short post today about shooting bright scenes, or scenes with a large amount of brighter objects.

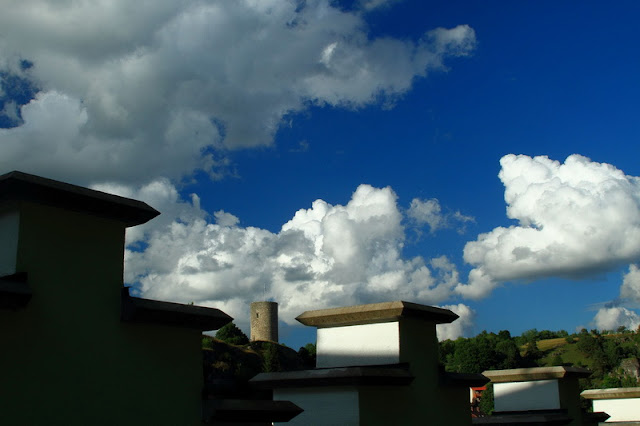
Hohenfels Volks: Castle in the Clouds
This shot was metered for the bottom of the clouds on the left. This left the bright clouds on the right a little overexposed. The values were brought down using the luminance curves in Canon's Digital Photo Pro to match my visualizing. By composing with the crenelations creating a stairstep effect and framing the castle tower, a brighter image could be created. It also brings the eye back to the tower and clouds, adding interest and depth.

The first thing we should be thinking about is our visualization. Where do we want to place our elements? For instance, if your scene contains fields, nice blue skies, and big fluffy clouds, perhaps metering for the fields will turn the sky white, and metering for the clouds will turn the fields black. Knowing where we want our elements in the range of values is the first step in putting our visualization to work.

After we’ve visually composed our image and noted the areas where significant detail must be maintained, we begin to meter. It’s generally best to make several readings from the different values within the scene, as this lets us know our range. In the above mentioned scene with the fields and clouds, we determine the sky itself to be the middle range. If we give this a +1 exposure, the sky is properly exposed, the fields are likely to be also, but the clouds will usually be overexposed. We can try to fix it on the computer, which is often difficult when the highlights are too far gone, or we can expose the clouds for +1 to +2 stops over their meter reading. This will darken the sky to a nice rich blue, and generally provide some slight underexposure in the field. The lowering of values throughout the scene also increases your overall saturation. It also gives you greater control over the chiaroscuro and play of light in your work.

Of course, none of this is useful to you if you don’t know what you want from your shot. Trying to capture the feeling you wish to share may require something else. Having this general idea, though, gives you another tool in the quest for the perfect shot.

Please feel free to share your photos on our Faceboook page. Everyone here would love the chance to see your work! Is there anything you’d like to see here? Do you have a question? Share your thoughts here or at the Hohenfels Volks Facebook page. Of course, commenting on both Facebook and here is always appreciated, too! Don't forget, we're on Google+, too!
Thursday, July 12, 2012

Continuing Yesterday

Greetings, volks. Welcome to Hohenfels Volks, THE place for our place! Another rainy day and pleasant evening pass through Hohenfels.

I had planned a post about converting color to black and white today, but didn’t get it done. Instead, we’re going to put up a couple more pointers on bringing your vision to life.

The first tip comes from a Facebook post by Clyde Butcher. Clyde is one of the greats. His photos of the Everglades and Florida in general, are incredible. Clyde’s working hard to preserve the Everglades. His tip of the day is to move forward a few feet when you’re shooting wide-angle lenses. This will bring your composition into your visualized range and remove some of the stray elements from the scene. This can be done through cropping, as mentioned in my edit on yesterday’s post, but combining the 2 can make your shots that much easier to edit. Take it from Clyde, he’s waist deep or higher in swamp water and shooting an 8x10 inch Deardorf view camera or an 12x20 Wisner. Check out his homepage, you’ll be amazed.

Our second tip comes from Strobist. The tips is simple, make an idea list. Taking it one step further, make a short term or single trip list, and make a long-term list. I won’t go into a lot of detail here, click the link and read the article. This site has some great stuff!

Our last tip comes from Photofocus. Try to look beyond the obvious. See what you don’t see right away. Try taking in the scene, closing your eyes, and visualizing the scene. You’ll notice more this way and may find your new subject. Again, I’m paraphrasing. Check out Scott’s page, you’ll be glad you did!

Well, that it for this evening. I hope to have the promised conversion post up Monday! I hope everyone has a great Friday, and an even better weekend! Enjoy and get your dream shot. Make sure to share it with us, too!

Do you have an image to share? We’d love to see it! Is there anything you’d like to see here? Do you have a question? Share your thoughts here or at the Hohenfels Volks Facebook page. Of course, commenting on both Facebook and here is always appreciated, too! Don't forget, we're on Google+, too!

Wednesday, July 11, 2012

Creative Exercising

Greetings, volks. Welcome to Hohenfels Volks, THE place for our place! Today, starting out gray and rainy, leaves Hohenfels in the clutches of a very pleasant evening!

Running into one of our friends in the grocery yesterday, I was asked about some exercises for creativity, and photographing some beautiful scenery. I thought a great subject for a post was seeded in that great question, so today, we’ll outline a couple simple ways to get the shot that has others wondering how you did it.

We’ve been posting about exercises to improve your composition, exposure, and creativity, so this is more of a review. It also reinforces how simple photographic techniques can create some winning shots.

The first thing to mention is never take the first shot. Most folks will see something, maybe a statue or other landmark, and take the easy shot. If you have to, take it just to get it out of your system, but then look for some other way to create your unique image. Walk around, check it out from every available and possible angle, view it through your lens, and try moving through a range of focal lengths. Once you’ve settled on the shot, make your image a reality. Remember, part of the creative shooting process is visualization! Edit- Take the first shot, if you pass it up, you may never get the same feeling you had at first. Thanks to Bodensee Bob for that cool tip!

Another simple exercise is to either shoot a prime lens, or use only 1 focal length on a zoom. Remember, doing this forces you to look for other ways to get the shot. You may have to move in closer to tighten up the scene, or move away to add some context. It’s a great way to change how you view the world around you!

The last 2 things are color and scale. First, on color, see how you can use it to create mood. Use your color to balance the mood and feeling, remember complimentary colors? Perhaps shooting a scene with a large red subject, shoot the subject at about 1/3 the frame and use green to fill out the other 2/3. You’ve given importance to the subject through size, and emphasized it by making the color stand out. This is also nice if you use 3 colors in a split complimentary scheme.

Using size and scale to emphasize a subject or restrain non-subject elements is a proven method of increasing interest in an image. It not only adds context, but also can be used creatively. Everyone shoots the trick photos of someone holding up the Leaning Tower, or holding someone in their hand. Moving beyond that, the ability to trick the eyes through scale can make for magic images. Using our first tip combined with this to make an image of a local landmark will stand out. Make the scale of the subject the subject. Instead of taking the Eiffel Tower, take a piece of it, and use the size as part of a composition to reference the actual tower. The same can be done with buildings, statues, and just about anything. Your photo will stand out as more than just another shot of the local scenery. Edit- Another tip from Bodensee Bob is to take the shot of the bigger piece and crop to your liking during editing. Great tip, thanks for sharing!

Hohenfels Volks:Amber Waves of Grain
ISO 125, f/8, 1/125, 56mm, 125 C/ft2 metered at the wheat.
A field of grain in Hohenfels. Using f/8 and 56mm gave me a reasonably shallow DOF, allowing the hills to blur out, and only the foreground section to remain in focus. This combined with the color of the wheat against the color of the sky brings out the wheat as the subject. By shooting from below, I was able to fill the majority of the image with the front wheat, and allude to the size of the field with the shallow DOF. Taking a higher angle allowed more of the field to be seen, yet seemed to lack scale and impact in the final image.

Of course, your best tool for creative and magic images is your mind. A really great photo can convey your reaction and feelings to the scene. It doesn’t have to be a literal rendering; the values you decide to place in each area of exposure are part of your creative process. Making the clouds a little darker than reality or the trees a little brighter is part of spreading your reaction.

I hope this post has helped get your creative regions revving. I can’t wait to see you’re your shots. Tomorrow’s post will hopefully be ready tomorrow. I’m hoping to show a method for converting color images to monochrome in a way that recalls the images of the past. Be sure to check it out.

Do you have an image to share? We’d love to see it! Is there anything you’d like to see here? Do you have a question? Share your thoughts here or at the Hohenfels Volks Facebook page. Of course, commenting on both Facebook and here is always appreciated, too! Don't forget, we're on Google+, too!

Wednesday, June 27, 2012

Projecting Your Vision

Greetings, volks. Welcome to Hohenfels Volks, THE place for our place! Lovely weather, beautiful skies, and an abundance of time give rise for photo opportunities and exercises here.

We’re blessed in the Hohenfels area with such a variety of things to cater to all our interests, at least photographically. Many volks find the castles and historic locations to be the ticket for them, others love the country scenes, and still other volks love seeing the cities. We’re located where you can find something to interest you and fuel your creative fire.

Today we’re going to try to throw some fuel on your fire by revisiting the subject of projects. As we discussed in a previous post, projects can get you thinking and lead to some creative ideas and photos. We’re going to do a short post about getting a project going as an exercise this week.

The first step to completing your project is getting together some ideas thinking through an outline. It’s important to have a theme, something that will tie each image to the other images, and to the project as a whole. Some ideas for projects in the Hohenfels area are shooting only trees, shooting playgrounds, a series of stream shots, or even the local Rathauses. Once you have a general theme, narrow it down some. For instance, if you choose to shoot trees, limit yourself to small trees or something to narrow your scope to less than just “trees.”

Decide on what tools you want to use. Decide on what items you’ll be using in your photography, and put together a kit to bring along. Make sure you have the right tool for the job! If you decide to shoot bugs for instance, don’t use a 24mm wide-angle lens, unless your theme is little specks of bugs in a big scene. Planning now can save you some missed shots later.

Also, think of some limitations on your tools. Perhaps shooting without a flash or using only a prime lens. By adding some creative limitations, you boost your creativity by working with what you have. A very important limitation is limiting the edits you can perform in software. Limit yourself to adjusting levels, curves, brightness, contrast, and saturation. Include these limitations in your visualization, or you may be disappointed with your results. Most photo contests you’re likely to enter limit editing to those listed above. For the purposes of this article, we’re going to use those limitations to help us get the most of the tools we have.

Once all the above have been decided, it’s time to make of list of places where we can the shots to work our project. Know where you’re going, research the places and lighting. You should visit a couple times at different times of day. Know the lighting and knowing how we make the most of it gives you the ability to make your image inspire others.

With everything in place, it’s time to get out and start shooting. Add some variety within your theme by shooting black and white, shooting some color, and low light shots. Keeping to your theme will bring everything together.

Projects can be created for the weekend, for vacation, or even for special days and times. One of my friends, Jen, recently did a series of lighthouses. Her shots were great, and although they have edits like vignettes applied, show how beautiful the structures, and more importantly the locations, are. These things are a marvel for anyone who’s ever seen one, and Jen crafted some wonderful images that fit that to a t! Check out her blog, Jennifer O on our links page, you’ll definitely enjoy her work!

I’ll leave you with a couple shots from one of my on-going projects, featuring crosses and small chapels in our Hohenfels Area.

Hohenfels Volks:Crosses and Crenelations
EI80, f/8, 1/60 Developed N-20% to control tonal range and contrast.
Crosses and Crenelations. Shot on film, exposed to bring the range near bright white on the walls and crenelations of the wall and developed to bring that back to a tone that holds detail. Even though that area is pushing white, the tonal range and detail are available.

Hohenfels Volks:Crosses and Crenelations 2
ISO 125, f/8, 1/30
Castle and Cross. By shooting the sky at about m+1/3, then decreasing exposure by about 1/2 stop and applying an inverted s-curve to the image, the clouds, cross, and castle all add an element to the image, and create a decent balance.

I hope this inspires everyone to undertake a project of their own. A project can take on a life of its own, and can add some inspiration to your time behind the camera. It doesn't have to take all your photo time, but you may end up giving it a more than fair amount! Take care and enjoy the rest of the week!

Is there anything you’d like to see here? Do you have a question? Let us know what project you're working on! Share your thoughts here or at the Hohenfels Volks Facebook page. Of course, commenting on both Facebook and here is always appreciated, too! Don't forget, we're on Google+, too!
Monday, June 18, 2012

Tips, Tricks, and Exercises

Greetings, volks. Welcome to Hohenfels Volks, THE place for our place! Here in Hohenfels, the weekend lived up to its promise. The weather and atmosphere made for some great shots. I hope everyone made a couple new favorites for their portfolios.

Today is a short post featuring a couple tips.

Tip 1- Try to get out right after the rain. Colors sing because the scene before you is fresh washed and saturations are usually pushed up. The air usually loses some of the haze seen along the horizon, and even over greater distances. Having a clean scene and air make the image look more as you envisioned it. Not to mention the receding storm leaves some awesome cloud formations to add interest to almost any image.

Tip 2- When shooting early in the morning or around sunset, remember the blue hour. You can see some beautiful additions to your image when lit with a softer, bluer light. Think architecture at twilight and you’ll know what I mean.

Tip 3- Move around. Take the shot that you thought was the winner, and then move around for a different view. Try to change perspective and use some DOF effects in different positions. Set up and take the shot you came to get, but make sure you explore the area and the light. You may find the lighting from slightly below and to the left of the subject creates a feeling unlike your first shot. Don’t limit yourself to the shot everyone takes; unleash yourself on the shot you want to make!

This week’s exercise is to shoot one location, one subject. Make multiple images of the same subject from different angles, distances, and with different lighting. Give yourself bonus points if you do it in the early evening, morning, or after the rain. Top off those points by combining all 3 tips into a small series of shots!

Here’s hoping you have a great week and capture a treasure worth sharing!

Is there anything you’d like to see here? Do you have a question? Share your thoughts here or at the Hohenfels Volks Facebook page. Of course, commenting on both Facebook and here is always appreciated, too! Don't forget, we're on Google+, too!

Monday, May 28, 2012

Better Late...

Greetings, volks. Welcome to Hohenfels Volks, THE place for our place! Greetings, volks, from Hohenfels. Another weekend passes into the ether of memory, preserved with our cameras and vision.

I hope you’ve had a chance to explore the new layout. By adding our links to another page, we’re able to expand them without limit and improve on the resources we can present. I’m currently working on an advanced section, covering metering, lighting, and other things beyond the basics.

This past weekend provided some excellent opportunities to make some photos and spend some time relaxing. I trust everyone made their shots and got their chill on, as it were.

Here’s what I’m looking at from for future posts. Beginners and Basics, Advanced Concepts and Techniques, Q and A, Composition, both elements and advanced, Reviews, and of course, continuing with our ride along shots and other items. I’d love to hear from everyone out there, if you have a suggestion, idea, or question, let us know through our Facebook link.

I’m going to close this post today with the following photo, made Saturday in Munich. Ride along with me, as we explore the shot as laid out.

Hohenfels Volks: OlympiaZentrum
Olympiazentrum in Munich.

As you can see, this was taken at Olympia Zentrum, the compound built for the 1972 Munich Olympics. Given the amount of visitors that flow through Munich on any given day, not to mention annually, the difficulty is composing your image. The difficulty arises when one realizes that just about every conceivable way of showing the park and Zentrum has most likely been shot. Add the featureless sky, and you’re destined for disappointment.

Walking around the lake and park presented some wonderful shots, some of which I took. The problem was in trying to make an image that was different from all the cookie cutter see and shoot snapshots you see everywhere. We all see the same shots and most of take them. Without ever moving around or seeing with a slightly different point of view, we cut our cookie with our neighbor’s dime store mold.

Stopping to view the flowers and see if I could work them into a shot, I was presented with this view. I knew this shot would give my cookie a life of its own, I metered the flowers at about 500 c/ft2, or about 1 ½ stops brighter than the sky. Setting my camera to f/11 at 1/60 gave me about M+3 on the flowers and M+2ish on the sky. It also allowed the trees and building detail to come through and hold their values quite well. I edited the shot for N-1, giving a nice separation to the sky and flower values, while allowing the trees to retain a large amount of color. Shooting slower allowed some nice DOF softening at the building and trees, without detracting from their form or impact.

This image gives me, what I feel is a departure from the everyday scenes of the place, without removing the ability to tell where it was taken, and at the same time departs slightly from a literal rendering of the scene by placing the values where I visualized them. Visualizing is an important part of any image-creating endeavor, and must be practiced. This little exercise allowed me to improve my skills while on a family outing.

This week's exercise is to visualize a shot of something mundane; creating a scene that you can take ownership of with pride. See the scene as you want to show it, think through the steps to make it a reality, and then make the shot. Practice this, shoot for your vision, and exercise your creativity, you’ll love what starts happening. You’ll love your creations that stand apart from every other shot of the same thing.

I’m looking forward to seeing your results and hearing from you. Get the comments, thoughts, and questions coming. Let me know what you think and how you’re using your camera! Share your thoughts here or at the Hohenfels Volks Facebook page. Of course, commenting on both Facebook and here is always appreciated, too! Don't forget, we're on Google+, too!