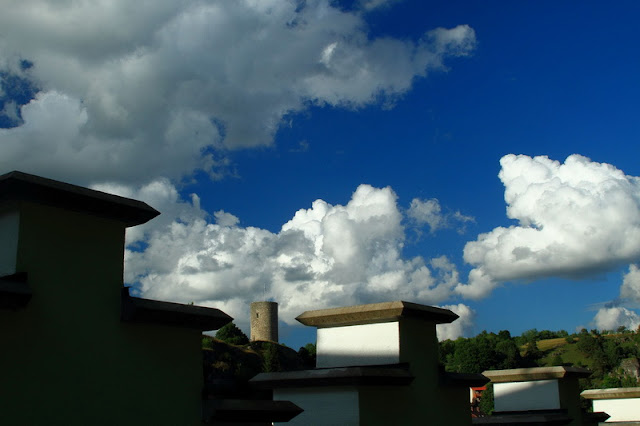
Some beautiful cloudscapes this weekend started me thinking about how we meter and where we place our exposures. Of course, this led to a short post today about shooting bright scenes, or scenes with a large amount of brighter objects.

This shot was metered for the bottom of the clouds on the left. This left the bright clouds on the right a little overexposed. The values were brought down using the luminance curves in Canon's Digital Photo Pro to match my visualizing. By composing with the crenelations creating a stairstep effect and framing the castle tower, a brighter image could be created. It also brings the eye back to the tower and clouds, adding interest and depth.
The first thing we should be thinking about is our visualization. Where do we want to place our elements? For instance, if your scene contains fields, nice blue skies, and big fluffy clouds, perhaps metering for the fields will turn the sky white, and metering for the clouds will turn the fields black. Knowing where we want our elements in the range of values is the first step in putting our visualization to work.
After we’ve visually composed our image and noted the areas where significant detail must be maintained, we begin to meter. It’s generally best to make several readings from the different values within the scene, as this lets us know our range. In the above mentioned scene with the fields and clouds, we determine the sky itself to be the middle range. If we give this a +1 exposure, the sky is properly exposed, the fields are likely to be also, but the clouds will usually be overexposed. We can try to fix it on the computer, which is often difficult when the highlights are too far gone, or we can expose the clouds for +1 to +2 stops over their meter reading. This will darken the sky to a nice rich blue, and generally provide some slight underexposure in the field. The lowering of values throughout the scene also increases your overall saturation. It also gives you greater control over the chiaroscuro and play of light in your work.
Of course, none of this is useful to you if you don’t know what you want from your shot. Trying to capture the feeling you wish to share may require something else. Having this general idea, though, gives you another tool in the quest for the perfect shot.
Please feel free to share your photos on our Faceboook page. Everyone here would love the chance to see your work! Is there anything you’d like to see here? Do you have a question? Share your thoughts here or at the Hohenfels Volks Facebook page. Of course, commenting on both Facebook and here is always appreciated, too! Don't forget, we're on Google+, too!

No comments:
Post a Comment