Showing posts with label controls. Show all posts

Sunday, September 29, 2013

Master or Mastered?

Greetings and welcome to Hohenfels Volks, THE place for our place!

The fact is that relatively few photographers ever master their medium. Instead, they allow the medium to master them...
Edward Weston

I posted that quote Saturday. I often get asked by volks about new gear or which camera is better. There are all kinds of questions about this or that pertaining to tricks to make them better photographers.

The quote goes on to say “… and go on an endless squirrel cage chase from new lens to new paper to new developer to new gadget, never staying with one piece of equipment long enough to learn its full capacities, becoming lost in a maze of technical information that is of little or no use since they don't know what to do with it”

It’s sad to say, but many of today’s beginners, and even those who’ve been around long enough to know better, are always searching for the better or the new. As you can see from the quote, this isn’t a new phenomenon, but has been a constant source of frustration since the early days of photography.

As often as that question is asked, there are answers ranging from try this lens or that camera. People will tell you a larger sensor is better, others that a smaller one is better. Someone will say not to use your on-camera flash and others will say that’s all they use.

The BIG, HUGE, AWESOME secret is simpler than the advices and opinions you’ll receive. But first, a photo…

Hohenfels Volks: Victory at Samothrace
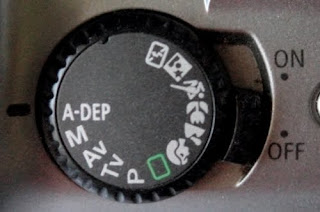
ISO 100, f/4.5, 1/60
Winged Nike, Victory at Samothrace, at the Louvre in Paris. This statue on marble was made to celebrate a Hellenistic victory at sea. The lines and flowing drapery of her gown are suggestive of a strong sea wind. This statue is considered an example of the Greek ideal beauty. It shows a sense of triumph, even with the missing head and limbs. By knowing your gear, you, too, can experience triumph and mastery of photography!

Here is the big secret- pick one thing and learn it until it becomes automatic. Master your kit lens and camera, and then add a lens. After you’ve mastered that one, add a flash and master single source off camera lighting. Each step building upon the previous, and each step building out your kit, will allow you to gain a mastery that will surpass even the best of the “secret chasers,” those who always go on Weston’s “squirrel chases.”

One method, and probably the best, is to read your camera’s manual. Study it and get to know it. Make up a little sheet that outlines the features you need or wish to use and keep it with your camera. Get with others who own the same camera and discuss the camera. Discussing with others, even if they don’t own the same gear, can lead to a better understanding of the basic elements and can go a long way toward reaching your mastery. Then, start in on your lens. Start using the different modes, color balances, and features of your particular gear. Make photos that combine your vision and the challenge of learning your gear. I’ve seen photographers capable of changing their shutter speed, aperture, sensor speed, and focus, all while looking through the viewfinder. They knew their gear, the settings, and the procedures to get the camera to do what they wanted.

After that, you can begin to pick up more gear and learning it. The process is endless, so is the growth and improvement. It’s really a simple series of 4 steps- acquire the gear, learn the gear, practice the gear, master the gear, and repeat. It’s a loop that never ends, at least while resources or initiative are available. That’s the path for most forms of growth, whether it’s gear you acquire or knowledge. Growth shouldn’t end after 1 cycle through, but should be ongoing, that’s how entire civilizations are built and shaped!

Get out and get making your photos! We’d love for you to share them with us on our Hohenfels Volks Facebook page. We’d love to see your work. You can also send us an e-mail, if you prefer. Our e-mail address is HohenfelsVolks(at)tks-net.com and we'd love to hear from you!

Is there anything you’d like to see here? Do you have a question? Share your thoughts here or at the Hohenfels Volks Facebook page. Of course, commenting on both Facebook and here is always appreciated, too! Don't forget, we're on Google+, too!

Thursday, January 17, 2013

Cheat...

Greetings and welcome to Hohenfels Volks, THE place for our place! Wow, a long has passed since our last post! Hohenfels has been in the grip of a dark and dreary winter. The warmth of the holidays and time with loved ones speeds the passing of winter, although not nearly enough.

Today we’re going to discuss the possibilities of making a quick cheat sheet for our camera bag.

Our cheat sheet won’t have everything to make us better photographers, that’s the job of the individual, but it will make a handy reference for quick calculations in the field. We’re just sharing some common knowledge and quick facts to tuck away for when you’re out shooting.

The first thing to remember is the “Sunny 16” rule. This simply states that in full sunlight, on a clear bright day, with an average brightness, set your aperture to f/16, and your shutter speed to 1/film speed. You’ll almost nail most of the time. For instance, at ISO 100, shooting at f/16, you should be shooting at 1/100 second.

This can be extrapolated to the following combinations, based on lighting:
f/11 at 1/ISO for hazy sunlight with soft shadows,
f/8 at 1/ISO for cloudy bright conditions, without shadows and an obscure sun, and
f/5.6 at 1/ISO for dull and cloudy, dark skies and no sun.

These values pertain to daytime shooting only, and will get you in the right place for most situations. If you’re shooting in open shade, open your aperture 2-4 stops, depending on your subject brightness. This may mean shooting at slower speeds, so keep that in mind.

Another useful bit for you deals with motion. First, subjects at a distance will allow slower speeds. Second, direction of motion and speed of motion are important factors in shutter speed, as well. A subject moving directly toward or away from the camera allows a slower shutter speed. With a direction of motion at 45 degrees to the camera, you will usually shoot at double the head on speed, and at 90 degrees direction, at 4 times quicker.

For subjects moving directly toward or away, shutter speeds of up 1/25 allow for good images, at speeds of 5-10 MPH and distances at 100 feet or more. The same subject at 25 feet, doing 60 MPH at 25 feet requires 1/400 or faster. At 90 degrees, 100 feet, doing 5 MPH requires 1/400 shutter. Keep these in mind when out shooting action or motion, and you can generally get better shots.

Of course, the above information is in no way complete, or 100% accurate, but it does provide some general guidelines. Keep these couple tidbits in mind, and you can dial in your exposure manually and get the levels, and therefore, the image, you desire. Little bits of knowledge add up, and when put together, can make you one of the photographers who can make your shots match your vision.

I hope that everyone will try to out together their own cheat sheet, make the shot, and share it with us on our Hohenfels Volks Faceboook page.

Is there anything you’d like to see here? Do you have a question? Share your thoughts here or at the Hohenfels Volks Facebook page. Of course, commenting on both Facebook and here is always appreciated, too! Don't forget, we're on Google+, too!

Thursday, December 6, 2012

10,000 Revisited

Greetings, volks. Welcome to Hohenfels Volks, THE place for our place! Everywhere you look, you’ll see white! Winter is here for the long haul, and that means it’s time to get some seasonal shots. I hope everyone is getting geared up for Christmas and some great photography.

Earlier today, we had blue skies and some nice clouds, perfect for the landscape shooter in all of us. Of course, things turned ugly quick, and left us in the midst of a dark and icy wall of snow. As often happens, the sun managed to beat back the snow and again we were ready for making some great shots.

Enough weather, that’s not what we’re here for, right? Today we’re going to talk about pride and accomplishment. It’s also a chance for an exercise in good old-fashioned photography. Even though we’re using our digital cameras, and often forget the importance of each shot we make, we can return to the old ways. Remember, as Henri Cartier-Bresson said, “You’re first ten thousand shots are your worst.” In a much older post, we addressed this and modified it to be about 100,000 to 1,000,000 shots. This is due to the inherent nature of instantaneous feedback and automatic cameras.

In the earliest days of photography, folks used glass plates for their negatives. Then film came along. In those early days, your film, or plate, was only sensitive to blue light. This made balancing your light and color very important. With the advent of thinner films and panchromatic emulsions, more sensitivity was added. Then, of course, came color film. When you shot either a sheet or roll, you couldn’t change your ISO or color balance. Film and digital sensors can be thought of as the same thing, and for the rest of this article will be used interchangeably.

Film costs money. It cost money in the old days, as well. When a photographer made shots, he weighed the value of the film and the shot. Every photograph was precious, and had to be made with care. Exposure, color balance, even composition had to be weighed and given some measure of value in relation to the photo. Photography took time, to both master, and in terms of the individual image created. Light meters for measuring exposure, going back to the 1800’s, are available on auction sites all over the internet. Focusing aids, powder flashes, apertures, and even shutters were part of the photographer’s knowledge. In many of the older lenses, the aperture was adjusted using an insert placed in the lens at the time of the photo.

Now that we see how valuable the image was, and the knowledge to make an image, we can see how those early photos, and those that have come down to us through the years, were not the product of guesswork or automation.

For the next few days, try doing an exercise in film. Choose one ISO for your camera, choose one color balance, and only limit yourself to 36 shots per session. Remember, getting your color balance and ISO right will require thought and planning. It will also require learning about your intended shooting situation. If you’re shooting outside, shoot in daylight or around 5200K, and inside shoot at tungsten or around 3200K. If you’re shooting in bright conditions, choose ISO 100, in the dark ISO 800. Finish your 36 shots before changing your settings. Also, don’t look at your images on the camera monitor, or delete any shot. Wait until you get home to see what you have. This will encourage you to value your images, while also helping you improve.

Hohenfels Volks: Dresden Christmas
EI 500, f/5.6, 1/60, 56mm
I couldn't resist this shot, the mix of shapes, textures, and tones are intriguing! Shooting manual all day, let me have control of the camera, instead of the camera controlling me. It also allowed me to use my knowledge to get what I wanted.

This little exercise will require you to know your camera settings, it will require the knowledge to get the shot right, and it will allow for a sense of visualization to settle in. Visualizing your image is an incredibly useful tool in photography. This is a great time to undertake this exercise, as our changing weather conditions, and lighting, will challenge even the best without proving impossible with a little effort. As an added bonus, it’ll make every shoot an adventure, and every moment until the photos are loaded like Christmas. It’s a fun way to experience the anticipation of Christmas with a gift in every session! It’ll also make shorter work of getting the best shots, since you’ll be improving with each photo made. You’ll also develop your confidence, which always helps! Remember, a great camera doesn’t make a great photographer, any more than a great kitchen makes a great cook.

Please feel free to share your photos on our Facebook page. Everyone here would love the chance to see your work! Is there anything you’d like to see here? Do you have a question or an idea? Share your thoughts here or at the Hohenfels Volks Facebook page. Of course, commenting on both Facebook and here is always appreciated, too! Don't forget, we're on Google+, too!

Tuesday, December 4, 2012

Large

Greetings, volks. Welcome to Hohenfels Volks, THE place for our place! Old Man Winter is settling in for his long stay here in Hohenfels! I hope everyone is settling into their anticipation and excitement for the long nights and brilliant moments ahead.

It’s certainly been some time since my last post! I’ve been quite busy as usual. Branching out into large format photography has filled me with new ideas and visions. I hope to make some of the winter shots I’ve been visualizing and preparing for. Large format gives you a way of relating to the scene and subject that it’s hard to imagine without seeing it. This leads us to today’s basic topic, shooting tethered.

One distinct advantage of the digital age is the ability to hook up to a computer and see our images presented quite large. When we load our photos onto our PCs, it gives a way to see detail an ordinary 4x6 print denies us. It also gives us a tool to learn far more rapidly, by allowing us to honestly assess our images in all their glory, and with all their flaws.

But, as many folks don’t know, it also gives us a way to see those flaws prior to making our shot. It allows us to compose our scenes at a scale which invites a more involved relationship with the image. It allows us to troubleshoot our images prior to recording them, and to resolve any images that may prevent the full realization of our vision.

Previously, this has been the domain of those with large format cameras, like the 8x10 field camera or a 4x5 view camera. The composition was done on a negative sized piece of ground glass, with the image upside down and inverted. This naturally led to a slower pace and more contemplative image creation process. Combined with film costs, equipment costs, and time costs, large format photography was largely practiced by those making money from it. With the proliferation of digital cameras and the advent of sites like E-bay, large format become reasonably priced to anyone with the desire and motivation to learn the ins and outs. The format can be daunting and challenging, sometimes extremely so, but it can also be rewarding.

Now that we have DSLRs capable of producing extremely high quality images, and the capabilities of our computers, we can all practice Large Format.

Now that the background is behind us, the steps and equipment are quite simple. You most likely have the equipment you need, as it probably came with your camera. This would include a USB cable to connect to your computer, and the capture software that allows for control of your camera. If your camera didn’t come with the capture software, your manufacturer may have it at their website. If not, there are commercial options available that run from free to higher priced options. You’ll want a tripod and maybe a platform for your PC if you want to use a laptop from other that your desk. That’s it. Just start the software, and for Canon’s, select Remote Live View.

Once you’re connected, you can control everything. You can focus in the autofocus mode using the software, or in manual mode. Both ways give you a giant magnification and full control of your focus. You can control white balance and display your camera’s metering, which will allow you to control your exposure and place your values below, at, or above, neutral gray. It allows for full functionality of the camera, and can even capture directly to your hard drive. The beauty is in a few Windows hot key shortcuts, you can zoom in the live preview, making your preview as large as your monitor. How’s that for large format? Focus, DOF preview, and exposure controls as if shooting directly form the camera, and viewing from the computer, it can’t be beat. You’ll know if you have a keeper even before making the shot.

This has been around some time, just search for tethered shooting, but the first thing to learn is exposure, white balance, and how to use your camera. Once you know these things, you can move on, in ways I can’t even begin to touch upon here! Using tethered shooting will give you an appreciation for all the detail in the scene and lead to a new found way of looking at the smaller parts of a scene to see the big picture. It also saves the frustration of having to sort through the good and the bad. You’ll find yourself making fewer bad images when you shoot tethered.

It has its drawbacks. Who wants to carry a tripod, computer, and cables everywhere? Who feels like lugging extra stuff to make the picture? There are trade-offs in it, but you’ll find if you’re shooting something for your own vision, or if your doing something where there is time to set up and work that way, tethered may be your new default!

I hope this gives you some new ideas. Getting out there and shooting , tethered or un-tethered, will give you the winning shot this winter, so get started making your images now!

Please feel free to share your photos on our Faceboook page. Everyone here would love the chance to see your work! Is there anything you’d like to see here? Do you have a question? Share your thoughts here or at the Hohenfels Volks Facebook page. Of course, commenting on both Facebook and here is always appreciated, too! Don't forget, we're on Google+, too!

Tuesday, November 6, 2012

Creative Metering and Exposure

Greetings and welcome to Hohenfels Volks, THE place for our place! I hope everyone is getting a decent start to the week. The Hohenfels area is beautiful this time of year, as many of you know, and full of go-to places for some great shots.

Today we’re going back a little to some basics. We’re primarily going to look at metering and exposure.

We all know the basics by now, that your meter offers a combination to make the measured area fall at 18% reflectance, or neutral gray. Most of us know that by overriding that proffered setting we can take fuller control and get closer to our vision.

I’ve discussed metering and key stops before, but today we’re going to see how it can be used for maximum impact when combined with our vision.

I’ll be referring to the following photo as an example.

Hohenfels Volks: I UnSubjugated
ISO 125, f/22, 1/2 on Ilford FP4+
I, Un-Subjugated.When we leave the I, or in this case the red, unsubjugated, a wider variety can thrive.

In the above image, both the highlights and shadows were extremely close in values, and were identical with the light shifting as it was. My initial reading was 15 c/f2 for the shadows and 30 for the highlights. The brighter leaves are red and the darker ones are green. Knowing the values were so close, with the red reading about 2/3 to a whole stop brighter, I chose a red filter to bring up the reds and decrease the greens. A red filter allows about 97% of the red light through, while only allowing about 12.5% of the blue and green. It also gives a factor of 8x or 3 stops. Throwing in the aperture decrease, I was shooting with 5 stops less available light for the greens and shadows. By adding 4 stops to their initial reading of 30c/f2, their levels were increased and the red was 2 stops over neutral. In yesterday’s shot, the same leaves and exposures were made, only using a green filter, bringing all the levels more in line with their illuminations.

This is the same shot, and levels as the image I posted yesterday. This will allow you to see how using the tools and techniques at our disposal, we can lead our image and our viewer to the desired result.

When we meter at our key stop, both for highlights and shadows, what we’re learning is the illumination of the subject. The reciprocal of our shutter speed is the amount of illumination, expressed in candles per square foot. By metering off the shadows, mid-tones, and highlights, we have a range of illuminations with which we can work. Those readings will always be the same at any key combination. For instance ISO 100 and f/10 or ISO 400 and f/20. So, we meter 100 foot candles at ISO 400, f/22. At ISO 250, we would set f/16 to get the same results. Now to place that value at somewhat higher value, for instance, we could set our shutter speed to 1/50 instead of 1/100 at f/16 ISO 250, and get a result that is lighter than neutral, by about 1 stop.

Throw in the ability to see our desired results and the steps to get them; an image can be made, not captured. We have several tools to modify the exposure we’ve selected without destroying the original image. With digital photography, shooting RAW gives you complete control. By raising your red tones, and lowering your greens and blues, a red filter can be somewhat approximated, and so on.

By combining exposure, processing, and value controls throughout the photo making session, we can bring our creative expressions to life. The first step to learn is metering and how to use that information. This little tool can be used for a record photo that leaves little to interpretation, and one for the magic of creative photography, as well. You can give voice to your thoughts without uttering a word. Using what you know, and the tools available to you, vision can be brought to life, and given a meaning according to your creativity and visualization.

I hope everyone enjoys the rest of the week and makes an image using their knowledge, tools, and vision to share with all of us! Get out and make it happen, then show us, share what you felt through your images on our Hohenfels Volks Faceboook page.

Is there anything you’d like to see here? Do you have a question? Share your thoughts here or at the Hohenfels Volks Facebook page. Of course, commenting on both Facebook and here is always appreciated, too! Don't forget, we're on Google+, too!

Thursday, June 21, 2012

On the Range...

Greetings, volks. Welcome to Hohenfels Volks, THE place for our place! Today’s weather turned out to be quite nice. There is a wide variety of things and places to shoot in our little part of Germany. Clouds and fields are just coming around to being incredibly photogenic.

Today we’re going to take a quick look at contrast and exposure. When we refer to contrast, we’re generally speaking about the range of values within an image or scene. From the brightest areas to the darkest is our range, and the contrast ratios can be quite high for a full range scene to rather low for a lower contrast image, such as a portrait.

As a general rule, higher contrast images tend to be more dramatic, while lower contrast images run toward the softer side. That’s the reason we call lower contrast “softer.” An image’s sharpness is also dependant upon contrast. When you decrease contrast, you can quickly decrease sharpness if your not careful.

Contrast can be varied by exposure. When an image runs toward high key, it loses contrast due the lower values being absent. The inverse is true in low-key images, though to a lesser extent. By adding shadow and decreasing brightness or overall exposure, contrast can apparently be increased. Decreasing exposure by 1/3 stop can be just the trick. The same can be said for color contrast, which is the range of tones in a single color within your image.

Drama can be added through darkening, and tranquility, or stillness, through lightening. Local contrast can be adjusted within a narrow range of tones, improving appearance, detail, and bringing interest to an area within the image. By using levels for general contrast adjustments, and curves for local effects, an interesting image can be created.

Combined with visualizing the desired outcome, or range of outcomes, limitless possibilities exist within each image. By exposing your brightest areas for M+2 and your darkest for M-3, a visual feast can be created from one shot, if done right. Visualize the effect of several adjustments and contrast ranges, and then set the shot so that each one can be accomplished using limited adjustments.

I hope this gives you something to think about and play with. Throw in some work with this week’s exercise, and you’ll be sure to get something that fills with that pride of accomplishment that comes from a shot well made.

Take care and enjoy the rest of the week!

Is there anything you’d like to see here? Do you have a question? Share your thoughts here or at the Hohenfels Volks Facebook page. Of course, commenting on both Facebook and here is always appreciated, too! Don't forget, we're on Google+, too!

Friday, June 15, 2012

Necessary Tools

Greetings, volks. Welcome to Hohenfels Volks, THE place for our place! The weekend, upon us, should lead to some exciting photo opportunities in and around the Hohenfels area.

I often talk about using accessories. A flash and some light modifiers can be essential tools in our kits. Today we’re going to talk about tools and not having them.

The first thing to know is that you don’t need it all. You don’t need a flash or lighting kit, you don’t need the wide fixed focal length lens, and you don’t need fancy intervalometers. In fact, you only really need your camera and your lens. Actually, you need 2 more things, your vision, and your knowledge.

Your vision is more than how you see things. It consists of how you see things and how you choose to express those things. It also consists of being able to visualize the intended final image and the steps to make it happen. Visualization allows us to plan and compose our image being we even approach our camera. It allows us to create a roadmap of our image’s creation and gives us the ability to follow through on our expression of the scene. One long time technique to aid in visualizing an image is to take an old 35mm slide frame and view your potential scene through the opening. You’ll see new ways to frame and compose an image. You can use a piece of black matting with a 1.5 to 1 ratio rectangle cut out. That opening can be 6x9, 10x15, or 4x6. The 1.5 to 1 is what 35mm film and today’s digital cameras use. This isn’t a tool in creating your image, but it is a tool in crafting your vision. Try it out, and let me know how it works for you. There are many nuances to vision and visualization that we’re not touching on in this post, so don’t think that’s all there is to it.

Our knowledge refers to our ability to use our camera for our purposes and art rather than letting the camera use us for its work. It’s knowing how to evoke a response to a scene and how to compose that scene for aesthetic rather that literal rendering. It involves knowing how our camera operates and how exposure works. Learning the exposure triangle and where along the range of values a brightness falls will be a giant step in mastering your vision. Knowing how and when to use DOF effects for impact and contrast to increase drama, knowing that a cloud should be exposed at about 2 stops over meter, maybe 3 if the your vision feels the need, is a key knowledge. So is knowing that long evening shadows cast by the low lying sun journeying home need to be at 2-3 stops below meter to capture the full range of detail.

Combining vision and knowledge can be a frustrating journey. It can also be incredibly rewarding. The key is to open yourself to learning and seeing every day. Once you feel your vision, you’ll start noticing things you never saw, and trying to figure out the best way to make your vision real. You’ll also notice that it isn’t about the gear, it’s about your image and art.

Do I still think of my tools as necessities? Of course I do. I love a portrait with shaped, directional light. I love getting a tiny bit of bounce into a shadow area. Using an umbrella to soften your light is a tried and true way to improve many photographs, not just portraits. Can I visualize an image without thinking about my tools? Of course I can. When I’m shooting large landscapes, a flash won’t help, neither will a reflector. The key is thinking the shot through before making it.

Enjoy the weekend, everyone. I hope you spend it capturing the moments that express your vision best!

Is there anything you’d like to see here? Do you have a question? Share your thoughts here or at the Hohenfels Volks Facebook page. Of course, commenting on both Facebook and here is always appreciated, too! Don't forget, we're on Google+, too!

Friday, May 4, 2012

Tech Talk: Rating Your Sensor

Greetings, volks. Welcome to Hohenfels Volks, THE place for our place! WOW! The annual Hohenfels Volksfest was a great time and the weather was perfect. Now the clouds are puffing up some, and that makes for great outdoor photos that include the sky!

Today we’re going to introduce rating and EI.

Your camera has a range of ISOs you can choose from, most likely running from ISO100 to ISO3200 in third stop increments. Camera and film manufacturers used the International Standards Organization methods to set the speed, or ISO, of your sensor or film. They generally are set to favor overexposure, as underexposure is harder to correct. Therefore, in test conditions ISO 100 performs at ISO 80-100 to get you exposed at the general target for the contrast and exposure standards set by the organization. This used to be referred to as a film’s “box speed.” For digital work, I’ve come to think of it as “nominal.” Therefore, when I say I shot it at ISO 125, that’s what I was set and exposed for.

The ISO recognized that most scenes deviated from test conditions, as did developing or processing. A film may be rated at ISO 100, when developed in a certain developer for a specific time, but not for any other combination. Film shooters would “rate” their film at different speeds for their methods, including exposure and development controls. For instance, some would shoot FP4+, which is ISO125 in Ilford’s ID11 developer, rated at EI80 developed in Kodak D-76 for their preferred method of exposing and developing a standard shot.

EI, or “exposure index,” is what you rate your film at for your methods, and usually refers to speed rating assigned that’s different from the film's actual speed. Generally, when you shoot with your digital SLR, you shoot maybe at ISO 100, and edit it in your manufacturer’s provided application and get decent results. You are shooting and making your shot at nominal speed, or box speed with film.

You may find that in high contrast scenes at nominal speed, you are getting shadows that are clipped to black and whites that are blown and have no detail. In that case, it’s time to change your EI, or rate your speed different. To do this correctly, you should test your camera, and we’re going to cover the procedures to do that for YOUR best results. Since this test is based on your equipment, metering, and editing, someone else will get different results using the same equipment. This test is based on your style and methods, which others may not follow. Keep that in mind when “rating” your gear, you can recommend your “rating” to others with the same camera, they will most likely appreciate the information, but each “rating” is subjective, and will work best in your hands.

This testing becomes especially important when shooting at extremes of lighting. In very low light, like that in most old buildings, noise is a real concern when trying to increase your image brightness during editing, and in bright daylight lit landscapes skies and clouds can become just blotches of white without any detail.

The procedures for setting your EI involved a gray card, meter, and your camera. You should be set up for this in light conditions that match your intended shooting conditions to effectively use this method.

Step 1, set up your gray card in lighting that matches your shooting conditions. Step 2, set your desired ISO reading on your camera, and select RAW mode. Step 3; set your camera to f/8 or f/11 and AV mode. Step 4, meter your gray card, use spot metering and fill as much of the frame as possible with the gray card. Note the shutter speed. Step 4, set your camera to manual mode, and enter the shutter speed metered in step3, which should give you an 18% gray image. Step 5: compose your test shot. You can pull back some, including other elements. I have a test screen that includes black and white pieces and collapses nicely into a camera bag, and prefer to use that to check contrast ranges while doing this test. Step 6, take the following series of shots- at the metered reading obtained previously, -1/3 stop, -2/3 stop, -1 stop, +1/3 stop, +2/3 stop, and +1 stop. Step 7, load the images onto your computer. Then open your image editing application. Step 8, Open each image in turn, and find the one that is MOST CLOSELY identical to the gray card in exposure for your set up. Make sure to perform absolutely no adjustments to the images, as we are looking for the most closely identical image. Take note of the settings used for this shot. Step 9, this is your EI for that type of scene with that ISO selected. For example if –1/3 stop produced the best rendition for ISO100, then your EI would be 125 or EI125. You will effectively be rating your ISO100 shots at 125, and removing 1/3 stop on all your shots in those conditions. To accomplish this, when shooting at ISO100 simply remove 1/3 stop exposure, either by increasing your shutter speed 1/3 stop or closing down your aperture 1/3 stop.

Rating your sensor or speed before shooting can save a lot of time editing and the heartbreak of a shot that doesn’t live up to your expectations. It’s not perfect, and varies based up taste, style, and personal preference, but it will bring you closer to achieving your vision. It’s definitely something to try in conjunction with this week’s exercise on contrast and contrast control. Combine it with M+ and M- exposure placement for even better results. By exposing properly, you can keep your contrast in the desired range, and make it easier to achieve your vision in your final processing stage.

For those interested in more information about film speed, Wikipedia has a great article. It includes formulae and details about how box speed and nominal are attained.

I’m looking forward to seeing your results and hearing from you. Let me know what you think and how you’re using your camera! Share your thoughts here or at the Hohenfels Volks Facebook page. Of course, commenting on both Facebook and here is always appreciated, too! Don't forget, we're on Google+, too!

Wednesday, November 16, 2011

Gear Day- Pop Goes the...

Greetings, Hohenfels, welcome to Hohenfels Volks, THE place for our place and our Volks. Another day, trees covered in white and ready for the icy grip of winter, closes around us.

Today we’re going to talk about flash. Learning to use flash is one of the major steps you should take in getting your photos gallery ready.

Today’s electronic flashes work amazingly well and can put a great deal of light right where you need it. The secret to using flash to get the right exposure is knowing how to meter and knowing how to balance your lighting.

First, let’s talk about several terms and features of an average flash.

The first term to know is Guide Number or GN. This is an indication of your flash’s power. It means your flash can provide light up to that distance at maximum zoom, for ISO 100. It’s usually measured in meters. The Canon 580EXII has a guide number of 58, as does the Yongnuo YN-560. This is used to calculate manual flash settings for your camera.

The second term is zoom. Your flash can often zoom to a preset distance to match the zoom of your lens, allowing it to throw light more in line with what you are shooting. This is extremely useful in auto flash; the drawback to that is the camera must be connected to the flash. The longer the zoon, the further the light will travel, and the less it will spread out.

The third term is sync speed, or shutter sync speed. On most higher end cameras, like the EOS 7D and 60D this is 1/250. For the lower end cameras, like the Digital Rebel series, this is 1/200. Some cameras won’t sync above 1/125 to 1/160. The slower the maximum sync speed, the slower you have to shoot. At speeds above the sync speed, either you will need a flash with high-speed sync, or you will get dark bands on your image.

The fourth term is rear or front curtain sync. In rear curtain sync, your flash fires at the end of the exposure, and in front curtain it fires at the start. This really only applies beginning at 1/30 – 1/60, depending on your model.

The last term I’ll introduce is TTL. Most of today’s automatic flashes are capable of being controlled by the camera, provided they are mounted to the camera. Today’s cameras meter through the lens, and pass that information to the flash to set output power and zoom. Many cameras use a more advanced feature called E-TTL, which is electronic metering through the lens. Using this method can improve your flash exposures. The downside is using your flash on camera can be disappointing, as it flattens the light and removes depth and character.

The range of a flash is limited by inverse square law, which states that light drops off from a source rapidly. For instance, a flashlight shined into the dark starts out quite bright, but ends up not even visible beyond some distance based on its power. This law states that doubling the distance from a subject to a source reduces light to ¼ its original level. Almost all light sources follow this rule.

When using your flash on camera, use your E-TTL features to get the best exposure. To correctly expose flash manually, you will need to adjust your aperture to control exposure for the light from the flash and your speed to control ambient light. To find the required to take a photo of a subject use this formula- f-stop number = GN/distance to subject. To figure out the distance to place your flash for a preset aperture use this formula- distance = GN/f-stop number. These are usually measured in meters, so remember to set up accordingly. Guide number is at ISO 100, so any change in ISO, must be accounted for.

A couple points- on camera flash gives a hard light, which results in a loss of shadows in the image making the subject appear flattish. On camera, or flash on the axis of the lens, gives red-eye effect, which is when the eye reflects red light straight back in the direction it came from.

Another thing to mention about off camera flash, besides adding depth, character, and bringing out detail, when used properly it can bring out the eye colors and make them stand out a little. This is especially true in brown and dark eyes. It takes some practice, but the results are worth it!

I like to use the YN-560, as this a nice, inexpensive, and powerful manual flash, paired with my with radio triggers. This allows for shots on camera can’t get, and it creates a nice direction to the light. Having directional lighting on a portrait really adds to the magic. That’s why you see it even in the paintings from the old masters. Next time we talk about flash, we’ll discuss fill, main, and lighting ratios. We’ll also discuss basic lighting patterns for portraits, and how to take the guesswork and mathematics out of getting your manual flash exposures.

I hope this information brings you another tool in our quest for the perfect picture. Let me know if it has! Remember to share your pics and post your questions at the Hohenfels Volks Facebook page, and or by commenting here!

Tuesday, October 18, 2011

Color Balance

Welcome back, Volks! Today we're bringing the subject of white balance to Hohenfels Volks.

Generally, white balance is an adjustment made to an image to make your neutral colors, neutral. What we really mean when we speak of white balance is color balance. Color balance removes colorcasts, or imbalances, caused by shooting in light of differing temperatures. Color temperature theory is a little too much for me to explain, so simply put; blue light has a high temperature in degrees Kelvin, as it requires more heat to create. Red requires less, so it has a lower temperature. Who knew engineers would create such a complex way of thinking about colors?

The sensor in your digital camera measures the temperature of the overall light to create a general color balance when set to automatic. It then adds or removes colors that remove the colorcast. In single lighting conditions, automatic can do a good job for you.

The difficulty comes in when we realize that we really don’t shoot with one color light. If you’re shooting on a nice sunny day, there is still light that is differently colored than the sunlight. This is caused by the nature of light. Light has no respect for your boundaries, and doesn’t stop only on your subject. Light tends to reflect and bounce everywhere. So, on this bright day, you’ll have light from the sun, light bounced off buildings, trees, grass, windows, and many other sources. Yikes, time for “white balance.”

When you use a preset white balance, you are telling the camera what type of light you used. The camera then adjusts for that type of light. For tungsten, it removes yellow and/or adds blue. For fluorescent, it adds green and/or removes red. You may end up with a bad colorcast if you have multiple color temperatures that vary by too much.

Shooting in RAW mode allows the most control, so what I describe will work best on images shot in RAW format. There are several options to deal with color temperature in RAW images. The first is to use a preset, as mentioned above. The second is to adjust your color temperature manually. The third is to click a neutral color. This last one can do a good job if you have a large enough neutral area. It samples a variety of pixels around your selection and applies the adjustment to the entire image. There are 2 more that I will mention here. The first is to use an Expodisc, or something similar. This fits onto the end of your lens, and then you take a photo of either your light source or your subject, and apply the resulting image as a custom white balance to your camera. The other and probably better way, at least for most, is a white card. You can use plain white paper, but it tends to have variations in the tone and colors, even between sheets. Your best bet is to get a white balance card. They are made to ensure your neutrals stay neutral. When using a custom white balance, if the lighting changes, you must do a new custom balance source to ensure accuracy.

For best results, take your white balance card and place it with, or near, your subject. Ensure the lighting is the same you will use for your subject, and fill your frame with the card. Make sure there are no colors in the frame, and click your shot. Then go into your menu and select custom white balance. You will have to choose the image you just created, and then apply it. All your shots taken in that lighting will be properly color balanced.

You can also batch color balance in your RAW conversion software by selecting your white card shot and selecting the source, then applying it to all your shots taken in that lighting.


The order of white balance settings in this sample chart is from left to right; as shot, Daylight, Flash, Shade, Cloudy, Color temp 5800k, Click on white, Tungsten, Fluorescent, with the last square white for reference.

There is a lot more to color balance, but this should get you going. Just remember that getting it right takes some practice and knowing your camera.

Thanks to Jennifer O for the suggestion for today's topic. I hope to hear more suggestions and comments! Your input will make this thing of ours great!

Here’s hoping the rest of your week is filled with loads of photos of Hohenfels, and lots of joy! Don't forget to share your pics and questions by posting at the Hohenfels Volks Facebook page, or commenting here!

Thursday, September 15, 2011

More Camera Controls

Today's post is being split in two part, as I intend to address two subjects.

First, more camera controls.

Here are some additional camera settings and controls for for helping you to get it right in the camera.

Exposure compensation- This allows you to tell the camera to overexpose or underexpose the image. You can usually set in in third stop increments. If your subject is a little bright, and you want to darken them up a little, underexpose by 2/3 of a stop and see how that looks. This small change can make a big difference.

Exposure Bracketing- This allows you to take a series of 3 or more shots, one will be what the camera thinks is correct, 1 will be underexposed by a stop, and the last will be overexposed by a stop. This is useful if you're not sure whether the exposure is correct and don't want to risk losing the shot.

Flash exposure lock- Allows you to set your external flash power to the area you lock your metering to. More on metering in another post.

AE Lock or Auto Exposure Lock- Allows you to meter from a different area of the scene than the focus point.

There are many more controls depending on your camera. We'll try to put more as we go!

On to the next post, Depth of Field.

Any questions or comments? Feel free to share them here or on our Facebook page.

Wednesday, September 14, 2011

Shooting MODES

Shooting MODES are part of you camera settings, and should be the first step in getting to know your camera. MODE is going to be all caps in this post to get us into the habit of thinking of these settings correctly, as MODES.

Let's start by looking at a typical dial on a camera.


This is the MODE dial on a Canon EOS Digital Rebel, EOS 300D

For the most part, almost all cameras use the same symbols to represent similar MODES.

The green square is the fully automatic MODE. Using this mode lets your camera have full control of the photo. You have no input or choice, so avoid this MODE!

The symbols on the right side, as we look at this image, are for automated MODES based on what you tell the camera you're shooting.

In order, they are:
Portrait MODE- for taking portraits, lower f-stop, and faster shutter speeds with less contrast.
Landscape MODE- for taking landscape style shots, higher f-stop, and slower shutter speeds with more contrast.
Close-up MODE- for macro or close-up shots of things.
Action MODE- for fast moving scenes, uses a higher ISO and faster shutter where possible.
Night scene MODE- for poorly illuminated subjects, usually used at night. High ISO, lower f-stops, slow shutter speeds.
Flash off, but fully automated settings.

It is important to note that none of these MODES offer you any choice of settings, including ISO. They will also use the pop-up flash whenever the camera wants to.

Moving over to the left side, we have:

P- Programmed MODE. You can set the ISO, Exposure Compensation, but not much else. More like the above MODES, with some limited choices.
AV- Aperture priority MODE. You set the ISO and f-stop, and the camera chooses the shutter speed for a correct exposure.
TV- Shutter Priority MODE. You set the shutter speed and ISO, and the camera chooses an f-stop to get a nice exposure.
M- Manual MODE. You set everything, this is where knowing your f-stops, shutter speeds, and ISOs is very important.

On newer cameras you also have
B- Bulb MODE. You use a remote trigger and as long as it's pressed, the shutter stays open. Great for low light and night time pics!
C1...etc- these are for you to pre-program settings that you use a lot.

Most point and shoot cameras have the automated settings MODES. Look for the symbols in the above pic and choose the MODE you want. If you dig around, you can find some advanced setting. For instance, on the Fuji, you can compensate for exposure by moving it up or down, usually in 1/3 of a stop increments. This is very helpful when taking pictures in a room with bright but uneven lighting or outside on a bright day.

So, if your camera tells you it should be shooting 1/250, f8, at ISO 100, but you want the background to be sharper. Switch over to AV MODE and set your f-stop to 11, your shutter speed should automatically go to 1/125.

If you're camera tells you 1/125, ISO 100, f11 but that's too slow for something you're trying to capture. Switch over to TV MODE and set your shutter speed to 1/250, your f-stop should automatically go to f8.

One of the best things you can do right now, is read your owner's manual for your camera. After you finish, read it again, while you have your camera, and try out some of the MODES.