Showing posts with label light. Show all posts

Monday, November 18, 2013

Daylight

Greetings and welcome to Hohenfels Volks, THE place for our place!

Today we’re going to talk a little about light. Hohenfels and our surrounding areas are home to a wide variety of light, and lighting conditions. For most of us shooting outdoors, we’re using what most volks think of as natural light. Really, though, any light can be natural if properly incorporated into our vision.

Generally speaking, we think of daylight as our source of natural light. Natural light really is made up of several components. First, we have sunlight, which is just that, light from the sun. Sunlight is warmer than plain white light, although we don’t perceive it as such until we examine our photos. Then we have skylight, which light reflected from the sky itself. This light tends toward the blue end of the spectrum. We also light reflected from clouds, which is more neutral than skylight. The last part we’ll look at is light reflected from environmental objects, such as buildings. This light picks up the colors of the reflecting source.

We can generally count on most daylight running between 5000 and 5500 k in color temperature. Photographically speaking, daylight is standardized for most applications as 5500 K. We generally, though, think in terms of warm or cool light.

Having covered both the general color temperature and make up of daylight, we can move on to some thoughts when shooting in it.

When using daylight as our source, we want to consider more than its intensity and temperature. We also want to consider its direction, or its diffusion. Diffuse daylight makes for some wonderful portraits, having a lower contrast. With a little help from a reflector, some nice shadows can be formed. This allows for marvelous shape and depth to a face. Less diffuse lighting makes for some very nice landscapes and detail shots.

The lower the sun is in the sky, the warmer the light we see. This can add some nice effects to an evening shot, bringing some golden highlights into your scene. Even later, during the blue hour, the light becomes incredibly cool, almost a pure blue!

Natural light can be used indoors, as well. Using only an open window and a reflector, an amazing portrait can be made. It’s also great for product or detail shots, with a little planning. Another great use for natural light indoors is for architectural shots. Churches, ruins, palaces, and the like can be a source for great photos when you shoot with natural light, as evidenced by the photo below.

Hohenfels: Bayreuth Schlosskirche, natural light
ISO 1600, f/3.5, 1/30
The Schlosskirche in Bayreuth. The only light inside the church was from the windows. Being large and reasonably open to the light, an adequate image could be made. Using only natural light, even indoors, can make for a sense of openess in almost any image if done right.

Well, that’s enough for today. Don’t forget that we're having a "Thanksgiving means..." feature. You can submit your photos on our Hohenfels Volks Facebook page, and we’ll get them posted here!

We want you to share your photos, especially of our place, with us on our Hohenfels Volks Facebook page. You can also e-mail questions, photos, or comments to HohenfelsVolks(at)tks-net.com, and we’ll get them posted!We also welcome any tips, tricks, and ideas. If you’d like to write an article about something photographic or some place of interest, we’d be happy to post it here!Of course, comments on both Facebook and here is always appreciated, too! Don't forget, we're on Google+, too!

Monday, September 30, 2013

On the Cheap

Greetings and welcome to Hohenfels Volks, THE place for our place!

“Valor is strength, not of legs and arms, but of heart and soul; it consists not in the worth of our horse or our weapons, but in our own.” Michel de Montaigne, Cannibales

“The Master said, “A true gentleman is one who has set his heart upon the Way. A fellow who is ashamed merely of shabby clothing or modest meals is not even worth conversing with.” (Analects 4.9)” Confucius

Both the above quotes refer to the fact that expensive is not always the best, nor is it always necessary. That’s the topic of today’s post, inexpensive lighting mods.

Firstly, this is not to say good equipment isn’t worth the price. A good set of lighting modifiers can be worth their weight, if they’re used. For most of us, a reflector, flash, and maybe something like a Rogue Flashbender are more than enough. There are also times when having something like a soft box or snoot can add a little something to your photo, especially in portraits.

Hohenfels Volks: The Ultimate Ransom
ISO 400, f/5.6, 1/30
This was shot in a local church. I used a Rogue Flashbender on my YN-560 flash wirelessly triggered. The flash was above and to the right of the camera. The soft light wraps, but still has direction to it, giving a nicely lit portrait of our Jesus' love for us!

When I first started out with homemade light mods, the first thing I built was an ice chest soft box. By cutting a hole in the bottom of a Styrofoam cooler the size of my flash head and covering the front with a white pillowcase, I had a soft box. The soft box softens the lights by giving us a larger light source, diffusing the lights internally to the box, and softening the light as it exits the box with a piece of diffusing fabric.

Take your ice chest, with the hole cut in it, and line it with aluminum foil, shiny side out. Tape of glue the foil to the inside of the chest. Let it crinkle up and have lots of texture, as this diffuses the light more. Once that’s done, tape, or glue a piece of white fabric to the inside of the ice chest to cover the opening. Taping it about 1 inch back from the edge gives you some spill control and allows for more directionality of the light. If you’re particularly ambitious, you can add some support to keep it from sagging, perhaps mounting it to a tripod.

Another great mod is a snoot. This allows a focused ray of light to be targeted to your application. One easy method is to cut both ends from a Pringles can. Using one end over your flash, and the other end open, you have a beam of light for a spot effect or hair light. Cover the flash end to prevent light leaks. You can even wrap the can with some colored paper and have a nice looking snoot. Placing the cap over the end of the can softens the spot a little, giving you a wider beam. A snoot can also be made from a rolled up cereal box, although you may want to line it with foil.

Another simple mod is a pie pan beauty dish. By taking a solid pie pan, or even some larger, a very nice light can be created. Cut an opening in the back for your flash, and drill 3 small holes. Place a 2-3 inch disk about 2-3 inches above the opening using stand offs or long screws, and voila, instant mod! Great for a more focused, glamorous light and ring like catch lights in your subject’s eyes, that adds drama to your scene.

For more advanced stuff, like large scrims or reflectors, PVC can be used as a frame with white sheets cut and sewn to fit. You can even make adjustable mods this way, and add legs or stands. Scrims are great for shooting in sunlight, as they soften the sun’s light and create nice shadows. You can even use a space blanket for extra large reflectors. They have a gold side and a silver side, like most commercial reflectors, and smaller sections can be used for fill light on product shots or close ups of flowers. When you’re making the larger sizes, it pays to measure everything out and have your fabric cut and sewn to match the several options you’ll have available. There are instructions online for making the larger PVC mods, and that’s a great way to build up your kit without breaking the bank.

With a little effort and ingenuity, a lot can be done. Even going back to Ansel Adams and many of the older era photographers, simple and cheap was a good thing. Ansel Adams was known to use the white side of his dark cloth for fill light when needed. Improvisation was often necessary, and following in that vein, we can get great shots without breaking the bank. A great place to start is DIY photography. They’re listed on our resources page!

We want you to share your photos with us on our Hohenfels Volks Facebook page. You can also e-mail questions, photos, or comments to HohenfelsVolks(at)tks-net.com, and we’ll get them posted!

Is there anything you’d like to see here? Do you have a question? Share your thoughts here or at the Hohenfels Volks Facebook page. Of course, commenting on both Facebook and here is always appreciated, too! Don't forget, we're on Google+, too!

Monday, September 23, 2013

Improve Our Seeing

Greetings and welcome to Hohenfels Volks, THE place for our place! Hohenfels is getting ripe for photographic opportunities. Within the next couple weeks, the “autumnal fireworks” will really be in swing. Time to explore our areas and get your images made!

Today we’re going to provide a couple exercises to get you thinking about your photography and small ways to improve.

First up, we’re going to look at the use of tone and tonal variations to improve our shots. The exercise is simple enough. You’re going to need a couple lightly textured items to photograph. A couple differently colored towels or pillowcases will suffice. The object is to learn how our exposure impacts our tonal ranges, and how tones translate into an important element of our final image.

It’s best to use red, green, and blue items, but whatever you have at hand will work. Set up your item and meter it. In manual mode, set your exposure to give you –3 stops exposure and make a photo. Repeat for every full stop between –3 and +3 stops. You’ll have 7 photos. Do that for the other colors. Compare them in your image editing application, and see how the saturation, texture, and feel of each color changes with the different exposures and colors. Then take the same series of photos, but put your different items in the same frame. Finally, convert the last series to monochrome, and review one last time. After reviewing them all, you can see the difference in tones and moods. This is a big part of visualization, knowing how your camera’s rendition of color and light will present itself in the final image. It’s a simple exercise that does more than give you that knowledge; it also shows you what your camera can do. By knowing that there should be texture through all the shots, you can identify where your camera begins to lose that texture. Hey, since it’s autumn, you can combine the shots with more than all you colors into making something to hang on your wall by shooting something of the autumn around you.

Hohenfels Volks: Technicolor Pathways
ISO 100, f/15, 1/25
One of my older photos, taken just outside Hormansdorf. The track to the field was dappled and the tonal range of the colors brought to mind something from childhood, a reminder that God's beauty is everywhere. Notice how dark and light tones of the same color come into play here, creating contrast and enhancing the feeling of magic.

The next exercise is patterns. Learning to recognize patterns is something we all naturally do from an early age. But, patterns can be subtle or glaring. Stucco has a nice texture, and can have something of a pattern to it if you observe it long enough. Decorative tiles, clothing, and even bark will present something to create the feeling of a pattern if you open yourself to it.

The exercise is shooting 5-10 photos of patterns around you. This can be the tracks from a tractor in a just harvested field, the still tall rows of corn, your hounds-tooth pants, anything presenting a pattern. Corn on the cob present a nice pattern that can be presented and intensified by including the green of the husk and the golden caramel brown of the outer silk. They’re everywhere once you open up to them! It’s a great way to add interest to your photography, and bring you into a closer relationship with the scenes we take for granted every day. There is so much in God’s green Earth to see and feel, that an entire lifetime isn’t enough to experience it all!

I hope everyone will get out and make some photos, both for the exercises and to celebrate autumn’s beauty. There’s no time like now to get shooting! Figure out where and when, the rest will follow. Then, make your shot and share it with us on our Hohenfels Volks Facebook page. We’d love to see your work.

Is there anything you’d like to see here? Do you have a question? Share your thoughts here or at the Hohenfels Volks Facebook page. Of course, commenting on both Facebook and here is always appreciated, too! Don't forget, we're on Google+, too!

Tuesday, November 6, 2012

Creative Metering and Exposure

Greetings and welcome to Hohenfels Volks, THE place for our place! I hope everyone is getting a decent start to the week. The Hohenfels area is beautiful this time of year, as many of you know, and full of go-to places for some great shots.

Today we’re going back a little to some basics. We’re primarily going to look at metering and exposure.

We all know the basics by now, that your meter offers a combination to make the measured area fall at 18% reflectance, or neutral gray. Most of us know that by overriding that proffered setting we can take fuller control and get closer to our vision.

I’ve discussed metering and key stops before, but today we’re going to see how it can be used for maximum impact when combined with our vision.

I’ll be referring to the following photo as an example.

Hohenfels Volks: I UnSubjugated
ISO 125, f/22, 1/2 on Ilford FP4+
I, Un-Subjugated.When we leave the I, or in this case the red, unsubjugated, a wider variety can thrive.

In the above image, both the highlights and shadows were extremely close in values, and were identical with the light shifting as it was. My initial reading was 15 c/f2 for the shadows and 30 for the highlights. The brighter leaves are red and the darker ones are green. Knowing the values were so close, with the red reading about 2/3 to a whole stop brighter, I chose a red filter to bring up the reds and decrease the greens. A red filter allows about 97% of the red light through, while only allowing about 12.5% of the blue and green. It also gives a factor of 8x or 3 stops. Throwing in the aperture decrease, I was shooting with 5 stops less available light for the greens and shadows. By adding 4 stops to their initial reading of 30c/f2, their levels were increased and the red was 2 stops over neutral. In yesterday’s shot, the same leaves and exposures were made, only using a green filter, bringing all the levels more in line with their illuminations.

This is the same shot, and levels as the image I posted yesterday. This will allow you to see how using the tools and techniques at our disposal, we can lead our image and our viewer to the desired result.

When we meter at our key stop, both for highlights and shadows, what we’re learning is the illumination of the subject. The reciprocal of our shutter speed is the amount of illumination, expressed in candles per square foot. By metering off the shadows, mid-tones, and highlights, we have a range of illuminations with which we can work. Those readings will always be the same at any key combination. For instance ISO 100 and f/10 or ISO 400 and f/20. So, we meter 100 foot candles at ISO 400, f/22. At ISO 250, we would set f/16 to get the same results. Now to place that value at somewhat higher value, for instance, we could set our shutter speed to 1/50 instead of 1/100 at f/16 ISO 250, and get a result that is lighter than neutral, by about 1 stop.

Throw in the ability to see our desired results and the steps to get them; an image can be made, not captured. We have several tools to modify the exposure we’ve selected without destroying the original image. With digital photography, shooting RAW gives you complete control. By raising your red tones, and lowering your greens and blues, a red filter can be somewhat approximated, and so on.

By combining exposure, processing, and value controls throughout the photo making session, we can bring our creative expressions to life. The first step to learn is metering and how to use that information. This little tool can be used for a record photo that leaves little to interpretation, and one for the magic of creative photography, as well. You can give voice to your thoughts without uttering a word. Using what you know, and the tools available to you, vision can be brought to life, and given a meaning according to your creativity and visualization.

I hope everyone enjoys the rest of the week and makes an image using their knowledge, tools, and vision to share with all of us! Get out and make it happen, then show us, share what you felt through your images on our Hohenfels Volks Faceboook page.

Is there anything you’d like to see here? Do you have a question? Share your thoughts here or at the Hohenfels Volks Facebook page. Of course, commenting on both Facebook and here is always appreciated, too! Don't forget, we're on Google+, too!

Thursday, August 30, 2012

Find the Light

Greetings and welcome to Hohenfels Volks, THE place for our place! Rainy nights mean clouds and fog coming for some great photos in our Hohenfels area.

Today, a quick post on seeing the light. Nothing long or elaborate, here.

Light glorifies everything. It transforms and ennobles the most commonplace and ordinary subjects. The object is nothing; light is everything - Leonard Misone

An interesting thought. Photography means writing or drawing with light. Often we forget to look at the qualities of the light that surrounds us. That light can make or break an image.

Lighting changes throughout the day, even during weather changes. A nice rich golden or reddish light can make an image pop, but only if you know what to look for in the light. The same can be said for blue light during the blue hour.

Black and white photographers used to use filters for creative effect and control of values based on light color. A red filter on a reddish subject or light, or blue to intensify atmospheric conditions of the light can make magic images that sing.

Scott Kelby’s says that if you find great light, finding something to shoot in it is far easier. Look for the light, and then worry about your subject. Another tool in your creative arsenal.

Hohenfels Volks: Vienna Fountain and Horse
ISO 200, f/8, 1/320
This was shot in bright daylight, which allowed for a faster shutter speed. It also allowed for an improved contrast. The image succeeds because of the lighting.

Don’t forget to share the results of your camera work with us on our Hohenfels Volks Faceboook page.

Is there anything you’d like to see here? Do you have a question? Share your thoughts here or at the Hohenfels Volks Facebook page. Of course, commenting on both Facebook and here is always appreciated, too! Don't forget, we're on Google+, too!

Thursday, June 14, 2012

A Tip for Composition

Greetings, volks. Welcome to Hohenfels Volks, THE place for our place! I hope everyone is doing well.

Here’s a little compositional tip, straight from Clyde Butcher- Close 1 eye when you approach the camera. Because an image is 2 dimensional and we see in 3 dimensions, you can get the feel of your composition before taking the shot. 3D sight requires both eyes open, you see this when you switch between your left eye open to your right eye open. It gives us depth perception. It really works, try it.

Speaking of composition, adding depth to your image by using shadows and the perception of light falloff with increasing distance can make for some great mood in your photos. It can lead the eye to your intended subject when shaped, and increase the 3D feeling when light falls off. Things will seem to pop right off the page. Of course, DOF and sharpness play a role in this, too.

With careful subject placement and light effects, you can create some real drama, or make a powerful scene seem serene. Crafting light and depth are a big part of giving your image life!

Here’s hoping the rest of the week brings you some great shots!

Is there anything you’d like to see here? Do you have a question? Share your thoughts here or at the Hohenfels Volks Facebook page. Of course, commenting on both Facebook and here is always appreciated, too! Don't forget, we're on Google+, too!

Thursday, May 10, 2012

Luminance Values and Exposure

Greetings, volks. Welcome to Hohenfels Volks, THE place for our place! Spring, being upon us here in Hohenfels, is ripe with opportunities for our craft. Looking around, the trees are bright and clean, the flowers are bursting with color, and the Germany is waking up to a wonderful summer ahead.

Today’s post, delayed by unfortunate occurrences, is about luminance values, and how we can record, refer to, and use those values to improve our image. There will be some math here, but nothing major.

The first thing we need to discuss is the exposure formula. Ansel Adams described it as being the reciprocal of the luminance at a speeds key stop. The key stop for any speed is the square root of the speed. Here is a list of most speed/stop combinations.

Speed Key Stop
100 10
125 11
160 12
250 16
320 17
400 20
480/500 22
620 25
800 28
1000 32

I began the table at ISO 100 and ended at ISO 1000. ISO 100 is the lowest most consumer cameras go, and f/32 is about as high as most consumer lenses get today.

By setting your camera to any of the pairs in the table, you can read the luminance of your metered object, measured in candles/square foot, or c/ft2. For instance at ISO 125, f/11, metering 1/125, then the luminance value is 125 c/ft2. If your meter shows 30 seconds, then the luminance is 1/30 c/ft2. That will put you at 18%, or neutral gray reference values. This is what I refer to as M, or an M exposure.

When photographing normal scenes, we often encounter a scale of values that for any given exposure will run from approximately M-5 and lower to M+5 or higher. By learning to look at luminance values as described above, you learn to tame that range, creating an image that will make you justifiably proud.

An example of exposing for your luminance reading is when you meter the clear sky; you should read about f/11, ISO125, 1/300. This will put your sky into the range of 18% reflectance. We know that a clear Northern sky should fall about M+1, which means we should expose for the sky at f/11, ISO125, 1/150. Of course, this goes back to place and fall exposures. You must decide the key elements within your scene and where they should be placed. Once this exposure and placement is determined, all other values fall where their luminance levels impact your sensor. Knowing these values will help you determine where you wish to place elements and where your remaining elements will fall.

Even metering clouds, you will find a range of luminance values that may run from 200 c/ft2 to 1000 c/ft2. By meter the brightest part, 1000 c/ft2, then adding 3 stops, you bring your 200 c/ft2 up to nearly M+1 ½ in the exposure range, which is slightly brighter than the surrounding blue sky, and significantly darker than the brights in the clouds. Your brights will print out with slight tonal variations, and darker areas will have adequate or better textural ranges. You also bring areas metering at 50 c/ft2 up to the equivalent exposure of 400 c/ft2. These equivalent values are in relation to your original metering from the bright part of the clouds.

Recording your luminance values across the range of your scene will help you learn to recognize values, and expose with more confidence. It will also help in editing your images and preparing them for either printing or display. I would suggest metering across the range of M-4 to M+4 after determining your priorities, and noting the results. Even if you’re shooting at some combination not listed above, take the luminance readings using a combination. After reading the values, switch to your desired settings, compose, and make your image. Values for M+ and M- can be extrapolated by halving or doubling the values obtained with your meter. This is less accurate, but still of considerable value in perfecting your images.

Another great advantage of knowing your luminance and place values, is the ability to tell anyone about your exposure without giving the ISO, f/stop, EI, shutter speed, and so on. Tell them you metered this at 250 c/ft2, and gave M+1 to get the exposure where you wanted it. Regardless of your settings, they will know that to get that exposure from 250 c/ft2, then they give M+1 at whatever aperture and speed they desire, for instance ISO 125, f/8, 1/250 or ISO 400, f/5.6, 1/1600. Both will give the same results, and use the same values, 250 c/ft2 +1 stop, and make exposing a scene more consistent. It’s also useful when referring to edits performed. Taking the last example, you may have shot at M+1, and then edited it to M to decrease contrast. In this case, you can say this was shot at 250 c/ft2 +1 stop, then edited to M for the final effect. This will help others understand and help you remember your shots without having to know every little bit of detail.

There are other ways of expressing luminance, for instance EV or c/m2, or lumens, and as long as you find a consistent method of evaluating and expressing that exposure, your images will be consistent with your vision. Don’t get hung up on what I use, try it and if it doesn’t work, try something else. You’ll still have a working system, and you’ll still be enjoying what we love to do!

Time to get out and do some shooting, I hope you’ll be out today getting your shots in, too!

I’m looking forward to seeing your results and hearing from you. Let me know what you think and how you’re using your camera! Share your thoughts here or at the Hohenfels Volks Facebook page. Of course, commenting on both Facebook and here is always appreciated, too! Don't forget, we're on Google+, too!
Tuesday, February 28, 2012

Hohenfels Cloudy

Greetings, volks. Welcome to Hohenfels Volks, THE place for our place! After a chilly day and busy day, Hohenfels is best served with a cup of HOT chocolaty cocoa!

Today’s lighting was nice for some outdoor environmental portraits. The sky can be a great light source if used properly.

Cloudy overcast skies give us nice soft light that wraps around our subjects. Being so soft allows the light to smooth and flatter the folks you’re photographing. It works best if we can keep the sky out of the scene, like shooting against a nice background or in an office through a large open window. Soft light is what makes a portrait nice and can be used for awesome effect.

When we don’t have the luxury of cloudy weather, open shade works about as well, depending on reflections and such. When shooting near the edge of a wooded area like a park, it can give the same soft effect. Using reflectors and other light sources allows us to make it more or less dramatic according to our vision.

Don’t forget, though, that cloudy and overcast can also be your friend when shooting cityscapes and nature shots, and can add some nice smooth highlights to close up flower shots. This last one is especially true right after a rain. I’ve found that taking shots of features near old buildings in cloudy weather can smooth out your light and help hold the exposure for your metered areas to bring out the details. A little bit of golden tone to the cloudy light can really add some warmth to those details, as well.

Try getting out during these end of winter and early spring blah days. Look for the soft light, look for something that inspires your vision and encourages a shot or 2, and take the shot! You’ll enjoy reviewing your results over a cup of cocoa.

Don’t forget to post any of your images you’d like to see here at the Hohenfels Volks Facebook page. Of course, commenting on both Facebook and here is always appreciated, too! Don't forget, we're on Google+, too!

Friday, February 24, 2012

Digital Density

Greetings, volks. Welcome to Hohenfels Volks, THE place for our place! Let’s start by welcoming a little sanity and quiet, as peace returns to Hohenfels and our surrounds!

The last couple weeks have been trying for everyone, I’m sure, but things are getting back on track.

I went out and shot some film today, and developed 2 rolls this evening. That got me thinking about something that we’ll discuss here today. Before we begin, I should explain that many of our recent references to Ansel Adams are because he was probably the most prolific educational writer on photography. He’s not the only great, but his vast amount of work and writings are the most widely read, studied, and approachable.

Today we’re talking about “Digital Density.” This has nothing to do with being behind the curve on technologies. I’m referring to something that hit me today while developing my film.

When old photographers spoke of their negatives, they spoke in the arcane language of photographers. A negative that was thin was dark in printing and so on. Too dense often leads to blocked, or clipped, highlights. Contrast was a product of your negative’s density. So was tonal range. The density was determined by the thickness of remaining silver, or emulsion, after development. Adams developed for a zone 8 density of 1.25-1.35 for his preferred diffusion enlargers. Density is a logarithmic number, and we’re not going into it here. Generally, zone 8 is where the brightest details can be discerned and identified. Zone 9 results only in very slight variations in tone and 10 is pure white. By exposing to keep the darkest shadow details in zone 3-4 and developing to keep highlight details in zone 8, he was able to make magnificent images.

Most of that is overly simplified, but it gives us a basis for the next part of this post.

First, let’s look at a basic representation of the zone system.
Hohenfels Volks: Zone System
The basic Zones chart

Now, we’re going to convert that to a negative.
Hohenfels Volks: Zone System in Negative
When converted to a negative, this is an approximation of the basic zone chart

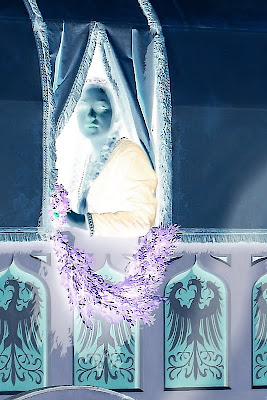
You can see how things changed. Assuming a pure white light behind the negative strip, you can see that zone 1 is pure white, and so on up the scale. Below are the negative versions of a couple photos, one black and white, and the other color. Looking at them, you can see that the darker parts are actually the lighter areas when the image is returned to original.

Areas with no density, other than film base+fog, will have absolutely no detail, and tone. Areas that are pure black will have no detail and will be pure white. Knowing how the density affects photos, you can do a bit of editing on your image after converting it to negative. In Photoshop, this is done by inverting the image, or CTRL-I. In Lightroom, it’s the same. In Paintshop Pro, it’s under the Image Menu- negative image.

Here are 2 conversions of digital photos, taken with a Canon digital SLR, one in color and one black and white.
Hohenfels Volks: A Lady in Waiting
This is a color photo converted to negative. Look for the original in my works.

Hohenfels Volks: Developing for your vision
The photo we used in our last post about developing for your vision

Once you’ve done your conversion, you can clone out dust, with greater accuracy if you’re messy with the mouse. Another great thing about this feature is the ability to bring out detail in your highlights. Digital doesn’t deal too awfully well with blown highlights, but you can recover small amounts of detail by converting to a negative of your image. This is great for working with skies and snowy areas. It’s possible to recover some in the shadows, also.

The caveat is that there must be information there, or it will be less effective.

You can also increase your control over your tonal range by performing level and curve adjustments on a negative layer, then inverting it. When working on a color image, be aware, that subtle changes to exposure can be localized to perhaps a small portion by extraction that selection as a layer and converting it a negative. It allows you to expand the tonal range of any color, or the whole image, in ways that can be very impressive. You can also diminish some colorcasts! Colors are inverted in a negative, so keep that in mind, or you’ll end up all abstract and disappointed, unless that’s your vision! It’s almost like working with a large negative.

Using the tools taught to us by those who were taking photos when our folks were kids, we can learn to improve our digital art. Using your vision, seeing both the negative and the print, you can begin to get some awesome stuff going on. Give it a try and see how it works with your vision and your exposures. If it's something you're happy with, post the results, we'd all like to see!

Don’t forget to post any of your images you’d like to see here at the Hohenfels Volks Facebook page. Of course, commenting on both Facebook and here is always appreciated, too! Don't forget, we're on Google+, too!

Wednesday, January 18, 2012

Tools of the Trade: Flash Part II

Greetings, volks. Welcome to Hohenfels Volks, THE place for our place! Today’s post is going to deal with using your flash in manual mode.

For some Volks, manual mode and photography don’t seem to go together. They leave everything on automatic, letting the camera tell them when to click the shutter, which seems a bit too much like serving the camera, not the camera serving us. By now, most of you have been shooting manual for a while. Chances are, though, that your flash is doing the majority of your work when you use it. I hope that this post will change that some!

First, we’re going to learn some terms and concepts. Flashes are rated by something called the GN, or Guide Number. It’s a measure of a flash's output. You have to know this number. The YN-560 that I have is rated by the manufacturer for 58 meters at 105mm, ISO 100. The actual rating is more like 35 meters at 35mm, ISO 100, which should give us about 50-55 meters at 105mm. I haven’t formally tested it in a controlled manner, but that seems about right. What that means is shooting at ISO 100, 105mm, and with the flash at full power, my max range for the flash is about 58 meters. At that distance, the light has fallen drastically in intensity, but spread out in coverage. The next thing we need to understand is aperture, or the size of the opening in our lens. A larger aperture means more light and conversely a smaller aperture means less. Aperture is measured as f/stop, a ratio of your aperture’s diameter to the level of light it allows. That’s oversimplified, but you get the idea. You already know about aperture, but will need to understand it for flash work. The last thing we’re going to bring up is distance between the flash and the subject. These 3 things are how you determine a manual flash’s power and set your exposure correctly. A flashes GN is the rating assigned to it by the manufacturer, so you have to be careful to read the specs before buying one. Some makers will call their flash GN58, but if you look at the tiny print, it’s at ISO 200 or even 400. That makes it more like a GN20 at ISO 100. Also, make sure the units your GN is listed in, feet or meters, or both are consistent throughout your calculations. Also remember that we're dealing with light, so sometimes it doesn't seem to make sense due the inverse square law. That's why we use GN!

The 3 things listed above are what you need to know to expose properly for manual flash. We’re going to start this part by giving you the equations to use, then giving some examples.

The first calculation is to determine your GN. First, set your flash to manual mode, full power, and if it has it, full zoom. Then place your flash a measured distance to your subject, say 5 meters. Then shoot a series of shots at successive f/stops. Note the aperture that gives you a proper exposure. For this we’re going to say f/8. Now multiply the distance by the f/stop. For this we’re going to multiply 5 meters by f/8, which means 5x8=40, or a GN of 40 at ISO 100, full power, max zoom, or about 20 at half power.

The next calculation is to determine your f/stop for that GN. If you have a GN 20 at ISO 100 flash, what f/stop do you use for 4.5 meters? The calculation for that is GN divided by distance. For GN 20, that would be 20/4.5=4.5 or f/4.5. Set up the above flash, GN 40 at half power, 4.5 meters and shoot using f/4.5, you should be almost dead on every time!

Last, we have figuring out your distance for a GN with a desired aperture. That is calculated by dividing GN/f/stop. As above, GN 20 at half power, we’ll say f/8. To get that we divide 20 by 8, or 20/8= 2.5, or 2.5 meters.

Here are the calculations listed:

Your GN=f/stop x distance to subject
F/stop= GN/distance to subject
Distance to subject= GN/f/stop

Here are some things to note. The distance is ALWAYS the distance from the flash head to the subject, not the camera to subject or flash to camera. Light modifiers like a Sto-Fen or umbrella lower your flash power by about 1-2.5 stops. Measure with them in place for more accurate readings. The same applies to bounce flash, count your distance as being from the flash to the reflector + the reflector to the subject, or adjust your exposure to compensate. A few times doing this with your calculator and flash manual will give you a great starting point for your flash shots, then before you know it, you’ll be nailing them every time!

Now that you know all that, use your camera's built in spot metering mode, go to AV or aperture priority, set your required f/stop, and meter for the rest of the scene. That shutter speed will allow you to balance your flash with the ambient light to create a nearly perfect exposure. Tinker with it, and you'll make that magic of having your image match your vision that much easier!

Working with your flash off camera in slave mode can also be a trial. The secret to that is point your optical sensor at the camera and rotate your flash head toward the subject. The sensor detects the flash from your camera and triggers the flash. It also has to be where it can see the flash from on camera. For some flashes, this will trigger it before it should go. The Yongnuo flashes have a mode called S1 that trips the flash at the very first blip of flash, and S2 that only triggers when the actual flash goes for the shot. Use S2 to ignore the red eye and pre-flashes your camera sends out. Also, turn of red eye reduction or pre-flash. Having your flash off camera will help prevent this phenomenon from occurring. Of course, you can also buy a wireless RF trigger and receiver from anywhere online for about $30 and avoid slave mode altogether.

A great resource for all things flash related is Strobist. We have a link to them in our links and they can really up your knowledge levels on flash. They put out some good tutorials and lessons in Lighting 101. Give them a read!

You’re probably bored after all that math and calculating. Get out there and shoot something, it’ll wake you back up! While you’re out shooting, don’t forget the milk, I mean your shots for this week’s theme! Complimentary colors with a contrasting subject. Should be something great in there and I can’t wait to see your work!

Don’t forget to post any of your images you’d like to see here at the Hohenfels Volks Facebook page. Of course, commenting on both Facebook and here is always appreciated, too!

Tuesday, January 17, 2012

Tech Talk: Candles and Calculations

Greetings, volks. Welcome to Hohenfels Volks, THE place for our place!

Today we’re going to go a little bit into what makes up your exposure numbers and how metering works. It sounds familiar, but we’ll be dealing with more math and other advanced parts of your exposure settings.

Let’s start with your ISO. Back in the old days there were lots of ways to label film sensitivity. There was by DIN number, ASA, Weston, and EV, as well as various others fallen by the wayside. Today we use ISO, which is for the most part ASA. Some folks use DIN, that’s why film still carries the DIN number. Under today’s scheme, 3 degrees DIN are equal to 1 full stop. ISO 100/21 has half the sensitivity of ISO 200/24. The Weston number, another popular standard used to gauge a film’s sensitivity, referencing Weston’s meters, is usually .8 times the ISO. Since we’re shooting today, we’ll use ISO, but there may be times we reference others in our future.

Moving on we come to light and light levels. Without the fancy gadgets we have to meter our exposure built into cameras, folks used external meters. Ansel Adams broke it down in his book The Negative. Meters used to measure light in candles, or candela, per square foot. That was the basis for your shutter speed. This will become important in a couple paragraphs.

Next we have aperture, the size of the opening through which light enters the camera. Each ISO had its native f/stop. To find the native stop for any ISO take its square root. For ISO 100 the native f/stop is f/10, for ISO 125 it’s 11, for 200 it’s about 14, and for 400 the native f/stop is 20. Apertures are measured in f/stop, which is a ratio based on the square root of 2, as each step is doubling or halving the light.

The last part is shutter speed. For a native aperture, the shutter speed should be 1/ the light measured in candles per square foot, or c/ft². If you read 125 c/ft², your shutter speed for a native aperture should be 1/125 second. It sounds easy doesn’t it? Well, don’t give up hope. Things are about to get tricky.

Since most light meters today don’t measure in c/ft², finding that speed may be difficult. Automation has taken away many of the tools used by those who came before us in every arena. You can buy a cheap ambient light meter and use it for your photography. The readings are usually in LUX. LUX can be converted, however, by dividing by 10.764. Just round to 10, and there you have it. 1000 LUX is 100 c/ft². At your native aperture, shoot 1/100 for zone 5 placement of what you just read and you’re cooking with gas. Using you digital camera’s metering, set your aperture to the ISO’s native aperture in AV mode. Then seeing the required shutter speed tells you there are that many c/ft² or 10 times that much in LUX.

It seems like talking about this doesn’t do much for you shooting digital, but knowing it will help you improve your light reading skill without your camera’s meter and make getting your exposure correct a lot easier. Plus, if you decide to go old school and shoot with an old camera or use an old meter it will help you to figure that stuff out. It also comes in handy when working with the zone system. Reading 1/100 at your native aperture, you have the knowledge of how to combine your speeds and apertures to get the right exposure for 100 c/ft². You also have the knowledge that you can move your image up or down a zone without playing guessing games as much. It’s quicker and easier to figure out once you try it a few times. A good example is on a bright, sunny, semi-cloudless day. The sky reads about 300 c/ft² when read usually. So for ISO 125 at f/11 you should be set for 1/300 as a good starting point. Then adjusting your speed inverse to any desired aperture changes, and you should have a decent exposure with the sky at zone 5. You can adjust just your aperture or speed to move the sky and other subjects into different zones and create what you visualized that way.

Ansel Adams described it as the exposure formula. He taught that zone 5 was 1/c/ft² at a film’s key aperture. It still holds true. Some minor adjustments may need to be made, but you should be almost dead on. It helps to spot meter for your highlights and shadows to get the best range in your image, but for quick shooting, try it out! I think you’ll see something very cool!

The new theme for this week is “Flattery (Not everything complimentary is flattery!)” You may have already guessed that this has to do with colors, right? Your shots should be composed with complimentary colors as a major element of your composition. Another aspect of your image must consist of contrast in your subject, as well as the contrasting complimentary colors. Perhaps age and youth, or hot and cold. I hope that you get the creative juices flowing for this one and get working on it soon! I also hope that we will see everyone out there submitting this time!

Don’t forget to post any of your images you’d like to see here at the Hohenfels Volks Facebook page. Of course, commenting on both Facebook and here is always appreciated, too!

Friday, December 30, 2011

Tips of the Trade- More Exposing?

Greetings and welcome to Hohenfels Volks, THE place for our place. Tomorrow is the last day 2011, is everyone in Hohenfels ready for the New Year?

Today we’re going to do a short post on long exposures. By that, I don’t mean what you might be thinking… Actually, we’ll be talking about exposures made over an extended period, usually longer than 1 or 2 seconds. Most of you already know this stuff, but a little refresher is always nice. With longer nights upon us, and lovely seasonal decorations and lighting, long exposures can be a real shot maker during this time of year. To create starbursts, for instance, longer exposure means longer rays.

Chances are you already know that long exposures absolutely REQUIRE the use of a tripod. Notice the capitalization of REQUIRE. If you don’t have a tripod, and your exposure is short enough, a monopod will work, but it’s a tradeoff. 30 seconds on a monopod probably won’t get the shot you want. The best option is a slightly heavy tripod, one that has the fewest leg extensions. More leg extensions mean thinner legs and less support. When you can get way with it, don’t extend your legs, and if you have to, start with the top ones, which are thicker until you get the height you need. Try to use a tripod with a center element that doesn’t crank up, but if you do, keep it down where possible to add support.

Don’t use your finger to release your shutter. Get a good shutter release with a long enough cable for your purpose, or go wireless. Turn off your IS, if your lens has it. IS can cause blurring as the elements move looking for motion to offset. If your camera is capable, turn on mirror lock up. Even the motion of the mirror can cause subtle blurring. Compose your image, lock your mirror, and then activate your shutter. If your camera has a delay, activate it to get that extra pause to allow shake to diminish. Carry a good flashlight or other light source, as you’ll likely be working in the dark. Your kids or spouse can be helpful if you’re shooting inside to turn on the lights for focusing, then turning them off when you’re ready to start the shot.

Now I’ll give you a few ideas for using this information.

Has anyone shot star trails? This “simple” long exposure can create some interesting images. Find a strong center of interest and the North Star, Put the North Star at the center of interest and compose your image appropriately. Then expose for about 10 minutes, it will seem as if the stars are rotating around your subject. To do this, you should be in bulb mode and your remote release should have a lock function, as most cameras limit at about 30 seconds. Set your f/stop at about f/16 and your time to B. Longer times equal longer trails, shorter times equal generally brighter trails. Don’t do this during a full moon, as it works best on a moonless night.

How about light painting? Using an exposure time as above, you can use lights, flashes, and other sources to paint your scene with some good light, or create some really interesting effect. Try it with a candle or flashlight for something cool. Candles can create the illusion of fire rings and the like, check it out.

Try making a nighttime scene into a daytime shot. During the fool moon, long enough exposures can create the illusion of daylight. A nice feature of nighttime scenes is the slow shutter allows for nice effects with fog or moving water.

Of course, long exposures can be used to set a mood or allow dark areas to expose better, too. You’re only limited by your creativity! I hope you’ll post some of yours at the Facebook page and share them with us.

Enjoy the rest of your evening, and remember to cast your vote for next week’s theme. We have 2 votes now, and it’s a tie. Get yours in to have a say! Don’t forget to get your pics posted at the Hohenfels Volks Facebook page. Of course, commenting on both Facebook and here is always appreciated, too!

Thursday, December 15, 2011

Reading List: Light– Science & Magic

Greetings and welcome to Hohenfels Volks, THE place for our place. Another wet, rainy, and cold Thursday draws to a close, making us thankful the warmth of home!

Today’s reading list is LIGHT—SCIENCE & MAGIC an Introduction to Photographic Lighting, by Fil Hunter, Steve Biver, and Paul Fuqua.

This book is a veritable goldmine of lighting knowledge. These guys have put together something that no photographer should be without. This great book introduces us to light, its characteristics, and how to use it. There are lessons, exercises, and lots of ideas to be had here. They’re on the fourth edition now, which just goes to show you how valuable a resource it is.

Much of what they cover applies even without a flash. The nature of light is the same, whether you’re using a flash or shooting ambient only. The book starts at the most basic information about light, runs through light transmission, reflection, refraction, and onto to more photographic information. They cover angles and the families of angles, as well as some very useful stuff that will make you say “Aha, that’s how they did it!”

One of the early points in the book is that not every photographer has enough lighting equipment to light everything perfect, but every photographer has enough to do things well. A flash or studio strobes are nice, but light is light. It generally acts the same every time, which allows us to use almost any light source for great results.

The other really nice thing about this book is that it covers even tricky subjects like glass and metal. That alone makes it an invaluable resource to someone trying to learn lighting. It’s definitely worth the price. Check it out and let me know what you think.

I hope things are coming along nicely as you work on exposing yourself for this week’s theme. I can’t wait to see what you Volks come up with!

Remember to cast your vote for next week’s theme. Don’t forget to get your pics posted at the Hohenfels Volks Facebook page. Of course, commenting on both Facebook and here is always appreciated, too!

Tuesday, December 13, 2011

Your Bubbles

Greetings and welcome to Hohenfels Volks, THE place for our place. Another cold and frosty morning stirs through Hohenfels and the surrounding area like a spoon through cocoa.

Our first post today features all the submissions your submission from last week’s theme, bubbles of light. Once again, Jennifer was the only one who submitted. Here’s the great shot she gave us.


Jennifer’s bubble

It’s very interesting, and it shows us how light can have its ups and downs, as it were. Using the lamp the way she did, shows us exactly how light can form a bubble. By putting herself in the corner, and using a somewhat rounded light source, she created a bubble of light around herself. You can see the light falloff on the 2 walls and the shape of the light itself really worked in this shot.

Due to the nature of light, you can create a source that seems to be a bubble using anything rounded. One good way to see the bubble is to place an IPad with a white screen face up under a semi-transparent Tupperware bowl. When you place a vertical object next to it, you can the bubble shaping up, just like the bubble that took form in Jen’s photo. By placing more objects at differing distances from the light source, you can create even more of a bubble. It’s all caused by light and the physics behind it. The primary thing to know about light is the inverse square law. If an object’s distance to a light source is double, the light’s apparent power is quartered due to spread and the nature of light.

In a later post today, we’ll be going to Nuernberg’s Christmas market, so get your camera ready!

Remember to cast your vote for next week’s theme. Don’t forget to get your pics posted at the Hohenfels Volks Facebook page. Of course, commenting on both Facebook and here is always appreciated, too!

Monday, December 5, 2011

Tiny or Big, it's Bubbles!

Greetings, Hohenfels, welcome to Hohenfels Volks, THE place for our place. I hope everyone is having a great weekend. Today is definitely a Monday; if ever there were one, this would be it. Hohenfels, complete with cold, rain, sun, hail, and whatever else came our way. Don't worry, though, Christmas will soon be here in our little Hohenfels area, and all the joys that come with it!

Well, this week one person submitted for the theme. Thanks to Jennifer for your submission, I’ll try to get it up here tomorrow after discussing it with her. Then, there is the news that the 6 votes are counted. Our theme for the week will be Bubbles (... Of Light, DUH!) This is more advanced than last week’s; so let’s get this ball rolling.

This one may make you think, it may make you scream, or it may make you rise to the challenge and create something magical. Of course, it may make you do all 3! A bubble of light? What is it? What does it do, and what’s it look like? How am I supposed to do this without any knowledge of this bubble thing, and if this one bursts and ruins the economy, who gets the blame?

Relax; it’s nothing like that. Creating a bubble of light is a trick that can be seen by looking back at our post on chiaroscuro, which can be found here. The biggest secret is that light moves and bounces according to your light source. One of the easiest ways to create the bubble for this week’s theme is to use off camera flash and a semi-translucent half dome. The effect can be even more apparent with subjects cloaked in dark and shrouded in light, with nice transition between the two. Of course, it’s not really like a bubble, but presents the illusion of one.

By examining the image from that post, you can see how it seems as if the ladies are surrounding a glowing orb. By knowing how and where light falls, Van Honthorst was able to create the magical lighting in his image. It seems as if the matchmaker is closer than the older ladies are, almost like she’s showing a treasured globe. The lighting here, and the resulting bubble, come from the shape of the candle flame. Another type is to make it seem as if your subject is encased in a bubble of light, almost like a snow globe. Examine some rounded shapes, balls, bubbles, footballs, and other items to see how the light falls on them. Knowing that can help you figure out how the light radiates from them, and what kind of bubble you might expect.

For those without a flash or the ability to trigger it remotely, you can use lamps of any kind, LED flashlights, anything that will create the type of bubble you want to make. The important thing to remember is the shape of your light source and how the light will radiate from it. Flash or other types of light will produce almost identical results in that department. You can also work some more of this type of magic with multiple lights, and colored gels. When you shoot in B&W, the color of your light can be changed, and a matching filter added to increase the effect even more. The sharper your transition to dark from light at the very edges, the more abrupt and sharp your bubble will appear. Keep that in mind.

If I get some time this week, I will try to make an example image, but I probably won’t have much time. The new poll for next week’s theme is up, it expires at midnight on Sunday night. Here's hoping we get at least 19 votes this time around! Get your votes in, vote early, and let’s bring volks into this theme.

Tonight, take the time to check out some spheres, globes, bubbles, and balls. Take a little time to visualize your own shot; even it’s an exact copy of Van Honthorst’s painting. Write down some ideas. Then during the week, refine your visions and your notes. Once you’re ready and your vision is fully fleshed out, set up your scene, blow your bubble, and get the pics posted at the Hohenfels Volks Facebook page. Of course, commenting on both Facebook and here is always appreciated, too!

Thursday, December 1, 2011

Ride Along Shot- Avoiding the Cold

Greetings, Hohenfels, welcome to Hohenfels Volks, THE place for our place. I hope everyone is having a great week and looking forward to something great this weekend.

For our ride along today, I thought we’d stay in lovely Hohenfels. In fact, it’s so cold and gloomy; I thought we’d stay inside. Let’s go to the living room and get started.

This is my first Christmas photo of the season. There’ll be many more, I’m sure, but getting this one set up and in the camera is always exciting. Last year, it was a bottle of wine with a glass and the tree.

Hohenfels Volks- our first Christmas shot
ISO 100, f/4.5, 15 Seconds, 53mm, 3000K
Merry Christmas!

Come Christmas season, I love to take creative shots that illustrate this time of year. I visualized this shot all day while cruising Nuernberg's Christkindlmarkt. Getting home, I rushed into the house to get the shot set up and going. Of course, this kind of shot requires shooting on a tripod with IS turned off. That means using a remote trigger. I like using a remote trigger cable, some folks prefer wireless. Locking up the mirror allowed for that little bit of extra sharpness in the glass and the decorations surrounding the candleholder. Focus was on the glass to minimize the DOF between tree and candle. Placing the candle holder in sharp focus at or near an intersection of thirds isolates it and makes it the obvious center of interest, while allowing the eye to wander through the tree and memories of long ago Christmases.

This shot proved more difficult than first glance implies. I’ll be trying this one a few more times to get it perfect, but I really enjoy the way it turned out. It just says “Merry Christmas!”

After several failed attempts using multiple flashes to light the tree some and the glass, I went with a longer exposure and used just one flash. After getting the exposure started, I manually fired the flash at 1/128th power with the head zoomed in to 110mm. The flash comes in from camera left at about 45 degrees to the candleholder. The second pop of the flash at the same level was again camera right, zoomed to 50mm almost dead at the tree. The third and final pop, again at 1/128th and 110mm zoom, was aimed at the platter and decorations around the candleholder from camera right.

By setting the flash at minimum power and adjusting the zoom, I was able to bring out the green of the tree, the colors of the decoration, and use the longer focal length with a wide aperture to create some nice boke, or blur, behind the glass. It also highlighted the edges of the glass, and shows the nice, almost home spun, texture of the candle glass. It also allowed some detail in the decorations around the base of the candle.

Shooting at 15 seconds allowed me to manually zoom, aim, and pop the flash. That brought the whole thing together, bringing out detail while allowing a warm winter night feel to the image. The highlights in the image were slightly overexposed to allow for detail in the shadows, and it was darkened during conversion from RAW in Canon Digital Photo Pro software. I lowered the color temperature to about 3000K to bring out the green in the tree and hint at the blue in the platter holding the decorations and candleholder.

The candleholder was one that Mrs. Hohenfels-Volks picked up at a local market. The little things you can pick up at Moebelhof and other such places can really add some flavor to your photos. I’ll definitely try this shot again, perhaps with a snoot over the flash and some black cards to darken the highlights in the glass, perhaps giving a more old timey feel to it.


Same settings as above image
Here’s another version with the color temperature raised to about 3500K. Adding in that little bit of red makes it feel almost as if a fireplace is blazing somewhere in the room.

Now on to other things, remember to get your votes in for next week’s theme. We have a 3-way tie right now, and that means it’s my choice if we end the week that way! This week our theme is “Morning Moments.” I hope to see everyone participating! Get shooting and start posting at the Hohenfels Volks Facebook page. Of course, commenting here is always welcome, too!

Tuesday, November 29, 2011

Tech Talking

Greetings, Hohenfels, welcome to Hohenfels Volks, THE place for our place. Here’s hoping your week is off to a good start and Tuesday didn’t turn in to Monday part 2.

Today we’re going to introduce the concept of “Dynamic Range.” If you remember our introduction to the Zone System, there are 11 zones, 0-10. Ansel Adams considered this the full range, zones 1-9 were the dynamic range, and 2-8 the textural range. Zone 2 is the lowest value that retains discernable texture, and zone 8 is the highest value retaining usable texture, and in both cases the values where detail is preserved and recorded.

When we speak of dynamic range today, this still in some ways holds true. Metering from a gray card, it’s how many stops of exposure above and below middle gray that are usable. For instance, the EOS 7D has about 8 stops. Its range consists of 5 stops below gray before clipping to black or solid noise, and about 3 stops above middle before blowing to white. This means it runs from about zone 1 to zone 8, maybe a little higher. Each camera’s range is different; so don’t use one camera’s range to guess another’s. "Dynamic Range" determines the amount of contrast an image can have and how sharply that gets applied. It also can effect how you change the sides on your exposure triangle, based on your intention.

When you know your camera’s range, you can adjust your exposures appropriately. If you wish to increase middle gray, zone 5, to zone 6, you have to know your limits before the higher zones blow out. Taking 5 to 6 brings zone 7 to 8, and anything starting at or above 8 will be blown to solid, textureless white.

A camera’s range often times is limited by the size of the photocells or photosites. These are the individual receptors on the camera sensor. A larger frame sensor will usually have larger photocells, allowing more light to be received and detail retained. There are millions per most of today’s sensors.

Another way to expand your “Dynamic Range” is to always shoot RAW, as your camera records more information. You can add up to a stop and a half shooting RAW. Shooting automatically and in JPEG mode can cost you that latitude in your exposure. Keep that in mind when shooting in very bright or low light conditions.

Well, that about wraps up our discussion. Try to keep that in mind when you’re out capturing the beauty of Hohenfels, our area, and your holidays. The results will amaze you.

On to other things, I’d like to remind all of you to get your votes in and get working on your photos for this week’s theme, “Morning Moments.” I can’t wait to see what you amaze me with!

Shoot for the love, of photography, your subjects, and your art, it really will show! Get shooting and start posting at the Hohenfels Volks Facebook page. Of course, commenting here is always welcome, too!

Wednesday, November 16, 2011

Gear Day- Pop Goes the...

Greetings, Hohenfels, welcome to Hohenfels Volks, THE place for our place and our Volks. Another day, trees covered in white and ready for the icy grip of winter, closes around us.

Today we’re going to talk about flash. Learning to use flash is one of the major steps you should take in getting your photos gallery ready.

Today’s electronic flashes work amazingly well and can put a great deal of light right where you need it. The secret to using flash to get the right exposure is knowing how to meter and knowing how to balance your lighting.

First, let’s talk about several terms and features of an average flash.

The first term to know is Guide Number or GN. This is an indication of your flash’s power. It means your flash can provide light up to that distance at maximum zoom, for ISO 100. It’s usually measured in meters. The Canon 580EXII has a guide number of 58, as does the Yongnuo YN-560. This is used to calculate manual flash settings for your camera.

The second term is zoom. Your flash can often zoom to a preset distance to match the zoom of your lens, allowing it to throw light more in line with what you are shooting. This is extremely useful in auto flash; the drawback to that is the camera must be connected to the flash. The longer the zoon, the further the light will travel, and the less it will spread out.

The third term is sync speed, or shutter sync speed. On most higher end cameras, like the EOS 7D and 60D this is 1/250. For the lower end cameras, like the Digital Rebel series, this is 1/200. Some cameras won’t sync above 1/125 to 1/160. The slower the maximum sync speed, the slower you have to shoot. At speeds above the sync speed, either you will need a flash with high-speed sync, or you will get dark bands on your image.

The fourth term is rear or front curtain sync. In rear curtain sync, your flash fires at the end of the exposure, and in front curtain it fires at the start. This really only applies beginning at 1/30 – 1/60, depending on your model.

The last term I’ll introduce is TTL. Most of today’s automatic flashes are capable of being controlled by the camera, provided they are mounted to the camera. Today’s cameras meter through the lens, and pass that information to the flash to set output power and zoom. Many cameras use a more advanced feature called E-TTL, which is electronic metering through the lens. Using this method can improve your flash exposures. The downside is using your flash on camera can be disappointing, as it flattens the light and removes depth and character.

The range of a flash is limited by inverse square law, which states that light drops off from a source rapidly. For instance, a flashlight shined into the dark starts out quite bright, but ends up not even visible beyond some distance based on its power. This law states that doubling the distance from a subject to a source reduces light to ¼ its original level. Almost all light sources follow this rule.

When using your flash on camera, use your E-TTL features to get the best exposure. To correctly expose flash manually, you will need to adjust your aperture to control exposure for the light from the flash and your speed to control ambient light. To find the required to take a photo of a subject use this formula- f-stop number = GN/distance to subject. To figure out the distance to place your flash for a preset aperture use this formula- distance = GN/f-stop number. These are usually measured in meters, so remember to set up accordingly. Guide number is at ISO 100, so any change in ISO, must be accounted for.

A couple points- on camera flash gives a hard light, which results in a loss of shadows in the image making the subject appear flattish. On camera, or flash on the axis of the lens, gives red-eye effect, which is when the eye reflects red light straight back in the direction it came from.

Another thing to mention about off camera flash, besides adding depth, character, and bringing out detail, when used properly it can bring out the eye colors and make them stand out a little. This is especially true in brown and dark eyes. It takes some practice, but the results are worth it!

I like to use the YN-560, as this a nice, inexpensive, and powerful manual flash, paired with my with radio triggers. This allows for shots on camera can’t get, and it creates a nice direction to the light. Having directional lighting on a portrait really adds to the magic. That’s why you see it even in the paintings from the old masters. Next time we talk about flash, we’ll discuss fill, main, and lighting ratios. We’ll also discuss basic lighting patterns for portraits, and how to take the guesswork and mathematics out of getting your manual flash exposures.

I hope this information brings you another tool in our quest for the perfect picture. Let me know if it has! Remember to share your pics and post your questions at the Hohenfels Volks Facebook page, and or by commenting here!

Thursday, October 20, 2011

I've Seen the Light!!

Welcome back, Volks! Winter is lurking just around the corner, and Hohenfels is starting to feel its presence! I hope you’re prepared for it!

Hallelujah! I have seen the light! I say that about several things, but in this case, I mean something unexpected. Today we’re going to talk about how to see the light. I plan to keep this somewhat short, so let’s get this train moving.

Seeing the light is something that we photographers need to do to get the most from our art. There is more than one way to skin a cat, and more than one way to see the light.

Light isn’t just white. We learned a little bit about that when we discussed color balance. We need to see the effects that color may have on our subject. Color is just a part of it, but it’s important to look at. You can use your white balance card and camera to see that color. There are times of day that photographers know are generally colors by the atmosphere. About sunrise and sunset are prime examples and called the golden hours, for two reasons. The first is that this is one of the best times to shoot photos outside, and the second is that the light takes on an almost golden tint. Just before sunrise and after sunset, the light becomes bluish, and some call these times the blue hour.

Another part of seeing the light is seeing it’s impact on your subject’s tones and exposure. Remember your triangle here, you’ll need to see the light to offset or maximize its impact.

Lastly, let’s mention seeing the light in the context of seeing the light that’s not there. Examine your shadows. How do they interact with your light? How do they interact with your subject? Do your light, shadow, and subject, all play well together? Sometimes we judge what we have by what we don’t. Seeing the shadows helps to gauge your light.

Visualize the light you want, make that light happen. Easier said than done, even with lots of equipment, but can make for some shots that reward your effort with some wonderful warm feelings. You can’t always create light, but you can visualize the scene in different lighting conditions, and either wait for the right lighting or return at the right time. Not every shot needs taking.

Take some time over the course of your day to see the light. Examine how it falls on someone or something. See how you can change it by moving an object or the light source. See how you can shape the shadows, watch grow, shrink, and distort. Even if you don’t really learn, it’s a fun exercise!

Seeing the light, it’s more than becoming a convert to something or seeing the error of one’s way! It’s an important part of our creativity, of our art, and of our special part of the world, right here in Hohenfels!

Enjoy your week. Here’s hoping you enjoy the autumn and see the light in your own neck of the woods. See it and use it, create those masterpieces within you and share them with us on the Hohenfels Volks Facebook page. Don't forget to leave your comments and questions here and there!

Thursday, October 13, 2011

The Zone System

Welcome back to Hohenfels Volks. This time we’re going to deal with the Zone System.

Ansel Adams and Fred Archer developed the Zone System. Most of us have heard of Ansel Adams, and seen some of his magnificent works. Fred Archer was another big name in the early days of photography, pioneering the use of still photography for motion picture and movie star publicity, and was an early proponent of photography in advertising. Together they developed a system that brought the concept of sensitometry and print density together, allowing for proper exposure of film and prints.

It sounds pretty complicated, and an in depth analysis of it can be, quite technical. We won’t go too deep here, but we will hit upon it more than in our exposure topic. Learning about the basics of the zone system can bring some zing into your work, and help deliver you from the dark ages of auto mode, so here goes!

There are 11 steps, or zones, from black to white. Here is an image I made showing the zones.


The actual full range is smoother, but given the nature of photography, we end up with approximately these zones.

At zone 0, there is no detail and no texture. There is no usable information at all. This is the same at zone x. At zone i and ix, there is limited tone, but not much else in the way of detail. Ansel Adams described the ranges as; full spectrum, zones 0 through x, dynamic range, zones i through ix, and textural range, zones ii through viii. In his book, The Negative, he describes the zones as:

0 Total black in print
I Black with some tonality but no texture
II The first suggestion of texture; the darkest part of the image where texture and detail are required
III Average dark materials and low values showing adequate texture
IV Average dark foliage, dark stone, or landscape shadows
V Middle gray (18% reflectance): clear north sky; dark skin, average weathered wood
VI Average Caucasian skin in sunlight; light stone; shadows on snow in sunlit landscapes
VII Very light skin; shadows in snow with acute side lighting
VIII Whites with texture: textured snow, highlights on Caucasian skin
IX white without texture; glaring snow, may print as pure white
X Pure white: light sources in the picture area and specular highlights

When metering from a source, your camera, or meter, will render the metered object in zone v. Knowing this, you can use your exposure compensation or manual settings to bring the desired part of the scene into the zone you desire.

In practical application, you identify the main element in your scene, then expose for the desired zone, the other elements exposing according the placement of your main element. If you desire an area to be zone v, then the rest of the image exposes for the zones according to what you placed in zone v. It’s fairly straightforward. Take a meter reading from the parts you want in zone 5, and you will end up with something that matches what you visualized.

A great way to see the effects of the Zone System is to look up Ansel Adams on Google, or your favorite search engine. His work is quite addictive, though, so be prepared to spend some time admiring his art. Then look into the Zone System. After a few hits and misses, you’ll be glad that Fred Archer and Ansel Adams collaborated to create such a wonderful tool to make the pursuit of our passion a little easier!

I hope you have a chance to shoot away over the next few days. Hohenfels alone has enough incredible scenery to try out the zone system, not to mention the surrounding communities and towns. Maybe in a church or a field, or even a portrait. Let the magic work for you! Who knows, you may capture a real prizewinner! Get out and give it a try!

How do you plan to use the sone system? Let us see by posting at the Hohenfels Volks Facebook page. you might inspire a convert!

Remember; leave your comments and questions here and on our Facebook pages, also.
Thanks to all of you, have a great day!